
Your plastic windows can be made much more energy-efficient and draft-free by replacing the seal. Window seals may deteriorate with time, resulting in decreased insulation and air leaks. Thankfully, changing these seals is a doable do-it-yourself task that only requires a few simple tools and patience.
Determining the kind of seal your windows use is crucial before you start. The majority of plastic windows use foam strips or rubber gaskets to seal the space between the glass and the window frame. Choosing the appropriate kind guarantees that you buy the appropriate replacement parts for the task.
First, assemble the required equipment and supplies. Generally, you’ll need a tape measure, new window seal material (either rubber gaskets or foam strips), a small flat-head screwdriver, a utility knife, or a seal removal tool. Make sure you have enough new sealant on hand to finish all the windows you intend to work on.
First, use the utility knife or seal removal tool to carefully remove the old seal. Take your time so as not to scratch the glass or window frame. Assist in removing the old seal with the small flat-head screwdriver, making sure that all residue is well removed from the frame.
Next, determine the size of the window frame where the previous seal was taken off. Using the measurements you have taken, precisely cut the new seal material to fit. To guarantee that the seal efficiently keeps out drafts and preserves insulation, it must fit snugly.
After cutting the new seal to size, gently press it along the window frame. Apply light pressure as you work your way around the corner to make sure the seal sticks firmly. To ensure a clean finish, tuck any edges neatly into place using the small flat-head screwdriver.
Check that the window opens and closes smoothly and that the seal is not obstructing it after installing the new seal. Look for any openings where air could still seep in. By making these changes, you can be sure that your windows offer the best possible insulation and energy efficiency.
You can extend the life of your plastic windows and enhance their performance by replacing the seals with these easy-to-follow instructions. Maintaining a cozy home and cutting down on energy expenses related to heating and cooling are made possible by routinely cleaning and replacing window seals.
Discover how to easily replace the seals on your plastic windows. This do-it-yourself guide offers easy-to-follow instructions and useful advice on how to replace worn-out window seals to extend the lifespan and efficiency of your windows.
- What includes the concept?
- When to replace the sealing rubber?
- Is it necessary to change, the consequences of neglect
- How to choose the right tires?
- Basic installation rules
- Calculations: how much material will be needed?
- Tools and consumables to seal the PVC structure
- How to insert yourself?
- Removing the window sash
- Removing old material
- Installing a new
- Is it possible to paste without errors??
- Price for repair services
- Useful video
- Video on the topic
- Replacement of the seal on a plastic window or door
- Rubber replacement on windows
- Independent replacement of seals on the plastic fetters Rehau
What includes the concept?
Replacing the plastic window seal involves taking out the old polymer linings that were inserted into the glazing beads’ and profiles’ grooves and replacing them with new ones that are identical in size and composition.
Aid. The process is carried out to enhance the window structure’s thermal and functional qualities as well as the comfort of occupants in apartments, houses, or workplaces.
When to replace the sealing rubber?
In the event of any of the following, a new seal needs to be installed:
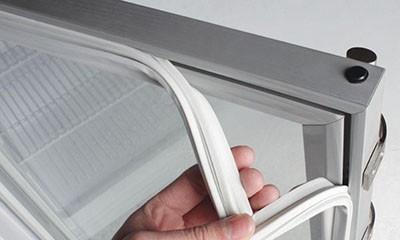
- In case of physical wear of the old sealing tape, as indicated by blowing through the window in the rebate or from under the glazing bead.
- When the old structural element freezes, which causes a violation of its structure.
- With prolonged exposure to direct sunlight, some materials harden, lose their shape, microcracks appear on their surface, and the seal cannot perform its functions.
- In case of mechanical damage to the polymer material, accompanied by its rupture.
- In case of a defect in the seal, interfering with its normal operation.
- If the sealing tape does not fit the shape of the lock to the plastic profile or does not fit tightly in it.
Under all circumstances, sealing tape contributes to a window structure’s increased energy efficiency, which in turn results in reduced utility costs during the colder months and increased comfort when the room is occupied.
Is it necessary to change, the consequences of neglect
Negative effects like the following could happen if the PVC window seal is not changed on time:
- Blowing from under the bead and closed sash, regardless of the quality of the fittings adjustment.
- The entry of atmospheric moisture into the room, the formation of mold on the windowsill, slopes, and in the body of the profile, which contributes to the proliferation of pathogenic bacteria.
- Considering that the window is part of the enclosing structure, when moisture enters, the dew point, which forms approximately in the middle of the thickness of the part, contributes to the formation of ice, causing expansion of the material and destruction of the glass.
- When the sash is opened, part of the seal begins to fall out, worsening the aesthetic qualities of the window structure.
Vital. In order to prevent such repercussions, the issue must be promptly identified and resolved by replacing the sealing profile all the way around the sash or the glazing bead.
How to choose the right tires?
In order to purchase an identical product, it is necessary to research the market for these materials and ascertain the precise geometry of the element’s cross-section in order to determine what kind of seal is required for a PVC window. Additionally, you must locate the blowing location:
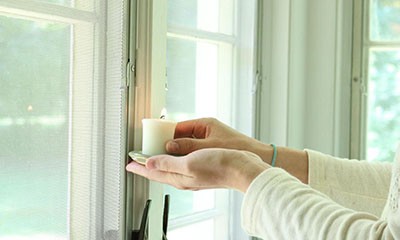
- If it blows from under the bead, two problems may arise with the seal – on the bead, or along the perimeter of the glass unit. In both cases, you should dismantle the clamping strips and inspect the space around the perimeter of the junction of the translucent structure with the plastic.
- When the window sash is blowing, but the adjustment was carried out correctly, the winter mode is set to maximum pressing force, special attention should be paid to the seal around the perimeter of the sash.
You should select one of the following compositions, each with technological features, when selecting a material:
- Rubber – has increased strength and durability, but is not resistant to significant temperature changes.
- Ethylene propylene – can withstand any climatic conditions, is highly durable, but consists of toxic components, and when fixing it, adhesive compounds are required.
- Silicone – one of the most high-tech materials for sealing window structures, the only disadvantage of which is the high retail cost.
- Polyurethane – the most durable material that will last a long time on windows, but breaks easily in the cold, and also leaves residual deformation when bent.
- PVC materials – increased elasticity, consists of environmentally friendly components, but its condition and shape depend on climatic conditions.
Note: In our country, retail stores offer a broad variety of each type of insulation. You also need to be aware of the installation location and operating conditions to avoid making a mistake with your selection.
Basic installation rules
Regardless of the installation location, material, or fastening technique, the following general safety guidelines must be followed when replacing a seal:

- If the seal is worn out only on part of the window structure, it should be replaced entirely, along the entire perimeter of the sash, since the problem with the remaining material will appear in the near future.
- When replacing an element, it is necessary to dismantle the sash and place it on a horizontal surface. This will prevent the risk of the glass unit falling out, damaging it and causing injury.
- When removing the old tape, you need to make sure that there are no scraps of material or sealant left in the grooves. The presence of foreign objects will complicate the subsequent operation of the window.
- Immediately after installation, it is necessary to check the quality of the seal and the presence of blowing points.
- You need to install a new seal using plastic spatulas. When using metal chisels and knives, there is a risk of damaging the profile and soft polymer material.
Vital. It is essential to inspect the material quality all the way along before installing the seal. Such tape should not be installed if there are flaws, uneven thickenings, or cuts.
Calculations: how much material will be needed?
The installation location is the primary determinant of the quantity of sealing tape needed. It is necessary to take the following measurements in order to calculate the molding correctly:
- When replacing the sealing element on the sash, the easiest way out is to dismantle the old tape and then measure it along its entire length.
- If the seal is torn due to mechanical damage, you need to measure 2 linear dimensions of the sash along the length of the groove for the tape, then multiply the resulting value by 2. The tape around the perimeter of the sash should be installed as a continuous line.
- The same algorithm is used when replacing the seal on a double-glazed window – with the glazing beads removed, 2 linear dimensions of the translucent structure are measured, and the resulting value is doubled.
- When determining the amount of material for the glazing bead, you need to dismantle the element and measure its length.
- Considering that the material is easier to trim than to build up, before cutting the tape, you should leave a 30-50 mm reserve, which is cut off with a knife after installing the polymer part.
Vital. It is important to keep in mind that experts do not advise joining tape, not even for cost-effectiveness. If the roll is not long enough, you should purchase a new tape. An additional joint is another doorway for the cold.
Tools and consumables to seal the PVC structure
It’s an easy task to replace the seal; no specialized equipment from a professional is needed. The instructor The following standard set needs to be kept on hand:
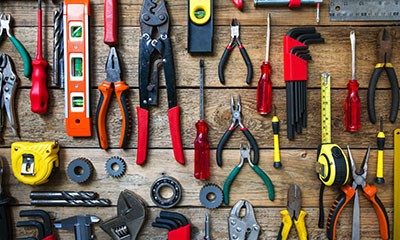
- Roulette, ruler, marker for removing sizes and marking.
- Scissors or a construction knife with a sliding blade for cutting.
- Slobes and forceps to extract an old seal from a groove.
- Awl, or a metal rod to clean the groove from pollution.
- Plastic spatula, to fix the new tape "to the castle".
- Screwdriver or screwdriver for dismantling and re -installation of sash elements, accessories.
- Silicone lubricant in the cylinder for processing the seal after installation.
- Vacuum grades for convenient transportation of the double-glazed window during its extraction or installation in the frame.
- Rubber hammer for fixing the stacks after replacing the tape.
Note: To get the desired outcome, all tools need to be in good working order, sharpened, and free of any remnants of previous pollution.
How to insert yourself?
Given that glass is a breakable material that can result in injury, replacing the seal requires adhering to safety regulations as well as following every step on the technological map.
Removing the window sash
The first step in replacing the insulation is to take apart the window sash, which can be done by following these easy instructions:
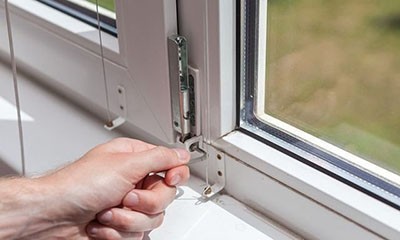
- A free horizontal surface on the floor or table, lined with a soft cloth, is prepared in advance.
- The shutter opens 90 degrees after turning the handle.
- Considering that during installation of the tape you will need to turn the structure over, you should remove the handle. To do this, the decorative trim at its base is bent 90 degrees, and two self-tapping screws are completely unscrewed with a screwdriver.
- Decorative plastic caps are removed from both hangers.
- The metal rod is removed from the upper loop with pliers.
- The sash is carefully pulled out first from the top hinge, after which it is lifted and released from the bottom.
- The structure is carefully laid on the prepared surface for further manipulations. The seal on the sash should face the ceiling.
- When replacing the sealant on the stacks, it is necessary to carefully pick up the element with a sharp object sequentially, from the corner and to the middle. A screwdriver is inserted into the resulting gap, which works like a lever. All graduates should not be removed at the same time, as this can lead to a double -glazed window loss.
- In the case of replacing the tape around the perimeter of a translucent structure, all graduates are neatly extracted from the grooves, and the double -glazed window is parallel by the hand. After the design of the structure from the latches, vacuum captures are installed, in 2 places – along the edges of the structure. The window block is neatly extracted from the frame and laid on the horizontal surface.
Vital. When dismantling a sash that weighs more than 70 kg and has long dimensions, one or two assistants should be involved.
Removing old material
After the sash is taken apart, you must carefully check the seal once more, determine the issue, and begin removing the old tape:

- First of all, you should find the end of the tape – it should be in the corner of the sash.
- Do not pull on the free edge of the polymer material, as it can easily come off.
- The end of the tape is picked up with a knife to release it by 3-5 cm.
- Next, you need to carefully pull the tape, constantly changing the grip as close as possible to the place where it is fixed.
- The tape is removed along the entire perimeter. If a part breaks, the procedure is repeated from this zone.
- The sealant is removed from the bead in one step, along its entire length.
- If the old tape is removed along the inner perimeter of the sash – in the place where the glass unit is installed, you can use a chisel to remove it conveniently.
You should blow out the grooves and, if required, clean them of any leftover sealant after removing the sealant.
Installing a new
You will need to have material on hand with the same geometric properties in order to install a new seal. There are multiple stages to the work’s completion:
- The required length of polymer is measured from the roll.
- The tape is cut, taking into account a small margin, and straightened to length.
- To simplify fastening, its end should be lubricated with silicone material.
- The part is loaded from the corner of the sash, gradually, with pressure.
- If you have difficulty inserting the material into the groove with your finger, you should use a plastic spatula. It is not recommended to use knives or other sharp metal objects as they can cut through the material.
- When installing, the tape should not be tensioned.
- After the element is mounted along its entire length, its end is cut off so that the seal is located strictly along the edge of the groove.
- When installing a seal around the perimeter of a glass unit, you need to use silicone or acrylic sealant, since the material does not have a designated edge.
Vital. During installation, if an unfixed area is found, it needs to be tucked in and smoothed to length right away. You must remove the tape’s section from the damaged area and repeat the process if the tape warps after installation.
Is it possible to paste without errors??
When using adhesive tape Certain issues might require immediate attention:
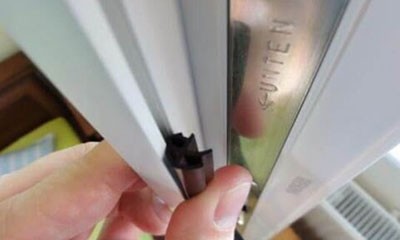
- The size of the tape does not always fit the mounting groove – the material needs to be replaced with a product with the required dimensions.
- There is not enough tape along the length of the product. If the material is installed around the perimeter of the sash or double-glazed window, it is allowed to join in the corners of the structure without overlap, under slight tension so that no gap is formed.
- The tape along the length of the bead must be installed without interruption.
- Overlaps or joining along the length of the profile are not allowed.
- Tension of the tape during installation – the elastic material returns to its previous state over time, which causes the formation of a gap at the edges. The tape should be arranged without tension.
- When dismantling the old seal, it begins to crumble due to old age and loss of strength. In such cases, you should carefully remove the material from the groove piece by piece using a metal rod.
- Warping of the tape – to avoid the problem, you need to smooth the material after installation every 10 cm.
Vital. To enhance functionality and lengthen service life, the seal must be inspected and lubricated after installation.
Price for repair services
There are a lot of rival businesses that install and maintain window structures on the market. Replacing sealing tapes is also on their list of tasks. The number of windows on the property, as well as its complexity and volume, determine how much the service will cost.
The average cost of this kind of work in the Russian Federation is:
- Polymer tape lubrication – from 70-80 rubles. for 1 m. P.
- Replacing the seal on the bead – from 120 rubles. per element.
- Replacing the seal on a double-glazed window – from 150 rubles. for 1 m. P.
- Replacing the seal on the sash – from 180 rubles. per 1 m. P.
Prices may differ based on the company’s price list, the difficulty of the task, and the cost of consumables.
Useful video
Watch the video to learn how to replace plastic window seals correctly:
It’s easy to replace the seals on your plastic windows, which can enhance comfort and energy efficiency in your house. You can easily replace old, worn-out seals without the help of a professional by following a few simple steps. Determine whether your windows are sealed with silicone, foam strips, or rubber gaskets to begin with.
Next, use a flat-head screwdriver or a seal removal tool to carefully remove the old seals. During this process, take care not to damage the window frame. To create a smooth surface for the new seals to properly adhere to, clean the groove or channel where the old seals were removed.
To ascertain the precise size of replacement seals required, measure the groove’s dimensions precisely. To guarantee a tight fit and appropriate window sealing, you must select seals that are the same size and type as the original seals. When buying replacement seals, carry your measurements with you because many hardware stores offer a range of options.
Lastly, firmly press the new seals into the groove that has been cleaned. Make sure the seals are evenly seated and firmly in place as you work your way around the window frame, starting at one corner. After installation, shut the window and examine the seals for any holes or places where the seal might not have compressed all the way. Your windows’ insulation and soundproofing can be greatly improved with this easy do-it-yourself project, improving the comfort and energy efficiency of your house.


