
The facade is one of the most important aspects of your home’s exterior maintenance, both in terms of appearance and security. Due to aging and exposure to the elements, plastered facades may eventually acquire cracks, discoloration, or other wear indicators. Not only does fixing these problems make your property look better, but it also protects it from future harm.
Plaster facade repair is a multi-step process that aims to return the surface to its original state. Every choice made, from determining the degree of damage to choosing the appropriate materials, affects the longevity and aesthetics of the restored facade. The secret to getting long-lasting results is careful planning and execution, whether you’re doing a full overhaul or just fixing small cracks.
It is essential to comprehend the fundamental causes of facade damage. Plaster deterioration and cracks can be caused by a variety of factors, including structural settling, temperature fluctuations, and moisture infiltration. During the repair process, you can avoid future problems in addition to fixing the visible issues by addressing these root causes.
Selecting the right materials and repair methods is crucial to a good result. Repairs could involve adding more layers of plaster, reinforcing the facade with additional protective coatings, or even just filling in cracks with the appropriate fillers, depending on how severe the damage is. Every technique has a distinct function in regaining the integrity and aesthetic appeal of the facade.
In the article "Repair of Plastered Facade," we examine crucial procedures and factors to take into account when repairing a building’s external surfaces. This guide intends to provide homeowners and contractors with useful solutions, from recognizing common problems like cracks and moisture damage to detailing step-by-step repair techniques. Understanding the underlying causes and selecting appropriate materials are essential to achieving a long-lasting and aesthetically pleasing finish, whether taking on minor repairs or extensive renovations. This article provides readers with the knowledge necessary to effectively improve the lifespan and appearance of their home’s facade through the use of professional advice and simple illustrations.
- 1. Repair of wall plaster in separate places technology
- 2. Inspection, preparation, repair of damaged areas
- 3. Applying a new coating to the facade
- Video on the topic
- Repair of house facade
- Restoration of the facade of the plastered house / Repair of the old house / Facade update
- Instructions for façade repair using BEERS technology
1. Repair of wall plaster in separate places technology
In actuality, new construction is impacted by this issue. The private sector has been actively building residential structures over the last few decades. Customers are naturally driven to hire a small number of skilled contractors in order to lower the overall cost of construction. However, standards and specific technological procedures are not always followed when it comes to construction technology.
Owners of older homes also have to deal with the issue of extensive plaster damage. It is possible to repair damaged facades without having to remove the old plaster entirely, which drastically lowers labor costs and time.
Technology used to repair plaster on the facade after partial removal:
- Inspection of the building facade, assessment of the damage surface;
- Removing plaster in places of damage;
- Cleaning and drying areas of removed plaster;
- Treating the working surface with a primer emulsion;
- Filling damaged areas with plaster mixture, leveling it and grouting it;
- Installation of a new plaster layer: application, grouting;
- Priming and painting the plastered facade.
It is important to note that wall plaster repair in discrete locations is a technology intended solely for beneficial outcomes, contingent upon a precise workflow that includes every step of the process. Strict adherence to the technological map is a necessary requirement for selecting a facade repair technology that involves partially removing the old coating in the hopes of achieving a long-term result.
2. Inspection, preparation, repair of damaged areas
The first step in repairing a cottage or country home’s facade is to carefully examine the facade and evaluate the damage. The likelihood of the coating being destroyed elsewhere in addition to the obvious locations is very high.
Using a rubber hammer to tap the plaster on a wall is the simplest way to find any hidden damage. A cavity under the coating or partial peeling of the coating will be indicated by a dull sound in the affected areas.
Plaster that is loose and loose should be carefully removed before beginning any major or ongoing repairs. Only the fragments with a strong clutch with the wall and clear strength characteristics can be left. A solid foundation is required. The new facade layer may crack and fall off if you leave plaster fragments that are not adhered to the wall surface.
Once the old facade’s pieces have been removed, the base needs to be completely cleared of dust and debris. Using a medium pressure washer for this task would be a wise choice.

All areas that have had the coating removed are carefully treated with an appropriate primer emulsion once they have dried. Rollers or brushes can be used for this, depending on the area of the surface that needs to be treated. Using a sprayer is worthwhile for large areas. The emulsion’s goal is to increase adhesion and decrease the base’s absorbency. Primers are required to guarantee that the freshly applied plaster adheres properly to the wall’s base and the remnants of the previous layer.
Next, a leveling solution is poured into the cavities using a spatula in accordance with the standard procedure. In particular, make sure that the wall is completely smooth and that there are no surface transitions.
The filled space needs to be thoroughly rubbed and smoothed after the mortar has set, which can take anywhere from 30 to 90 minutes, depending on the type, weight, and weather. After that, before the commencement of a new phase in the facade repair, at least 24 hours must elapse. The facade wall needs to be covered with a film regardless of the weather, to prevent it from drying out too quickly in the sun or from potential moisture intrusion.
3. Applying a new coating to the facade
If there is time, it is advised to extend this period to three days. The final coating is applied to the wall’s entire surface no earlier than 24 hours later. In theory, you are free to use any kind of solution that works, but in practice, you should start with the knowledge that the previous coating is not very strong and that the new one shouldn’t be overly thick.
It cannot be guaranteed that all areas of the old plaster that were damaged have been removed. Furthermore, no one can guarantee that a particular plaster section, which appeared to be firmly attached to the wall during testing, actually has the proper adhesion to it.
It takes at least a few days for the fresh façade plaster to adhere firmly to the previous layer. The previous layer of plaster will "work" at this point.
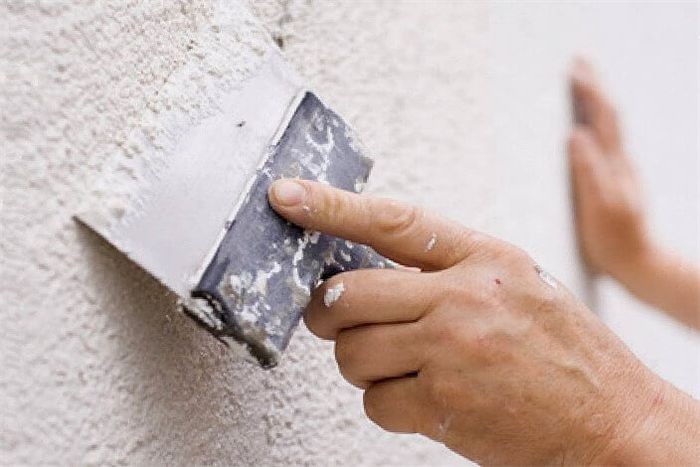
You can use an expensive white cement solution or one based on gray cement, depending on the paint color. To achieve a smooth surface, the mortar should be spread uniformly using the conventional technique, first with a metal spatula and then with a trowel in the finishing stage. The newly installed facade needs to be shielded from moisture for at least 24 hours following the application of a fresh layer to the wall during the drying process.
Of course! For your article on "Repair of Plastered Facade," here is a succinct conclusion:
Maintaining the longevity and structural soundness of your home is just as important as improving its appearance when it comes to plastered facade repair. Cracks, chips, and weather damage can be fixed quickly by homeowners, preventing more serious problems like mold growth and water infiltration.
Selecting the appropriate tools and methods is essential. Whether you’re doing a complete restoration or just touching up minor flaws, using high-quality materials appropriate for the type of facade you have will guarantee a long-lasting finish. This method safeguards your investment over time in addition to improving curb appeal.
Maintaining the look and functionality of your facade requires regular maintenance. By keeping an eye out for wear and tear, cleaning frequently, and taking care of small repairs right away, you can prolong the life of your facade and avoid the need for later, more expensive renovations.
In the end, plastered facade maintenance requires a harmony between preventive maintenance and prompt repairs. Homeowners may take advantage of a stunning and durable exterior that raises the value and comfort of their property by knowing what causes damage and making quality repairs.


