
Insulating a loggia is a great way to add comfort and value to your apartment. Many people perceive this as a simple repair, but in fact it is a serious matter on which the microclimate of the entire apartment depends. Unfortunately, it is precisely because of its apparent simplicity that there are many pitfalls here.
Improperly performed insulation can lead not to comfort, but to a whole host of problems: from constant condensation and mold on the walls to cold floors and huge heating bills. Mistakes made during the work phase are very difficult and expensive to correct later.
To ensure that your balcony truly becomes a warm and dry extension of the room, it is important to be aware of the most common mistakes. Let's take a look at ten key mistakes that are important to avoid so that you can enjoy the result for many years to come.
- Mistake 1: remodeling and replanning without permission
- Mistake 2: Moving the radiator to the loggia
- Mistake 3: installing frameless glazing
- Mistake 4: Projecting glazing on brackets
- Mistake 5: single-layer insulation
- Mistake 6: Neglecting vapor barrier
- Mistake 7: Overuse of sealant without protection
- Mistake 8: Incorrect floor construction
- Mistake 9: insulating the wall between the balcony and the apartment
Mistake 1: remodeling and replanning without permission
Even if you do not want to demolish the wall between the apartment and the balcony, but only want to insulate the space outside the window, it is better to notify a representative of the Bureau of Technical Inventory (BTI) of your intentions so that you do not have problems later, for example, when selling the apartment if there are discrepancies in the technical passport of the property.
InMyRoom tip: glaze the balcony with sliding double-glazed windows with aluminum profiles – and equip your unheated summer loggia in this way. This will still add space (for storage, for example), and there will be significantly fewer drafts from the balcony. No permit is required for this type of glazing.

Mistake 2: Moving the radiator to the loggia
If you have obtained permission for redevelopment, you are unlikely to plan such a trick. But in any case, be aware that it is not permitted to run pipes for the radiator and the battery itself outside the building's external wall. Heat loss on the balcony is too great, pipes can freeze if not properly insulated, accidents are possible; until recently, you would have had to pay a significant amount extra for heating uninhabited square meters after individual recalculation. One way or another, batteries cannot be moved to the loggia—keep this in mind when designing an insulated balcony.
InMyRoom tip: an electric underfloor heating system or oil-filled radiator will help—it can be attached to the wall in the same way as a regular battery.

Mistake 3: installing frameless glazing
Frameless sashes look great—when closed, they form a smooth surface, sometimes without even edges. In addition, the sashes conveniently fold up like an accordion, without taking up space on the balcony. However, this solution is not suitable for an insulated balcony: single glazing and gaps between the panels will not protect against the cold. In addition, dirt and dust quickly accumulate on them, fingerprints remain, and mosquito nets cannot be attached.
Advice from InMyRoom: take a look at the latest developments, such as thermally insulated lift-and-slide windows. But the best choice for glazing a warm balcony remains PVC double-glazed windows with good old swing sashes. In fact, they don't take up much space—they can be opened only for ventilation and swung open twice a year to wash the glass from the outside.

Mistake 4: Projecting glazing on brackets
In an effort to increase the area, or more precisely, the volume of the attached loggia, apartment owners build a frame for glazing that extends several dozen centimeters. A wide canopy appears along the upper perimeter, on which snow constantly accumulates, and in the off-season, rain loudly beats down on it. Most importantly, a glass growth appears on the facade, which spoils the appearance of the building.
InMyRoom tip: an alternative is only possible within the framework of facade uniformity. If your house has open balconies (or they should be open), it is worth giving up the idea of connecting them or even just glazing them. Instead, you can decorate the loggia with green plants.

Mistake 5: single-layer insulation
To create an insulated loggia, the parapet and walls are duplicated with 70–100 mm thick foam blocks – this material has excellent thermal insulation properties and frost resistance, so some people believe that it is not necessary to additionally insulate the walls and parapet lined with foam blocks from the inside. In fact, masonry of this thickness can freeze through.
InMyRoom tip: add either extruded polystyrene foam panels or rock wool slabs to the insulation layer.

Mistake 6: Neglecting vapor barrier
This is especially dangerous if you use mineral wool as insulation—without a vapor barrier, it will become damp and ruin the walls and floor of the balcony, and your neighbors may find condensation on the ceiling of their loggia. Inside an outdoor storage room connected without vapor barrier, condensation will certainly appear immediately.
InMyRoom tip: even if you only use foam or other foamed materials for insulation, there is nothing to stop you from adding a thin layer of vapor barrier film. For mineral wool, such an addition is an absolute must-have!
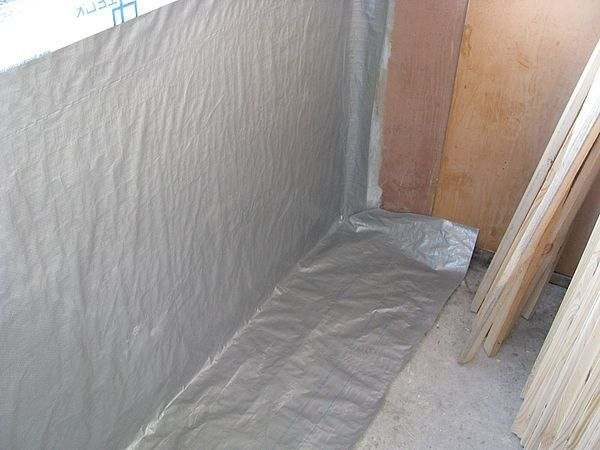
Mistake 7: Overuse of sealant without protection
Joints with bubbling mounting foam are a perfectionist's nightmare. Not only are they aesthetically unattractive, but they also threaten to ruin the climate in your apartment: the fact is that polyurethane sealant foam cannot tolerate direct sunlight and moisture. Without proper protection, it quickly deteriorates, exposing previously sealed gaps and cracks to drafts and street noise.
InMyRoom tip: carefully treat the “foamed” joints—cut off the excess sealant, sand the material with fine sandpaper, and cover with putty or acrylic paint (it is better to use both options). If you don't have putty or paint on hand, use special mounting tape, but keep in mind that paint will not adhere well to such joints.

Mistake 8: Incorrect floor construction
Do not try to make the floor perfectly level using a thick sand-concrete screed, which will subsequently be covered with a thick layer of tile adhesive and then ceramic tiles. Overloading the floor is dangerous. It is better to insulate the floor using ultra-lightweight materials (let's agree right away that this example does not refer to a heated floor system).
InMyRoom tip: there are many recipes for insulating the floor on a balcony, but they all essentially boil down to using soft insulation directly on top of concrete slabs (you can use penoplex or mineral wool). Then it is recommended to lay a second layer of insulation—and be sure to apply waterproofing (lay hydroglass insulation with an overlap of more than 15 centimeters). A thin screed can be made on top – and many craftsmen simply lay plywood if the balcony does not have a significant slope: plywood is thin, light, and even, and both carpet and laminate can be laid on top of it in a warm and moisture-protected loggia.
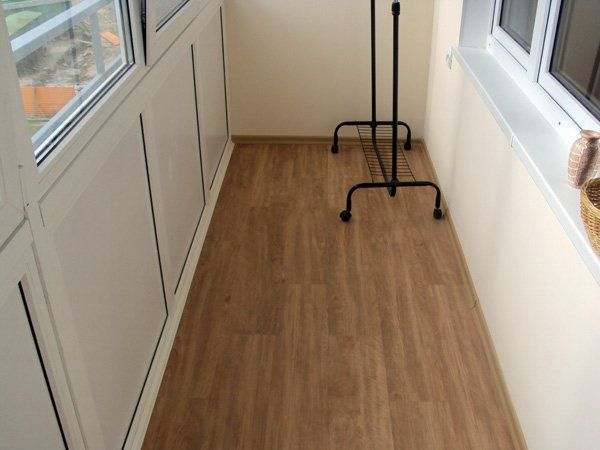
When insulating a balcony, many people rush and make typical mistakes—whether it's choosing the wrong material, ignoring vapor barrier, or poorly sealing joints. They often skimp on quality, forgetting that cheap solutions quickly fail. Others do not think about ventilation or dew point at all, which leads to moisture and mold. And some people immediately start insulating without sealing the gaps in the windows or insulating the floors and ceiling. The result is a cold, damp space and wasted time and money. To make your balcony a warm and comfortable extension of your home, it is better to know what not to do and do everything right the first time.
Mistake 9: insulating the wall between the balcony and the apartment
If the balcony is attached and insulated, the exterior wall becomes an interior wall. And covering it with all kinds of heat-insulating materials will, in most cases, be a waste of time and money—insulation will not affect the climate in the apartment on either side of this wall.
InMyRoom tip: spend the money you save on beautiful wall and window sill finishes. And also on important details — see the next point.

Insulating a balcony is a great way to add comfort and usable space, but this is a case where mistakes can be very costly. Incorrect actions can lead not only to a loss of money, but also to dampness, cold, and even problems with neighbors.
The most important thing is to approach the work systematically. Do not skimp on vapor barrier, neglect ventilation, or glue insulation directly onto old frames. Remember that a balcony is not just a room, but a complex junction where different temperatures meet. Your main task is to create a continuous and correct “layer cake” of materials that will cut off the cold and prevent condensation from forming.
If you are unsure of your abilities or encounter unclear issues (for example, the condition of the parapet), it is better to consult a specialist. Properly installed insulation will keep you warm and cozy for many years, making the loggia a full-fledged part of your home.


