
Are you considering enhancing the comfort and energy efficiency of your house? Polystyrene foam ceiling insulation made at home might be the perfect answer for you. This inexpensive, lightweight material is perfect for insulating ceilings, assisting in the control of interior temperature and lowering energy expenses.
Styrofoam, also known as polystyrene foam, is well known for having superior thermal insulation qualities. It functions by erecting a barrier that reduces the rate at which heat is transferred from your house to the outside. Your living space will be more comfortable all year round if you insulate your ceiling with polystyrene foam insulation, which will keep your house cooler in the summer and prevent heat loss during the winter.
Installing polystyrene foam for ceiling insulation is very simple, which is one of its main benefits. Polystyrene foam boards are lightweight and easily cut to fit the dimensions of your ceiling, in contrast to more intricate insulation materials. This makes it a sensible option for do-it-yourselfers who want to improve the insulation in their home without hiring a pro.
The moisture resistance of polystyrene foam insulation is an additional advantage. Mold and mildew growth is a frequent problem in poorly insulated spaces, and this material helps avoid it. Polystyrene foam creates a moisture barrier that not only enhances indoor air quality but also increases ceiling longevity by lowering the possibility of water damage.
| Materials Needed: | Polystyrene foam sheets, adhesive suitable for foam, measuring tape, utility knife, straight edge |
| Steps: | 1. Mea Cover with decorative finish if desired. |
- Characteristics, pros and cons of ceiling insulation with foam plastic
- Characteristics
- Advantages and disadvantages
- Which foam is suitable
- Thickness
- Materials and tools
- Preparatory work
- Insulation technology
- Glue method
- Frame method
- Video on the topic
- DO NOT INSULATE YOUR CEILING WITHOUT WATCHING THIS VIDEO! ERROR CORRECTION THREE YEARS AFTER CONSTRUCTION
- INSULATION OF THE ceiling WITH PENOPLEX from the inside | We build a house with our own hands
- Penoplex after 3 years – will mold appear?? We insulate the ceiling from the inside!
Characteristics, pros and cons of ceiling insulation with foam plastic
Expanded polystyrene, also known as polystyrene foam, is a contemporary building material that is frequently utilized in the building sector. It’s a thin white polystyrene sheet, similar to styrene. Its granular structure is readily apparent, with each grain being made up of numerous carbon dioxide-filled air chambers.
Produced without the use of a press. Many experts mistake it for insulation made from polystyrene, which is the same raw material, but produced through an alternative process called extrusion. "Penoplex" is a common example of extruded polystyrene.
Penoizol, a liquid polystyrene foam, has recently entered the building materials market. Its application technology is essentially distinct from that of conventional foam insulation techniques. Therefore, it will not be taken into consideration in this article as the editors of StroyGuru believe it deserves its own piece of content.
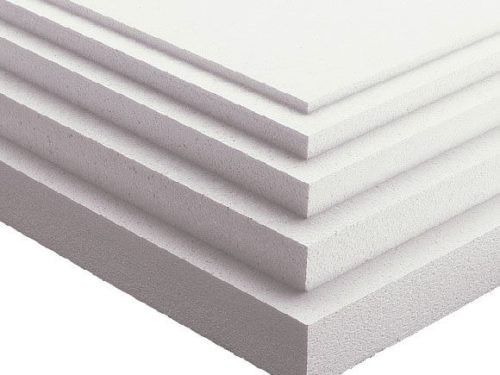
Characteristics
Polystyrene foam is widely used in many sectors of the US economy because of its functional and technical qualities.
- low thermal conductivity coefficient – 0.037-0.043 W/(m×°K);
- light weight – 8-40 kg/m3;
- high level of compressive strength – 0.04-0.16 MPa;
- low level of water absorption – 2-4%.
Expanded polystyrene is made in thicknesses ranging from 10 to 100 mm, with 10 mm increments between each thickness. If an unusual order is placed, the machinery can be adjusted to accommodate sheets up to 500 mm thick. There are two standard dimensions: 1000×1000 mm and 500×1000 mm. It is rare to find a size of 1000×2000 mm on sale.
Advantages and disadvantages
As with all building materials, polystyrene foam has advantages and disadvantages. Strengths of TO should be credited with:
- durability – thanks to various additives, the service life is 20-50 years;
- low thermal conductivity;
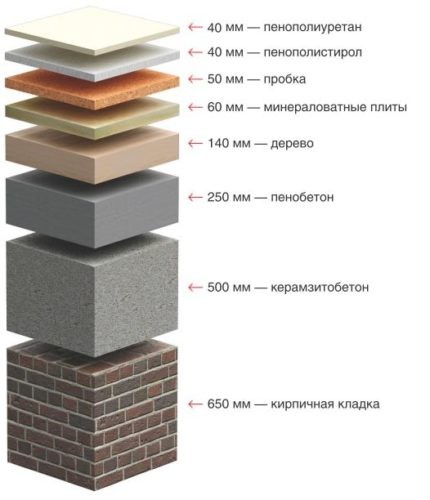
- affordable price for mass buyers;
- ability to withstand frost up to 50 o C and heat up to 75 o C;
- simple insulation technology – all work can be done with your own hands;
- low density, as a result of which it is possible to insulate all structural elements of the building without exception;
- resistance to cement-sand and gypsum mortar, fungi and mold.
The insulation’s shortcomings also include:
- despite the addition of fire retardants, it burns well with the release of harmful and toxic substances;
- during a fire it melts and spreads over structures, increasing the area of fire;
- when heated above 30 o C, it begins to release harmful styrene;
- contrary to popular belief about good noise-absorbing properties, it actually resonates, enhancing the sound flow;
- melts when most types of solvents come into contact with the surface;
- intensively deteriorates under sunlight;
- does not allow steam to pass through;
- has low bending strength.
It remains their preferred habitat even after several additives designed to keep out mice and rats were introduced.
For reference, the work "Foam Insulation" goes into greater detail about this kind of insulation.
Which foam is suitable
PPS-10 (PSB-S-15), PPS-14 (PSB-S-25), PPS-16F (PSB-S-25F), PPS-25 (PSB-S-35), and PPS-35 (PSB-S-50) are the five foam plastic grades that Trade offers. Each of them has a distinct price, purpose, and density. For instance, PPS-10 (PSB-S-15) is primarily used for wall insulation when sheathing is used beneath a suspended ceiling, either with it or without it, and from the interior of the room (walls and ceiling). Furthermore, using insulation with this density to insulate roofs has shown to be effective. It is priced at 1900 rubles per square meter.
Additionally, expanded polystyrene PPS-14 (PSB-S-25) specializes in thermal insulation for paint, wallpaper, and decorative plaster on interior walls as well as ceilings both inside and outside that are fastened with an adhesive method for paint, liquid wallpaper, and decorative plaster. Cost: 2390 rubles per m² and higher.
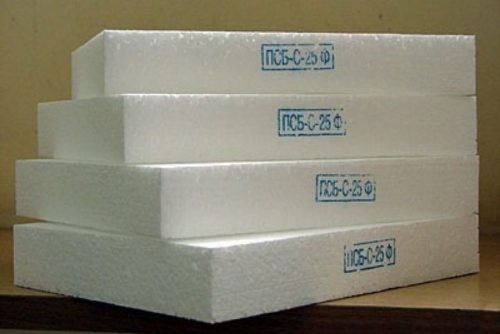
PPS-16F (PSB-S-25 F) grade is specifically designed for "wet" façades. The starting price per m^ is 2900 rubles. Polystyrene foam insulation for the garage ceiling is available in two different varieties: PPS-10 (PSB-S-15) or PPS-14 (PSB-S-25) is a good choice for interior use, while PPS-16F (PSB-S-25 F) is the best option for exterior use. However, the PPS-25 (PSB-S-35) brand is also an option. Here, the price is the deciding factor.
Recap the main points. Foam with a density of 15 kg/m 3 is required for the ceiling from the inside of the room when lathing or under a suspended ceiling (PPS-10). Density: 25 kg/m 3 (PPS-14) for decorative plaster, painting, and wallpaper.
Grade PPS-10 (PSB-S-15) ventilation gap beneath the laid floor outside. You need PPS-14 (PSB-S-25) if you intend to walk on the insulation (there won’t be an attic). The best choice for insulating the ceiling above a garage is PPS-25 (PSB-S-35).
Thickness
If the brands of insulation make everything more or less obvious, things are less clear when it comes to the foam thickness used to insulate a private home’s ceiling. Must tally. This is challenging to complete on your own: even seasoned builders are unsure about where to locate numerous coefficient values for thermal formulas. In this instance, what can we say about the owners who handle the work themselves?
There are two ways to go about this: either look up online calculators (which are available here) or make use of the expertise already gained:
- 50 mm when insulating the ceiling in a private house from the inside or outside;
- 20-30 mm for an apartment and the ceiling in a private house with a warm roof;
- 70-100 mm for insulating the ceiling of a cold cellar or basement;
- 100 mm for insulating the garage from the outside.
Materials and tools
What you’ll need to insulate the ceiling is:
- polystyrene foam – the grade and thickness depend on the location of the work and the method of finishing the ceiling;
- roll-type waterproofing material for insulating the ceiling in the garage from the outside;
- vapor barrier membrane (type A or AM) and film (type B or C);
Note: The work "Installing a vapor barrier with your own hands" contains a detailed description of the guidelines for handling vapor barrier materials.
- timber for sheathing 40×50 mm;
- rail 30 x 50 mm for installing a counter-lattice;
- reinforcing fiberglass mesh;
- deep penetration primer;
- fasteners for sheathing (metal corners, self-tapping dowels, wood screws);
- glue. For large areas it is best to buy Ceresit ST 85, and for the ceiling it is financially justified to use synthetic adhesives based on polyurethane resins. But it should be remembered that the reinforcement of the insulation surface is carried out only with a cement-based adhesive solution. In this case, for financial reasons, it is better to buy dry types of glue;
- special fasteners for foam plastic – umbrella dowels or dowels with a rondole washer;
- polyurethane foam (be sure to check for interaction with the foam so that it does not melt) or polyurethane adhesive foam for sealing cracks;
- stepladder or strong table;
- hammer drill or electric drill;
- drill bits for drilling holes for dowels through polystyrene foam;
- mixing attachment if the glue is cement-based;
- container for glue;
- screwdriver;
- putty knife;
- paint brush (roller) for priming the ceiling;
- jigsaw or hand saw for wood;
- roulette;
- construction knife – needed for working with hydro- and vapor barrier materials;
- a hacksaw with a fine tooth for cutting insulation;
- pencil.
In this post, we’ll look at a practical and affordable way to improve your home’s energy efficiency and comfort level using polystyrene foam ceiling insulation. We walk you through each step of the process, from measuring your space and preparing the materials to installing and completing the insulation. This article attempts to provide homeowners with the knowledge and confidence to take on their insulation projects, ensuring a warmer, more energy-efficient home environment. It does this by providing clear instructions and helpful tips.
Preparatory work
Prior to using foam plastic to insulate the ceiling, some preparation work must be done. For concrete flooring, you require:
- dismantle the overhead lighting, and then insulate the exposed ends of the electrical wiring with electrical tape or terminals;
- remove old finishes (paint, whitewash, liquid wallpaper);
- tap joints between reinforced concrete floor panels. In places with “bubbling” plaster, remove it;
- also remove the loose plaster layer from the surface of the panels;
- seal joints and places with removed plaster with repair mortar;
- if new construction is underway, check the ceiling horizon. If there are significant deviations, the surface can be leveled with gypsum mortar, but this is expensive, labor-intensive, and it reduces the height of the ceiling or the sheathing frame;
- clean from dirt, soot and volatile fats;
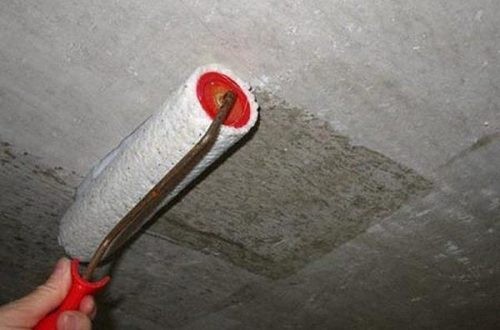
- after the plaster solution has completely dried, the ceiling is primed twice. The first layer is applied generously until the concrete has absorbed water diluted 30-40% with primer. If it dries quickly, you can do 2 passes. The second layer is applied after about a day – it takes time for the primer to adhere to the base. For better adhesion of the glue to the ceiling for re-priming, it is advisable to use “Betonokontakt”;
- if fastening is planned using the adhesive method, it becomes necessary to install lathing. The frame manufacturing technology is simple: a harness is attached to the ceiling or wall using metal corners and self-tapping dowels (the size of the drill or hammer drill chuck does not allow attaching it through the top of the beam to the ceiling or wall). The internal sheathing slats are attached to the frame in increments equal to the width of the slabs.
A wooden base is simpler to prepare:
- the chandelier is removed, the wires are insulated;
- the ceiling is freed from paint, whitewash or wallpaper;
- Dirt and soot are removed, and greasy areas are degreased with gasoline or acetone;
- the wood is treated with an antiseptic and fire retardant;
- if necessary, the sheathing is filled. It can be attached directly to the ceiling using long wood screws.
The primary preparation for insulating a garage from above the ceiling is the ceiling’s vapor and hydro- barrier. The following order is followed when performing the work:
- the ceiling is cleared of debris;
- all cracks, joints between floor slabs, sinkholes and cracks are sealed with repair mortar. The technology is completely identical to preparing a concrete base for a screed (“Preparing the floor for pouring a screed”);
- the surface is treated with a bitumen primer (primer);
- Rolled waterproofing (most often roofing felt) is laid over the ceilings with an overlap, extending onto the walls by 20-30 cm. Joints are treated with bitumen mastic or liquid bitumen;
- A polyethylene film is laid over the waterproofing layer. Overlap of at least 10 cm. The seams must be sealed with tape. The film itself is attached to the walls with a stapler or tape. Some experts suggest attaching a vapor barrier to roofing felt, and sealing the staples themselves with tape. Note that such an amendment to technology has the right to life.
Insulation technology
There are various methods for insulating the ceiling of an apartment, private home, dacha, etc. using polystyrene foam. The most typical is glue and a frame. Totally different technologies are used in a private house and garage to insulate the ceiling outside. Let’s examine each of them in greater depth.
Glue method
The work "Wall insulation with foam plastic" goes into great detail about doweling after glue-bonding foam plastic sheets to the ceiling. Additionally, a picture demonstrates each operation.
Let’s sum up the technology quickly:
- glue is prepared;
- an adhesive solution is applied to the surface of the foam with a spatula. There are important nuances here that the editors of the StroyGuru website.Kom advises to still look at the above work;
- the insulation sheet is glued to the ceiling;
- the second row is fastened with a shift in relation to the seams of the 1st row of at least 150 mm;
- inserts must be 15 cm or more in width;
- After the glue has dried, additional fastening of the slabs is carried out using umbrella dowels. The editors again refer their visitors to the given work, t.To. there are some nuances there;
- the surface of the insulating layer is reinforced with serpyanka mesh.
This is sufficient for liquid wallpaper and decorative plaster. The ceiling surface is puttied before painting or applying paper (non-woven) wallpaper. Getting a smooth surface is the aim.
Be aware that you can attach foam insulation beneath a suspended ceiling in any manner. Easy and less expensive: glue. In this instance, a type B vapor barrier film covers the thermal layer’s surface rather than reinforcing it.
Frame method
The technology for installing thermal insulation is less complicated when employing the frame method. First off, there’s no need for double fixation. Secondly, polyurethane liquid glue can be applied in two ways: either as a snake around the edge or as a strip with multiple points in the middle.
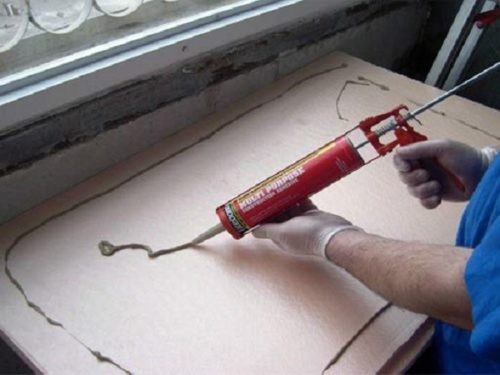
The following order is followed when performing subsequent work:
- foam boards are glued to the ceiling;
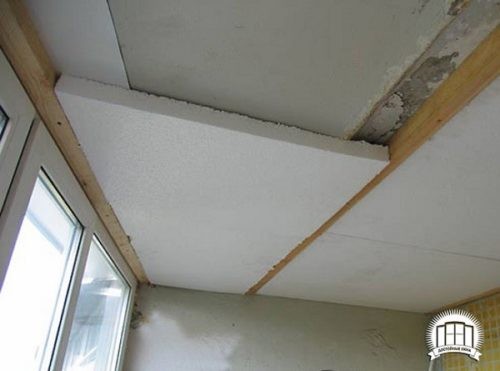
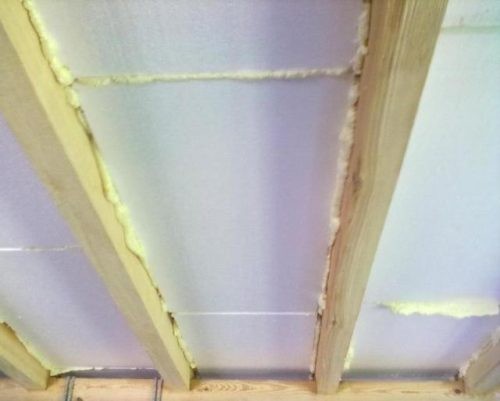
- the gaps (slots) between the polystyrene foam and the sheathing slats are foamed. To do this, you can use polyurethane-based adhesive foam or polystyrene foam compatible with polystyrene foam;
- the surface of the heat-insulating layer is covered with a vapor barrier film (type B) with an overlap. Attached with staplers to the sheathing. Connecting seams and staples are sealed with tape;
Important: Many builders choose to overlook this procedure, claiming that the insulation’s vapor-tightness justifies their choice. But they overlook wood, which actively draws moisture from the surrounding atmosphere. Additionally, the top has enough steam.
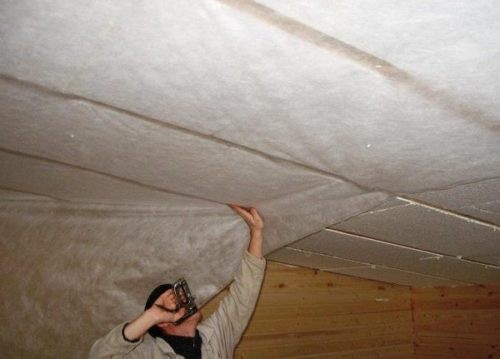
- a counter-lattice is placed on top of the vapor barrier.
Polystyrene foam ceiling insulation is a useful do-it-yourself project that can greatly increase your home’s comfort and energy efficiency. You can build a barrier that keeps your house cooler in the summer and lessens heat loss during the colder months by installing polystyrene foam panels. This insulation technique works especially well at stopping heat transfer via your ceiling, which is essential for year-round indoor temperature stability.
The lightweight and simple installation of polystyrene foam as ceiling insulation is one of its main benefits. Polystyrene foam panels are lightweight and easily cut to size, which makes them a great option for do-it-yourselfers who don’t have much building experience but still want to improve the insulation in their home. In addition to being well-known for its resilience to moisture and durability, this material also helps to keep its efficacy over time.
It’s crucial to consider correct installation methods when organizing your do-it-yourself polystyrene foam ceiling insulation project. First, make sure there are no spaces where heat could escape by measuring and cutting the panels to fit tightly between the ceiling joists. To ensure a tight seal, use the adhesive that is recommended for polystyrene foam to firmly attach the panels. If necessary, think about including a vapor barrier to increase the insulation’s efficacy.
Finally, to evaluate the effect of the insulation, keep an eye on your home’s comfort levels and energy usage after the installation is complete. Better energy economy, lower heating and cooling expenses, and year-round indoor temperature stability are what you should observe. To ensure that the insulation continues to effectively provide thermal comfort and energy savings for your home, regularly check it for wear or damage and make any necessary repairs as soon as you notice them.


