
Mineral wool insulation is a fantastic way to increase your home’s energy efficiency. It lowers the cost of heating and cooling your home by keeping it cozy in the winter and cool in the summer. In addition to providing soundproofing, this kind of insulation makes homes cozier and quieter.
Mineral wool insulation has superior thermal and acoustic qualities and is composed of either synthetic or natural minerals. It is a reliable and secure option for wall insulation because it is also moisture- and fire-resistant. It is also eco-friendly because it is frequently composed of recycled materials.
The fact that homeowners can install mineral wool insulation themselves is one of its best features. You don’t need to hire professionals to finish the project if you have some basic tools and some guidance. This not only helps you save money, but it also gives you the satisfaction of improving the efficiency of your house on your own.
We’ll walk you through the process of using mineral wool as wall insulation in this guide. We will give you all the information you need to complete an efficient insulation job, from choosing the best materials to applying it correctly. Together, we can improve the comfort and energy efficiency of your house.
- Pros and cons of using mineral wool for wall insulation
- Which mineral wool to choose for wall insulation
- Manufacturers
- Required materials and tools
- Preparatory work
- Arrangement of sheathing
- Installation of insulation
- Insulation of frame walls
- Insulation under siding
- Insulation of facade under plaster
- Video on the topic
- How to cheaply insulate a frame: installing mineral wool // FORUMHOUSE
- 👍How to insulate mines with cotton wool yourself.Do-it-yourself facade insulation (Azion)👍
- Ceiling insulation with mineral wool. DIY frame house.
Pros and cons of using mineral wool for wall insulation
There are three types of mineral wool available, which vary based on the original raw material: glass wool, basalt wool, and slag wool.

Every variety has unique traits, benefits, and drawbacks. They are the reason slag wool, with its high hygroscopicity, is not used as an insulator for facades. It gets damp very quickly. In addition to losing its ability to insulate against heat, it also corrodes any material it comes into contact with because water causes it to produce hydrochloric acid.
Both glass and basalt wool have individual flaws as well as shared shortcomings.
Benefits in general include:
- excellent thermal insulation properties – the thermal conductivity coefficient ranges from 0.035 to 0.052 W/(m K);
- versatility. In addition to the facade, basalt and glass wool is used to insulate the floor, roof, ceiling in the attic, as well as walls from the inside of the room. Mineral wool insulation perfectly copes with its functions in houses made of wood, brick, concrete, aerated concrete, foam block, gas silicate blocks, etc. materials;
- resistance to high temperatures – glass wool can withstand heating up to 300 o C, basalt fiber up to 1000 o C;
- perfectly resist mold and mildew – glass and basalt fibers do not provide a basis for the development of microorganisms;
- light weight, which does not create loads on the insulated elements of the building;
- ease of delivery from the retail outlet to the place of insulation;
- simple insulation technology – all thermal insulation work can be done with your own hands;
- environmentally friendly – the material does not cause allergic reactions and practically does not emit harmful substances during the heating process;
- fire resistance – flammability class NG.
Natural wool insulation for a home’s exterior walls has drawbacks as well. These include:
- connecting seams through which heat loss begins during operation (mats shrink, losing their shape). However, when using modern technologies for attaching thermal insulation boards to the wall, heat loss can be minimized;
- Dust – formed in the process of laying requires mandatory protection of the body and respiratory tract.
Additionally, the basalt cotton wool There are a number of benefits that fiberglass insulation lacks. This:
- Durability – the life of the material for at least 50 years;
- Low hygroscopicity. Experiments show that the fibers immersed in the water absorb only 0.095% moisture per day;
- good noise absorption, up to 75 dB, sound waves spreading through the air. Against shock and structural noise (distribute the structures of the house), the basalt insulation is powerless;
- Resistance against mice and rats – they do not eat cotton wool, do not arrange moves and nests;
- inertness to chemically active substances used in everyday life;
- high level of elasticity – the mats retain their dimensions throughout their entire service life;
- sufficiently high tensile strength, which allows you to insulate the facade using the “wet method” (apply a layer of decorative plaster directly to the insulation).
One of the drawbacks is the price.
There are unique strengths and weaknesses in glass wool as well. One benefit is that it’s inexpensive.
The list of flaws is longer:
- high hygroscopicity, which requires insulation to be insulated from moisture. Otherwise, destructive processes begin in the wet fibers, as a result of which the glass wool cakes and settles, forming uninsulated areas;
- short service life – about 10-15 years;
- low resistance to the class of chemicals represented by alkalis – fiberglass is destroyed under their influence;
- attractive to mice and rats – serves as a habitat for them.
The resource "Mineral wool for insulation" has comprehensive information about mineral wool.
Which mineral wool to choose for wall insulation
Two elements affect the effectiveness and caliber of mineral wool insulation for external walls:
- correctly selected insulation;
- compliance with the technology of thermal insulation work.
Selecting insulation may seem straightforward at first. However, this is from a "home craftsman’s" perspective. A specialist will quickly point out that multiple factors simultaneously affect insulation efficiency:
- type of insulation – for siding and other short-lived materials, it is better to buy glass wool. Here is the ideal combination of price and quality. For "wet insulation", cladding made of porcelain stoneware, artificial and natural stone, block house, basalt wool material is needed. The "biting" price is justified by a long service life. You can also use glass wool, but this is exactly the case when "the greedy pay twice";
- the thickness of the mat is one of the most important indicators. After all, firstly, the efficiency of insulation depends on it, and secondly, the location of the "dew point". Both factors are included in a special formula, which many specialists have difficulty coping with. For skilled hands, we give two tips on how to do without complex calculations:
- Take advantage of the established practice and buy slabs with a thickness of 100 mm for central Russia, 150 mm for the north, 50 mm for the south.
- Use the online calculator located here.
- linear dimensions. Modern production produces mineral wool with a width from 20 to 180 cm, a length from 100 to 600 cm.
The most practical size of mineral wool insulation for the building’s exterior walls is:
- width – 50-60 cm. With this size, it’s easy to fill the sheathing, it’s easy to mount the insulation inside the cells and attach it to the wall;
- in length – the slabs should be within 100-120 cm, rolls – of any length, because during the work they will have to be cut in any case, since long strips are difficult to work with;
- density. The thermal insulation properties of the material and the rigidity of the slab (the ability to resist deformation under the influence of mechanical loads) depend on the indicator, which is especially important when applying decorative plaster directly over the insulation (“wet method” of insulation) and insulating a frame house, when the weight of the upper slabs presses on the lower mat.
Purchasing mineral insulation density is advised by experts:
- 50-75 kg/m 3 for insulation of the walls of the frame house with mineral wool-the insulation with another density will begin to shrink over time;
- 80-130 kg/m 3 for wall insulation with a ventilated clearance;
- 130-160 kg/m 3 for decorative plaster;
- 150-175 kg/m 3 for facade from concrete structures.
Manufacturers
Purchasing cotton wool from reputable producers is preferable. There are a few that are well-known to the general public and some that are not, in terms of the mineral wool brand.
Rockwool. Basalt and gabbro fibers are used to make heaters by Rockwool (Denmark), which has operations across several nations, including Russia. An attribute of mats for insulation is:
- low thermal conductivity;
- good absorption of air noise;
- resistance to open flame (flammability class NG);

- long service life;
- ecological cleanliness.
Croatia. The PAROC company, a Finnish producer of basalt wool, provides customers with mats for use in building and recording studio acoustic insulation.
The insulation has a low coefficient of thermal conductivity, is durable, and resistant to fire. Products that are counterfeit are nearly impossible to find on the market because the company keeps a close eye out for them. Unfortunately, insulation is too expensive for the typical consumer.
Iseki. Russia is home to the production facilities of the multinational company Isover, which is registered in France and leads the mineral wool sales market in Europe. The product offers the best ratio of cost to value.
TechnoNIKOL. The heat and waterproofing material brand "Technonikol" is owned by Russian companies, although it is made in several European nations, including Belarus, Lithuania, the Czech Republic, and England. A prominent position is held by mineral wool insulation within the extensive product line. With the use of cutting-edge machinery and meticulous quality assurance, the business was able to break into the top five rankings of mineral wool suppliers to the European and CIS construction markets.
IZOVOL. In Russia, the IZOVOL company makes insulation made of basalt. The product is well-made and reasonably priced. The range of insulation products includes mats made specifically for floors, foundations, roofs, and facades.
Every quality attribute satisfies the requirements of Russian and EU standards. The appearance of quality is compromised by a small amount of fiber shedding during installation. Although the manufacturer is aware of the issue, it is currently unfixable.
It is important to consider the products of the brands "KNAUF" and "URSA" in addition to the ones mentioned above. It is frequently purchased to insulate wooden homes. One recommendation from experts is Beltep insulation (Belarus) for average prices. It is reasonably priced, easy to install, very rigid, and has good vapor permeability.
Required materials and tools
In order to complete the thermal insulation work on the facade, you will need to assemble a set of tools and accessories and purchase basic and auxiliary (consumable) materials.
Supplies you must buy:
- mineral insulation – you need to buy 10% more, since consumption increases due to pruning;
- vapor barrier (windproof) film;
- wooden block – usually 50 mm thick, width – depending on the thickness of the mats for the main sheathing;
- rail (distance strip) 20 x 50 mm for counter-lattice under siding, block house, imitation timber, etc.d.;
- plastic or metal corners for reinforcing corners;
- metal cornices for mats;
- primer;
- special fasteners for mineral wool (dowels with a large plastic head);
- glue “CERESIT CT190” for attaching mats to the wall and gluing reinforcing mesh;
Be aware that CERESIT CT180 adhesive is only meant to be used with glass wool. You should only use it at your own risk and peril when adhering basalt wool.
- reinforcing fiberglass mesh;
- self-tapping screws for wood when installing counter-lattice.
You’ll need the following tools and gear:
- scaffolding (needs rental) or trestles (just do it yourself). Working on stepladders or ladders is, firstly, prohibited for safety reasons, and secondly, it is inconvenient;
- hammer drill or electric drill;
- screwdriver;
- mixer attachment for preparing glue;
- wood hacksaw;
- a hacksaw or metal scissors (you can use a grinder);
- knife with removable blades;
- glue container;
- notched spatula;
- hydraulic level or laser level;
- building level;
- plumb line;
- chop cord;
- construction corner;
- roulette;
- hammer.
Preparatory work
The first step in any construction or repair process is preparation. Insulation for facades is no different. The following is the order of events:
- All unnecessary things are removed from the wall: drainage systems, street lights, ebbs, window and door frames, various strips, etc.d.;
- the walls are subjected to a thorough inspection, during which the vertical is checked – a deviation of no more than 1.5 cm is allowed, and cracks, cracks, and drilled holes are also found;
- when the wall is collapsed, it is primed, followed by plastering and reinforcement, cracks and holes in wooden houses are clogged with flax tow, in all others they are covered with special mastics (there are universal ones for a specific type of wall material);
Note: If plaster was used to repair walls or remove vertical elements, additional work cannot be done until the plaster solution has dried, which should take seven to eight days.
- surface of brick, concrete, gas silicate, etc.d. the walls are cleaned of dirt and dust, mortar build-up from masonry joints;
- wooden walls are impregnated with fire retardants and antiseptics;
- the facade is primed with a deep penetration primer twice;
- a vapor barrier film (diffuse membrane) is attached to the walls with a 10-12 cm overlap, with the smooth side facing the insulation. For fixation, you can use the staples of a construction stapler. To ensure high-quality vapor barrier, it is better to glue the seams with ordinary tape;
Be aware that a lot of experts overlook the facade’s vapor barrier beneath the insulating boards. The editorial staff of the website has found that it is challenging to adhere insulating boards to the film using glue, so the answer is currently no rather than yes. The whole weight may fall on the dowels if the membrane is unable to support it.
- at the level of the junction between the wall and the foundation, a metal cornice is installed (builders sometimes call it a “profile”) which will support the mats from sliding down. Fixation is carried out using self-tapping dowels. The connecting joints at the outer corners are cut at an angle of 45 o, after which they are fastened together with 2 plates.
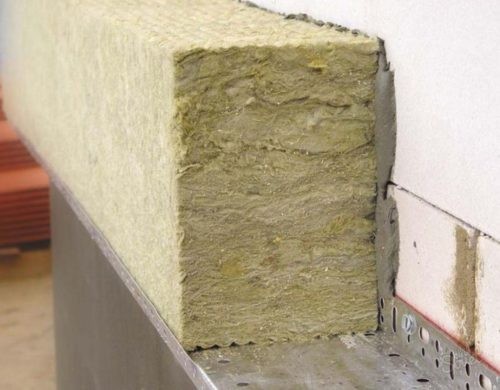
If the foundation is wide, there is no need for a cornice; instead, the slabs are placed directly on the base and covered with roofing felt, which serves as a damper and waterproofing layer.

The fixed film is placed on top of the lathing.
Arrangement of sheathing
For DIY facade insulation installers, sheathing installation is frequently a prerequisite for nailing mineral wool into the wall. However, that is untrue. With the help of glue and dowels, the mats stick to the wall surface flawlessly. Therefore, it is sufficient to reinforce the mats’ surface with fiberglass reinforcing mesh before painting the facade, and then apply a layer of putty on top. Additionally, the grille does not become stuck on frame walls. Insulation is positioned in between the frame posts here.
When using mineral wool to insulate exterior walls for block houses, siding, imitation wood, lining, etc., lathing is required.
We will examine the technology involved in attaching siding to the wall step-by-step using lathing as an example. In order to work, you’ll need:
- wooden beam 40×40 or 50×50 mm. Dry, straight, with a smooth surface, without falling knots, dark spots and mold;
- metal hangers or bars for attaching the sheathing to the wall.
This is the order in which the work is completed.
Step 1: Calculate the distance between the wall surface and the frame’s outer plane. The timber’s thickness is deducted from the final result. We thus obtain the bar’s size for the sheathing. The distance at which the beam should be attached to the wall surface when using direct hangers can be determined through calculations.
Note: There are two ways to attach the sheathing under siding, block houses, imitation timber, and lining: flush, which is the most sensible option in this case, where a counter-lattice is stuffed in, or protruding by roughly 4-5 cm to create a ventilation gap. The counter-lattice is not mounted in that case.
Step 2: Mark the timber attachment lines on the wall with a tape measure, a plumb line, and a marker. Distance measured horizontally: 60 cm, vertically: 40 cm. But theoretically only. Maintaining a size of 390 x 590 mm is more sensible. Surprisingly, mineral wool will squeeze itself into such cells quite tightly. The beam’s layout is depicted in Fig. below.

Step 3: Bars are made ready to match the measured dimensions.
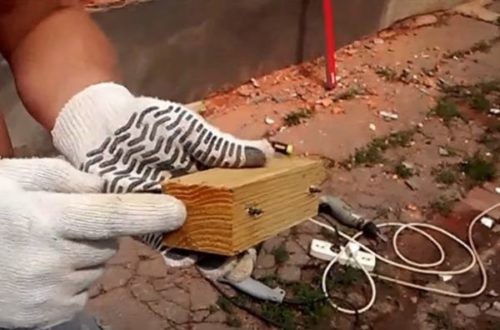
Step 4: Mark the locations of the beam’s attachments at each end and inside the beam in increments of 40–60 cm along its path of passage.
Step 5: A drill or hammer drill is used to drill holes for dowels.

Step 6: The drilled holes are filled with dowels.
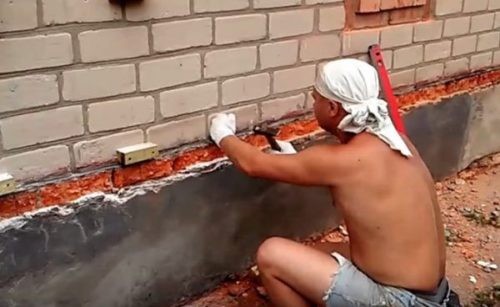
Step 7: The wall is anchored by a block.

Step 8 is packing the sheathing.
While this fastening method is straightforward technologically, it presents challenges for mat installation because you will need to remove some of the insulation beneath the block. If not, glue will not be able to hold the mineral wool to the wall. That’s why, even with the challenges of nailing the wood, seasoned pros favor metal hangers.

Important note: extra wood has been added to cover the window and door openings around the perimeter.
Mineral wool insulation is a cost-effective and practical way to raise the comfort and energy efficiency of your house. The majority of homeowners can complete this do-it-yourself project, which has several advantages like improved soundproofing and temperature regulation. You can successfully insulate your walls, reducing energy costs and generating a cozier living area, by following a few simple steps and using common tools.
Installation of insulation
Several technologies are used to insulate the facade with mineral wool. These are the guidelines for the most popular techniques: decorative plaster, insulation of frame walls, and facades beneath siding.
Insulation of frame walls
The work algorithm for insulation of frame walls is as follows:
- from inside the room, a para-insulating membrane is attached along the frame posts, with the smooth side facing the insulation;

- a block is placed on top of the membrane or a metal profile is screwed on to create a ventilation gap;
- OSB or plasterboard (gypsum plasterboard) is fastened onto a padded block (profile) for finishing;
- mats are mounted between the racks. Here, home craftsmen often do not know how to attach mineral wool to the wall of a frame house. There is no need to be tricky – it is held between the posts due to its rigidity and slightly larger size;
- A windproof film (type A) is fixed on top of the insulation with staples;
It’s crucial to remember that stretching the vapor barrier’s outer layer can cause the film to contract and possibly burst in icy conditions. The space between the posts should be one centimeter.
- the counter-lattice is filled with a block of 5.0×6.0 cm (according to SNiP, the ventilation gap should be 6 cm);
- the walls are sheathed.
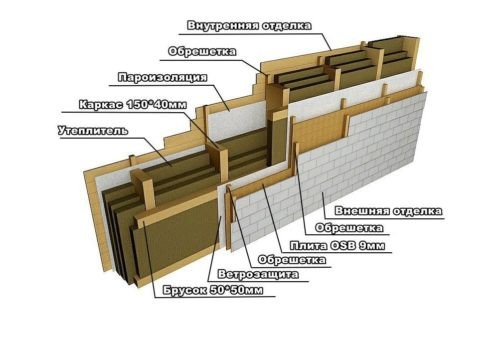
A frame house is frequently double-insulated, particularly in the nation’s colder regions. In this instance, the exterior of the frame is covered with a horizontal timber sheathing. Mats made of basalt wool are positioned in between the beams.
A windproof film is applied to the insulation, and to allow for ventilation, a counter-lattice is positioned on top of it. If natural or artificial stone is to be used to finish the façade, an OSB board measuring 9 mm in thickness is placed over the counter-lattice. The counter-lattice bars are where the siding panels are fastened.
Insulation under siding
In the absence of a horizontal beam, mineral wool slabs are laid beneath the siding as close to one another as feasible. In space, within the cells. Unique components at doorways, window openings, and corners last. A construction knife is used to cut to size.
A windproof film is placed on top of the insulation. It is covered by a counter-lattice with a beam height of 2–6 cm (SNiP violation regarding ventilation gap size does not result in negative consequences). The padded slats are where the cladding panels are fastened.
Insulation of facade under plaster
Rigidly fastening the matting to the wall is necessary before applying ornamental plaster to basalt wool. This modifies the technology of insulation. The following operations make up the process:
- prepare the glue according to the instructions printed on the package;
- The adhesive mass is applied with a notched trowel to the mat over the entire surface, pointwise or along the perimeter and with a point in the center of the slab.
Important: It is a grave error for some writers of construction site literature to suggest gluing the ends of the insulation.
- the mat is pressed against the wall. 1st row is glued. The mats of the second row are attached with an offset of at least 150 mm (like brickwork);
Be aware that no single work can capture all the nuances of the technological process. Thus, we highly advise that all do-it-yourself artisans who insulate facades using mineral wool study the following projects: "Wall insulation with stone wool" and "Wall insulation with foam plastic."
- corner, top and mats adjacent to door and window openings are cut to size with a construction knife;
- in the corner the mats should overlap each other one at a time, in a checkerboard pattern;
- corner joints are reinforced with plastic or metal plaster corner;
- the plates are additionally secured with dowels with a large plastic head at 5 points: 4 in the corners, one in the center. Fastening between seams is allowed. In this case, the dowel fixes two mats at once;

- The insulation surface is reinforced with fiberglass mesh. The glue is the same as that used to attach the plates. The mesh is overlapped, overlapping the previous strip by 20 cm. The top is covered with glue 2-3 mm thick;
- dried glue is primed twice;
- after the primer has completely dried, the facade is finished with decorative plaster.
Important: the same technologies mentioned above are used to insulate a wooden house’s exterior walls with mineral wool.
Thermal insulation technology under siding can be used to insulate the attic.
| Step | Description |
| 1. Measure and Plan | Measure the wall area to determine how much mineral wool you need. Plan the layout of insulation and other materials. |
| 2. Prepare the Wall | Clean the wall surface to ensure proper adhesion of the insulation. Remove any obstacles or debris. |
| 3. Install the Frame | Build a wooden or metal frame on the wall to hold the insulation. Make sure it"s securely fastened. |
| 4. Cut and Place Insulation | Cut mineral wool to fit the spaces in the frame. Place the insulation snugly within the frame without compressing it. |
| 5. Add Vapor Barrier | Install a vapor barrier over the insulation to prevent moisture from getting in. Staple or tape it to the frame. |
| 6. Seal the Gaps | Seal any gaps around the edges and between sheets of insulation with caulk or foam to ensure a tight fit. |
| 7. Install Drywall | Attach drywall over the frame and insulation. Secure it with screws, making sure it"s level and smooth. |
| 8. Finish the Wall | Apply joint compound over screw heads and seams, then sand smooth. Paint or decorate as desired. |
Using mineral wool as wall insulation is a sensible and efficient approach to raise your home’s energy efficiency. You can do this project on your own if you have some simple tools and meticulous planning. You can save money on labor expenses and feel more accomplished by improving the comfort and value of your house when you do it yourself.
Recall the value of preparation at every stage of the procedure. Before you start, make sure your walls are dry and clean, and take your time taking precise measurements. For the insulation to function as best it can and to avoid gaps, proper installation is essential. To keep yourself safe from dust and fibers, especially when handling mineral wool, abide by the safety instructions.
Once installed, the way the temperature is regulated in your house will change. Mineral wool has soundproofing properties in addition to helping to keep your house cool in the summer and warm in the winter. Your home will have more comfortable living quarters all year round and cheaper energy costs as a result of this insulation upgrade.
You’re making a wise long-term investment in your house when you put in the time and effort to use mineral wool as wall insulation. It’s an environmentally friendly decision that lowers your energy usage and carbon footprint. You can benefit from a well-insulated home and attain professional results with the appropriate strategy.


