
Achieving a level and stable floor during building renovations is crucial for long-term comfort and durability. A common technique to accomplish this is using expanded clay in dry floor screed. Expanded clay aggregate, a lightweight and porous material, is used in this technique to create a robust flooring base layer.
Expanded clay is well-known for having superior thermal and acoustic insulation qualities, which makes it perfect for improving a structure’s overall energy efficiency and soundproofing. To create an even surface, the expanded clay must first be spread and leveled throughout the floor area. Expanded clay dry floor screed is easier to install and requires less drying time than traditional wet screeding techniques, which involve pouring and drying concrete.
When compared to traditional concrete screeds, expanded clay’s lightweight nature lessens the overall load on the building structure, making it an excellent choice for dry screeding. When heavy materials could cause structural issues in older or weaker buildings, this weight reduction can be especially helpful. Furthermore, the natural composition of expanded clay helps to improve indoor air quality by inhibiting the growth of mildew and mold.
Moreover, a variety of flooring materials, such as tiles, laminate, and wooden floors, can be used with dry floor screed that contains expanded clay. Due to its thermal characteristics, underfloor heating systems can benefit from it as well, increasing the comfort and effectiveness of a building’s heating solutions. All things considered, selecting expanded clay dry floor screed provides a flexible, effective, and eco-friendly way to achieve a level and sturdy flooring base for building and remodeling projects.
- Advantages and disadvantages of dry expanded clay screed
- What fraction of expanded clay is used for dry screed
- Calculation of expanded clay for dry floor screed
- Step-by-step instructions for installing a dry screed
- Required Tools
- Preparing the subfloor
- Waterproofing the subfloor
- Marking the screed line
- Installation of beacons
- Installation of damper tape
- Expanded clay backfill
- Laying GVLM slabs
- Conclusion
- Video on the topic
- How to make a dry floor screed. Dry bulk floors KNAUF all the pros and cons
- Installation of dry floor screed Knauf
- DIY dry floor screed Knauf ! Installation of screed and floor insulation with expanded clay
- Superfloor in 3 hours (installation of dry screed)
Advantages and disadvantages of dry expanded clay screed
The low cost of materials and quick installation are not the only factors contributing to dry screed’s popularity. Professional builders started using it extensively because of its many benefits.
- Withstands a load of 0.5 t per 1 m2, which allows you to install any type of furniture in the apartment.
- Can be laid on any floor surface: concrete, wood, soil.
- The low weight of the screed allows it to be laid on wooden floors in old houses, which is impossible to do with a screed using cement.
- Serves as a good insulator, which is guaranteed to protect the floor from winter cold.
- This screed is not subject to rotting, corrosion, cracking. The level of sound insulation is superior to cement-sand mixtures, which does not require additional soundproofing work.
- Allows you to hide communications – it is convenient to lay water pipes, telephone and electrical wires in it and, which is currently becoming relevant, elements of heated floors.
- Speed of work completion. Installing a dry expanded clay screed with your own hands, without preparatory work, takes 5-8 hours per room. In this case, no special skills are required to perform the work. Just read the instructions carefully and follow them.
- Possibility of continuing further floor installation work immediately after completion of the screeding process – no time is required for cement to set.
These are the principal benefits, but there are several others that go unnoticed, including:
- absence of dirt during work;
- environmental friendliness of materials;
- expanded clay does not burn, which ensures high fire safety.
Experts mention the following drawbacks:
- The hydrophobicity of expanded clay, as a result of which the pillow made from it is deformed, and the floor, naturally, is destroyed. Therefore, it is not recommended for use in rooms with high humidity, such as the bathroom, toilet, kitchen and corridor next to the bathroom;
Important: Double waterproofing screeds have recently been used to overcome this drawback. They are placed along the floor’s base to keep moisture out from underneath and on top of the flooring sheets to keep water out of the apartment. For instance, apply bitumen to waterproof the top layer of chipboard or plywood.
- Expanded clay screed significantly raises the floor, which steals the volume of the room. In apartments and houses with low ceilings, this disadvantage is clearly manifested;
- High cost of gypsum fiber sheets. However, the quality of the substrate will not suffer if there is a combination of layers of gypsum fiber board, plywood or chipboard, which significantly reduces the cost of materials.
What fraction of expanded clay is used for dry screed
It is necessary to ascertain what expanded clay is required for a dry screed when getting ready for repair work. After all, it comes in various densities and sizes. The percentage of expanded clay that is laid determines the floor’s stability as well as its qualities of sound and heat insulation.
For dry screed, many instructions advise using expanded clay sand, which has granules up to 5 mm thick. This advice, though, is not entirely accurate. The surface actually seems to part and fall through a 3 cm expanded clay backfill when subjected to a light weight (roughly 50 kg). Additionally, a thicker expanded clay layer is required for larger granules.
When building apartments with low ceilings, builders try to use less screed. A 4 mm thick expanded clay sand backfill holds the surface in place and compacts effectively. At this minimum thickness, the floor will not give way or "play." Such a screed does not, however, have good sound or heat insulation qualities. Therefore, the specifications for the size and density of expanded clay are entirely different in single-family homes or apartments built in the past with high ceilings.
In order to achieve a floor screed and insulation at the same time as a layer of sound insulation, a low density mixture of various fractions, such as brand M300, between 0.5 and 20 mm is required.
A denser screed can be produced due to the granules’ varied thicknesses, and a layer with many pores will have a low specific gravity that acts as a good heat and noise barrier.
A greater portion, up to 40 mm, is poured into the base of the screeding machine when it is being applied on the ground, and the top is composed of 0.5–10 mm thick granules. Expanded clay is only needed for two purposes when screeding a floor with joists: noise absorption and insulation (joists handle load-bearing duties). The ideal crushed stone for this task is 20–40 mm thick expanded clay.

In this article, we’ll look at a practical and affordable way to achieve strong, well-insulated floors in building and remodeling projects: dry floor screed with expanded clay. This lightweight aggregate lowers the overall weight load on structures while simultaneously offering superior thermal and acoustic insulation. We go over its advantages, how to install it, and helpful hints for a seamless, long-lasting finish. It’s a great option for contemporary building methods that prioritize sustainability and energy efficiency. Does this fulfill your search criteria?
Calculation of expanded clay for dry floor screed
The purchasing of materials is the next step in getting ready to install floors. Accurately estimating the amount of expanded clay is impossible. Its density and size are the cause. We sell expanded clay in 20 kg bags. The volume of the bag can vary from 0.033 m3 to 0.057 m3 based on the size of the granules and the brand (the expanded clay’s brand indicates its density). You can see that there is a noticeable difference. As a result, the expanded clay calculation is done as follows:
- determine the area of the room;
- multiply by the height of the screed to find the volume of the required material;
- calculate the number of bags of expanded clay based on the average indicators of their volume:
- fine expanded clay (up to 5 mm) – 0.033 m 3 ;
- fraction 5-10 mm – 0.044 m 3;
- expanded clay gravel 10-20 mm in size – 0.05 m 3;
- crushed stone (20-40 mm) – 0.057 m 3 .
Expanded clay is inexpensive, so it’s always a good idea to be safe and purchase a few extra bags.
Step-by-step instructions for installing a dry screed
You will need tools in addition to materials (gypsum plasterboard sheets, expanded clay, damper tape, PVA glue, and 3.5×25 self-tapping screws) to complete floor screed work.
Required Tools
Dry screed with expanded clay necessitates a number of preparatory steps, including floor base preparation, beacon installation, and the placement of load-bearing material—such as plywood, chipboard, or gypsum fiber board—on top of the expanded clay. You must first get ready the following equipment in order to do this:
- aluminum rules: one 2 m long, the second – 1 m, since wooden ones do not guarantee the quality of work;
- perforator;
- level;
- hydraulic level (laser level);
- roulette;
- construction cord;
- fishing line;
- U-shaped guide profiles for beacons (they must be removed, since the expanded clay will sag by about 2 mm, and the profiles are rigidly fixed, which will lead to destruction of the floor over time);
- screwdriver;
- screwdriver;
- jigsaw;
- construction knife;
- pencil;
- construction stapler;
- plane;
- bucket;
- shovel.
The following technological steps are involved in installing a floor using expanded clay screed:
- preparation of the base;
- waterproofing the screed from below;
- marking screed lines and rows of beacons;
- installation of beacons;
- installation of damper tape;
- expanded clay backfill;
- plywood, chipboard or gypsum board flooring;
- waterproofing from above (work is performed in rooms with high humidity).
Preparing the subfloor
Backfilling expanded clay onto spotless concrete with patched cracks is recommended. If repair work is being done, the concrete base is cleaned of leftover screed using a hammer drill. The ceiling is cleaned to remove debris before new construction begins. Small fissures are covered with sealant. They expand and are poured with cement laitance multiple times in order for the repair mortar to set with concrete. Large fissures are mortared shut and reinforced.
Important: the concrete base is fully primed using a semi-dry and wet screed. The work mentioned above is not necessary when using dry screed.
Black wooden floors also need to be arranged before screeding. Boards that have rotted or sagged are removed, and holes and cracks caused by fallen knots are filled in using parquet putty or a unique mixture of sawdust and oil paint.
The turf layer is taken off of the leveled soil base. Sand is applied to the surface first, followed by expanded clay. Water is added to the layer cake, and it is then compressed. The document titled "Preparing the base for floor screed," which is available for viewing here, provides a thorough explanation of the work.
Waterproofing the subfloor
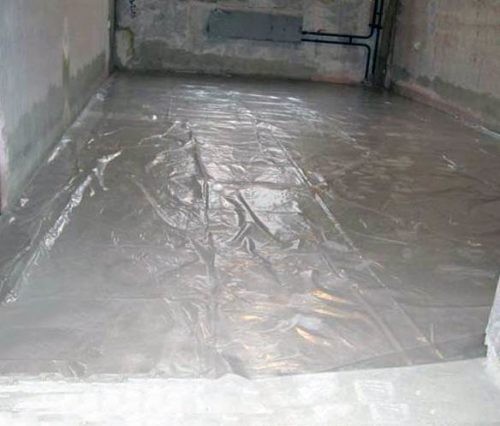
The base of the floor is covered with polyethylene film, with an overlap of 10–15 cm and a film thickness of 100 microns or more, or another waterproofing material, to keep moisture from penetrating the expanded clay from below (see details about waterproofing work here). Tape is used to glue the seams together. The film extends 20–25 cm up the walls to create a bathtub-like structure that shields the expanded clay from moisture.
Marking the screed line
Marking the zero horizon, determining the screed’s level, and figuring out how many beacon rows to place along the floor’s base are the next tasks in the project. Marking the zero level (horizon level) is the first step in the work. To accomplish this, mark a spot at a height of roughly 1.5 meters above the ground.
A horizon line is drawn around the room’s perimeter using a hydraulic level. We determine the smallest number by using a tape measure to measure the distance between the floor and the zero line. The floor’s highest point is found at the location where the shortest segment was measured. Cut this section short by at least 4 cm (or 3 cm for other kinds of screed) and remove the screed line.
In the event that you intend to use a dry screed as an insulator of heat and sound, the screed line will rise by 6–10 cm.
It would appear that a zero line is not necessary in these situations. The floor errors are covered by the screed’s height. It is preferable to execute and take measurements, though. It will take some time, but once it does, you will be able to see that there is no slope—up to 10 cm. Determining such deviations visually is extremely challenging.
Finding and marking the number of linear beacons is the next task on the list. In order to do this, beacons in the two outermost rows, close to opposing walls, are marked. Their recommended distance from the wall is 10–20 cm. They are measured apart in distance. The rule should specify the maximum permissible distance between beacons within the room; that is, the rule should slide continuously along the linear beacons when aligning the screed. Here is the technology needed to complete these works.
Installation of beacons
Beacon installation is the penultimate stage of preparation. In this case, two conditions must be strictly met:
- do not use beacons on self-tapping screws, as the waterproofing will be damaged;
- linear beacons must be removed, and their traces must be covered with a fine fraction of expanded clay.
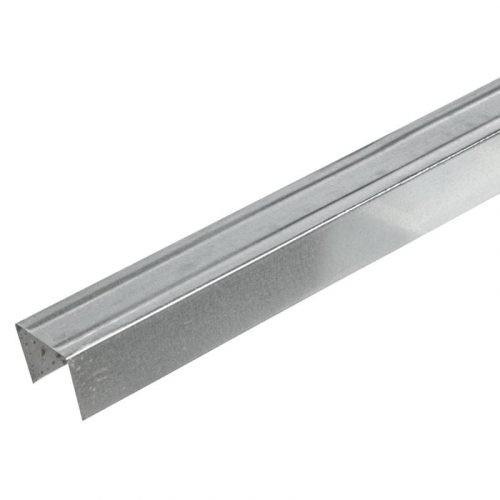
It is best to use linear aluminum beacons with a U-shaped profile to fulfill these requirements. They can be put in on cement piles as well as on hard surfaces like ceramic tiles, plastic, wood, and other materials.
They are laid with the edges down, which makes it simple to fix their mark if you decide to remove them, which is preferable. When the slats are installed with their sides facing upwards, taking them down will seriously damage the screed layer, which is hard to replace. These beacons are therefore left in the screed. The cost of the work will significantly increase if you have to lay three layers of gypsum fiber board to stop this effect from showing up when the floor is being operated.
"How to set beacons for floor screed?" provides step-by-step instructions for installing beacons.
Installation of damper tape
Putting damper tape around the whole room finishes the process of preparing the floor’s base for the screed. Using double-sided adhesive tape or a construction stapler, it is fastened to the wall. positioned at flooring level and 1 centimeter below the screed line. Many people think that this stage of work is not required for dry screeds, but rather is only required for semi-dry or wet screeds to compensate for their expansion caused by variations in temperature and humidity.
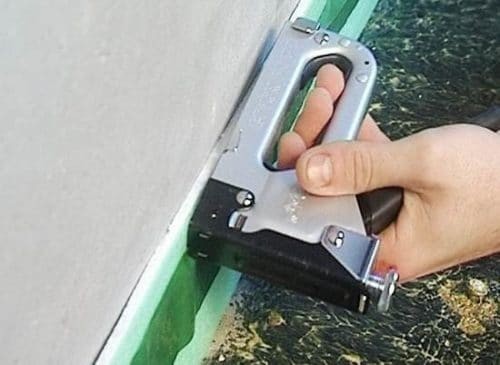
After two or three weeks, the flooring starts to creak against the wall, exposing the falsehood of this strategy.
Expanded clay backfill
Partially pouring expanded clay for the dry floor screed from the far corner. Larger granules are poured first if using different fractions in layers is the plan. In the event that expanded clay of different thicknesses is present, it is thoroughly mixed prior to backfilling in order to attain the highest possible layer density.

One row at a time, the backfill is done so that the work is finished when the person leaves the room.
Important: A vibrating plate must be used to compact any expanded clay layer that is thicker than 7 cm. The boards may, however, drift away from the joists in a wooden floor base, upsetting the entire structure. As a result, only soil and concrete floors are appropriate for this compaction technique.
This is a crucial point to remember: flooring made of gypsum fiber sheets can be installed between the beacon rows or after the entire screed has been completed. I filled it in, then spread out the flooring sheets, filling in another one as I went. The most important thing is to remember to take down the beacons.
Laying GVLM slabs
If there are footprints on the screed’s surface, how can flooring be made? Here, you have two options: either place gypsum fiber boards (such as plywood or chipboard) on the screed as you fill it, or place entire sheets of gypsum fiber board on the screed’s surface so that people can walk on them. These bridges are moved to a new location during the flooring installation.
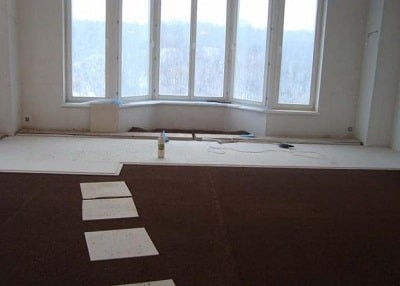
Note: A lot of instructions suggest slicing squares of gypsum fiber and using them as walking sticks. This is illogical because, when they are thrown away, money from the family budget will also need to be thrown away.
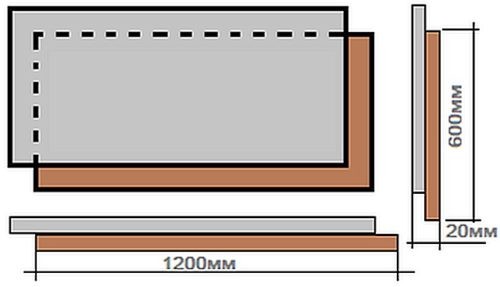
Starting from the far corner, the flooring is also being laid. Cut the connecting edge off a slab of gypsum board from the side of the sheet that is next to the wall with a planer or a construction knife. Using your hands, press the sheet firmly against the expanded clay once it has been placed on the surface. The connecting edges (locks) need to be covered with glue before the next sheet is laid (regular PVA holds well).

The first layer is covered by the second layer. Here, it’s crucial to make sure that the second layer’s seams move apart from the first by at least 20 centimeters.
Using a screwdriver and self-tapping screws, the layers are secured in 20–25 cm horizontal and vertical increments. screwed until the plasterboard’s heads are fully sunk (GVL). It is recommended to utilize 3.3×19 self-tapping screws.
It’s important to remember not to mark the front door’s seams when marking where the flooring sheets will go.
Putty is used to seal the second layer’s connecting seams.
For those who are using GVL for the first time, take note. A pencil cutting line is drawn on one side of the sheet to give it the desired size. Using a construction knife, make an incision along it that is about half the thickness of the sheet. Next, the protective film on the other side is carefully cut after the GVL is placed on the edge and snaps with a sharp movement.
As soon as the flooring is laid, you can start the installation process.
Note: In the event that waterproofing is required over the screed, it is applied, allowed to dry, and only then is the floor laid.
Conclusion
We can create a strong foundation for installing any kind of flooring, including laminate, linoleum, ceramic floor tiles, parquet boards, and more, by using expanded clay and GVL boards for dry screed.
You finish the task entirely by hand and swiftly at the same time. It’s crucial to adhere to the following order:
- prepare the base;
- waterproof the screed from below;
- set up beacons;
- fill in expanded clay;
- remove the beacons and lay two layers of gypsum fiber board, plywood or chipboard;
- do not forget to lay plastic film over the completed screed to prevent moisture from entering the expanded clay from above.
Expanded clay in dry floor screed provides a flexible way to improve structural stability and insulation in both residential and commercial buildings. Using expanded clay aggregates and cement, this technique produces a floor base that is both sturdy and lightweight.
Excellent thermal insulation is one of the main benefits of using expanded clay in floor screed. Expanded clay’s porous structure traps air, which lowers heat loss and increases a building’s energy efficiency. Because of this, it works especially well with underfloor heating systems, which help to distribute heat throughout the room fairly evenly.
In addition to its thermal advantages, expanded clay dry screed is well-known for its ability to insulate sound. Noise transmission between floors is reduced by the composition’s absorption of sound waves. In places like offices, hotels, and apartments where soundproofing is crucial for privacy and comfort, this feature is extremely helpful.
In addition, compared to conventional screed materials, expanded clay is easier to handle during construction due to its lightweight nature. This makes it a cost-effective option for contractors and builders as it can result in quicker installation times and lower labor expenses.
To sum up, expanding clay combined with dry floor screed is a workable and efficient way to improve insulation, acoustic performance, and overall structural efficiency in modern construction projects. It is a flexible choice for both new construction and renovations due to its combination of thermal advantages, soundproofing qualities, and simplicity of installation.


