
Sandwich panel slopes provide structural and insulation advantages, making them a useful and affordable solution for a range of building projects. Sandwich panels are made up of a core material that provides thermal insulation—typically foam or polyurethane—enclosed by two outer metal sheets. Because these panels are strong and lightweight, they are perfect for building walls or roofs with sloping terrain.
Precise planning and execution are essential when installing slopes made of sandwich panels. In order to create a continuous surface that efficiently sheds water while preserving structural integrity, panels are joined together. When the panels are docked correctly, there are no gaps that could potentially affect the weatherproofing and insulation.
Make sure you have the required supplies and equipment, such as sandwich panels, fasteners, sealants, and cutting tools, before starting the installation. Measure and mark the panels first in accordance with your slope design. To get a smooth, polished finish, cutting and aligning panels precisely is crucial.
The process of docking, or connecting panels together, is a crucial step in constructing slopes using sandwich panels. To prevent gaps and guarantee a snug fit, this process calls for meticulous attention to detail. You may use tongue-and-groove joints or overlapping edges sealed with the proper adhesives or sealants, depending on the design of the panel.
Prioritize safety during installation by donning the proper personal protective equipment (PPE) and handling and cutting sandwich panels in accordance with manufacturer instructions. To minimize debris and achieve clean edges, these panels can be cut to size using specialized tools like circular saws with fine-tooth blades.
After the panels are docked and fastened, think about taking extra precautions against weathering, like sealing the edges and joints. This procedure improves the slope’s overall durability and helps stop water intrusion. Your sandwich panel slopes will last longer if you perform routine maintenance, such as inspections and, if needed, resealing.
- What it is?
- Specifications
- Advantages and disadvantages
- How to do?
- Material properties
- Preparation of materials
- Selecting Tools
- How to finish?
- How to install window structures?
- Foam mounting
- How to attach to wooden slats?
- Useful tips
- Video on the topic
- Slopes on PVC windows made of sandwich panels! How to do? With your own hands!
- Installation of slopes from a sandwich panel
- SANDWICH PANELS without starting profile and corners
- Do-it-yourself installation of slopes from sandwich panels #HouseGarden
- How to install a slope from sandwich panels with your own hands? A very simple way.
- How to mount a slope from a sandwich panel…
- How to make a slope from plastic for a beginner without experience
What it is?
Sandwich panels are slabs of polystyrene foam that have been extruded and have either one or both sides covered in PVC sheets. Standard expanded polystyrene has a thickness of 9 mm, while finish thicknesses range from 1 to 1.5 mm. Overall measurements: 150 by 300 cm.
The panel’s internal insulation may differ:
- polyurethane foam;
- extruded polystyrene;
- free foam plastic.
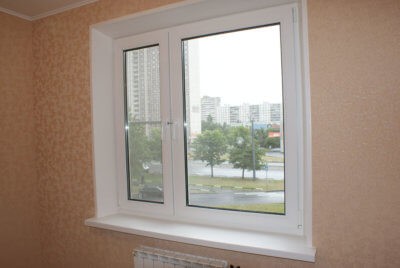
Options for external coatings also differ. It is able to be composed of:
- Rigid PVC (installation of PVC slopes is discussed here). Has increased density (1.4g/m³). The sheet is always white, but depending on the coating it can be matte or glossy.
- Foamed PVC. Applicable to the inside of the panel. Has a low density (0.6 g/m³), insulates well.
- Laminated plastic. Consists of several layers of plastic and decorative kraft paper, which are compressed and impregnated with resins.
Sandwich panels come in various layers, with the following types:
- Unilateral. One side is rough, the other, with greater thickness, is front.
- Double sided. Both sides are obverse.
Sandwich panel systems that are pre-made and suited for window slopes are available. Together with the material, their kit also comes with the required fasteners.
Specifications
The technical features of sandwich panels for finishing window slopes are as follows:
- service life – up to 30 years;
- permissible temperature range – from -50 to +50 degrees;
- noise insulation – up to 21 dB;
- average density – 30-35 kg/m³;
- compressive strength – up to 0.25 MPa;
- thermal conductivity index – 0.029 W/(m*K);
- flammability class – G1 (low flammability).
Advantages and disadvantages
The primary benefits of sandwich panels are:

- no need for additional processing and decoration;
- immunity to moisture (condensation), absence of wetting and subsequent destruction;
- high thermal insulation properties;
- ease of care;
- easy installation;
- long service life.
Additionally, sandwich panel slopes have the following drawbacks:
- Appearance of yellowness with prolonged exposure to sunlight. This happens with low quality products.
- High requirements for compliance with installation technology. Their service life and performance characteristics directly depend on this.
We’ll take you through the easy steps to properly create and install slopes using these adaptable panels in our tutorial on "How to Make Slopes from Sandwich Panels." We’ll go over important docking panel tips that will guarantee a secure fit and efficient insulation. Whether you’re remodeling a shed, garage, or house, this article gives you useful advice on how to get professional-looking results using simple tools and a do-it-yourself attitude.
How to do?
Prior to beginning the installation of sandwich panels as window slopes, the preparatory stage must be completed. This includes cutting the parts, choosing the appropriate tools, and learning about the fundamental characteristics of the material.
Material properties
The following attributes describe this finishing material:
- high thermal insulation;
- long service life;
- protection from sounds and noise from the street;
- easy installation and maintenance;
- affordable price;
- resistance to moisture, as well as the formation of fungus and mold;
- light weight.
The panels come in a variety of hues and textures, including glossy and matte.
You should confirm the material’s quality and the manufacturer’s credibility before making a purchase. Low-quality plastic sandwich panels will quickly become yellow or deform.
Parts must be handled with extreme caution because they are brittle and prone to breaking. This typically occurs during the marking and cutting phase. Transportation is another challenge brought on by the panels’ fragility and size. For this reason, a few hardware stores offer to cut items into the necessary sizes.
Installing sandwich panels is not possible if there is an obvious gap between the wall and the window hinge.
Preparation of materials

Element calculation, marking, and cutting are all part of the preparation phase. Order:
- Measuring the height and width of the window opening using a tape measure.
- Part marking. Their width should exceed the primary measurements by 10 mm, this way close contact with the frame is achieved.
- Manufacturing of blanks according to the received dimensions. A well-sharpened knife is used for slicing. In total, you will need to cut three elements: one top and two side.
- Adjusting the installation location and the panels themselves. In the foam, around the window frame, cut a hole 100 mm deep and 1 mm wide. From the inner edge of the part, cut off the plastic on the back side and the insulating layer. Width of cut edge – 10 mm. When installing, it is necessary to connect this cut and the recess around the frame.
Selecting Tools
You will require the following equipment, supplies, and fasteners for the task:
- starting profile;
- F-profile (cover);
- roulette;
- sharp knife or jigsaw;
- self-tapping screws;
- sealant;
- screwdriver or screwdriver;
- construction stapler and staples;
- polyurethane foam;
- wooden blocks 20×40 mm.
How to finish?
It is preferable to begin manually installing slopes the day after the windows are installed. The polyurethane foam will fully dry and set during this period. You must first finish the prep work and cut out the pieces to the proper size.
Stages of installation:
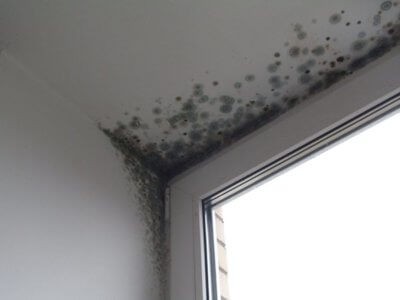
- Removing old plaster, treating slopes with a fungus and mold remover.
- Marking horizontal and vertical lines.
- Installation of the starting profile. Measure the inner perimeter of the opening and cut a piece of the required length from the U-shaped profile. Secure along the frame using self-tapping screws, fastening step – 20 cm. Profile installation must be done from top to bottom.
- Installation of panels according to the chosen method – on wooden slats or polyurethane foam.
- Installing the cover (F-profile). Its length is equal to the outer perimeter of the window. At the points of contact of the top and side strips (corners), their ends must be cut at an angle of 45°.
- Applying sealant to all joints. Removing excess material.
Sandwich panel slopes can be installed and joined with wallpaper pasted because there’s no risk of destroying or discoloring them.
How to install window structures?
Plastic slopes can be installed in three different ways:
- On the foam. This is the simplest and most accessible option for a beginner.
- For liquid nails. This method requires an initially flat slope surface, which is quite rare.
- On wooden blocks. Suitable for slopes requiring restoration and additional strengthening.
Foam mounting
This method works only with double-sided panels that have more rigidity. Installation phases on foam:
- Measuring and preparing parts.
- Setting up a starting profile.
- Installing the top element into the groove of the starting profile.
- Applying foam between the wall and the top element.
- Installing side parts, foaming gaps.
- Trimming excess foam after it has completely hardened.
- Installation of F-shaped profile, application of sealant.
How to attach to wooden slats?

You need to finish the following steps in order to finish this installation method:
- Measurement and production of parts.
- Setting up a starting profile.
- Installation of wooden slats along the outer edge of the window opening; a building level is used for leveling. As a result, a complete contour of wooden slats is obtained.
- Filling the space between the profile and slats with mineral wool or polyurethane foam.
- Installing panels into the grooves of the starting profile. Fastening them with a construction stapler.
- Cover installation.
Slopes can be installed with glue and no initial profile. In this instance, sealant treatment of the inner corner is required.
Useful tips
When creating slopes out of sandwich panels, you need to follow these guidelines:
- For hot climates, it is better to choose a material with a renolit coating. This film will protect slopes from high temperatures and deformation.
- When working, it is important to take into account the coefficient of linear expansion.
- To prevent cracking of the top layer of panels when cutting, it is worth using a circular saw with small tooth pitches.
- Do not cut parts at low room temperatures (below +5). Such conditions lead to brittleness and cracking of the material.
- When choosing a starting profile, you must take into account the recommendations of the panel manufacturer.
- Before installation, wooden slats must be dried and treated with antiseptic impregnation.
- The sealant for seams should completely coincide in shade with the color of the panels. After drying, the difference in shades will be evident.
Sandwich panels are a straightforward way to finish window slopes when installing new windows. High performance, simplicity of installation, and ease of maintenance define this material.
You can read more about MDF panels, laminate, wood, siding, and metal slopes on our website.
| Step | Description |
| 1. Measure and Cut | Measure the window or door opening and cut the sandwich panels to the correct size. |
| 2. Prepare the Surface | Clean and smooth the surface where the panels will be installed. |
| 3. Install the Panels | Place the sandwich panels into the opening, ensuring a snug fit. |
| 4. Secure the Panels | Fix the panels in place using screws or adhesive. |
| 5. Seal the Edges | Use sealant to ensure no gaps are left around the edges. |
| 6. Finish | Apply any finishing touches, like trim or paint, to complete the installation. |
For many renovation projects, building slopes out of sandwich panels is a practical and economical solution. These lightweight panels are well-known for their ability to insulate and provide an effective method of creating slanted surfaces on walls or roofs. It is essential to comprehend the docking and installation procedure before beginning this do-it-yourself project.
First, a level, a measuring tape, sandwich panel-specific screws, and a drill bit set are needed. Before starting the installation, lay out the panels on a spotless, level surface and make sure they are aligned correctly.
Use a methodical approach when docking the panels. First, firmly fasten the first panel to the base structure, making sure it is level and positioned in accordance with your measurements. Drill in the suggested screws, being careful not to overtighten as this could cause damage to the panels. To maintain structural integrity and weather resistance, repeat this process for each additional panel, making sure they all overlap each other correctly.
Make sure to properly seal joints and edges during installation. This is an essential step in keeping insulation effective and preventing water intrusion. Use the proper sealing materials, such as specialty tapes or sealants, in accordance with the design and manufacturer’s recommendations. Apply a liberal amount of these materials to the edges where the panels interface with walls or pre-existing roofing, as well as the joints where the panels meet.
Finally, make sure everything is safe and weatherproof by performing a thorough inspection after the installation is finished. Inspect the slope for any loose screws or gaps that could jeopardize its structural integrity. Deal with any problems as soon as possible to prevent more ones. You can successfully create slopes from sandwich panels by carefully following these steps, which will improve the construction or renovation project’s functionality as well as its visual appeal.


