
The key to rocking the craquelure look is to appreciate the beauty of flaws. This unusual decorative method purposefully causes surface cracks to give the appearance of age and wear. It’s a well-liked option for people who want to give their interiors a hint of vintage charm while still maintaining a feeling of timelessness and character.
Adding craquelure to your interior design can be a fun way to breathe new life into outdated accent pieces, walls, and furniture. Nevertheless, achieving this effect calls for some expertise and the appropriate supplies. In order to achieve the ideal craquelure finish, decorative plaster is essential. With it, you can enhance and repair surfaces that have beautiful, intricate cracks.
It is crucial that you comprehend the fundamentals of working with decorative plaster before beginning your craquelure project. Every stage is essential to the result, from surface preparation to plaster application and crack effect creation. Whatever your level of experience with home improvement, learning these skills can turn your living area into a masterpiece.
We’ll walk you through the process of using decorative plaster in the craquelure style to repair cracks in this article. You’ll discover useful hints and techniques to pull off the desired style and make sure your house has a distinct, vintage charm. Prepare to explore the world of craquelure and learn how to showcase those exquisite, artistic fissures in your interior decor.
- What is the "Krakelyur" style?
- The main causes of defects
- Violation of fundamental rules
- Moisture ingress
- Bad solution
- How to protect against defects?
- How to seal it yourself?
- Video on the topic
- Cracelure – decorative plaster to create the effect of cracks
- Decorative plaster two-layer Craquelure
- How to do decorative painting with cracks
What is the "Krakelyur" style?
The cracking effect on walls can be produced by creating artificial defects. But if everything is done correctly, it will appear fairly intriguing and inconspicuous. It is crucial to pay attention to the layer application method and distribution. In order to understand craquel, one must not only reconstruct surface cracks but also adhere to the solution application technique. Obtain a lovely pattern that will never be used again.
They purchase special plaster, paint, or varnish in order to recreate an intriguing drawing. A special solution is available for purchase at a store called Krakelyur. The list of steps required to achieve the desired effect is indicated in the instructions.
The product is manufactured under multiple brands, with minor variations between them. The methods used to apply these variations and the sequence in which they are done are unaffected. Initially, the walls were given the craquelure effect to give the room an artificially aged appearance. This method makes the space seem cozier and gives the impression that it has a long history.
At first look, producing the illusion of cracks doesn’t require any particular expertise because decorative plaster naturally fractures gracefully in the presence of high temperatures.
Improper proportions and tools, or poor application technique, can result in entirely different visions and interpretations.
Modern interiors benefit from the antique elegance of the craquelure style, which is characterized by a charming network of fine cracks. In addition to maintaining this distinctive look, decorative plaster repairs improve the room’s overall character. This post will walk you through easy, low-maintenance ways to preserve and bring back the elegance of craquelure, so your decor will always look chic and classic.
The main causes of defects
Violation of fundamental rules
There are uncontrollable reasons why cracks can occur. The most typical is when a residential building moves. Strong stress causes the plaster to burst when the building shrinks. This is applicable to newly plastered walls in newly constructed homes.

The primary reasons why plaster cracks are:
- Failure to comply with application technology when applying a plaster layer. At unfavorable ambient temperatures or high humidity, moisture accumulates in the pores of the dried mixture. They cause the wall to swell and cause further damage.
- Failure to comply with deadlines and gradual finishing work. The process should be completed in one day, the work should be completed as quickly as possible. The longer the plaster is applied, the faster it dries. Because of this, the layer dries quickly in one area, and twice as long in another. Differences in the condition of the coating can cause dissonance, which may result in cracking.
- Moisture ingress during drying of the plaster layer. Depending on the drying time, a constant temperature in the room must be maintained; sudden changes are harmful to the coating.
- Exposure to bright ultraviolet rays during the first day of drying. You should try to protect the treated surface from sunlight, which can disrupt the drying process and lead to the formation of an uneven layer.
Moisture ingress
Exposure to moisture is the most frequent cause of cracks developing on a plastered surface. Water has a variety of effects on surfaces.
The following factors may cause an abundance of moisture to appear:
- A lot of water was added while preparing the solution. This happens when the technology for mixing ingredients is not followed. It is necessary to follow the instructions, which indicate the proportional ratio of liquid to the components of the dry mixture. Both a lack and an excess of water can negatively affect the result of the work, leading to tragic consequences in the form of cracking of the plaster.
- Wet base. During priming of the starting coating, the surface could not dry completely.
Bad solution
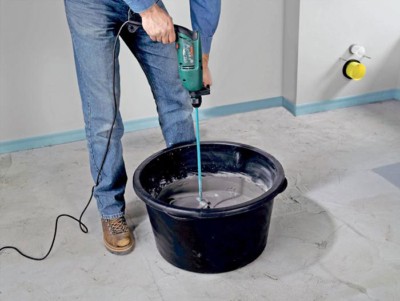
There are fundamental rule violations during the solution preparation process. This happens most frequently when you dilute the mixture yourself. Poor adhesion of the top layer to the base may result from the intake of a disproportionate amount of dry matter relative to water. This causes the finishing layer to crack and causes the usual issues with uniform drying.
A poor solution is rarely found on store shelves. This batch may be write-off due to defects if the manufacturer violates the mixture’s production technology. However, incorrect storage techniques frequently result in low-quality final formulations.
If the plaster composition is not followed, the solution’s quality deteriorates. This could lead to the finished wall surface developing cracks. Inadequate storage of the composition also occurs occasionally. For instance, in an extremely humid space or in the sun’s intense heat.
Any deviation from the recommended mixing method or storage of the completed mixture could lead to issues with the proper dispersion of the composition on the surface, as well as additional poor adhesion and cracking.
How to protect against defects?
In order to prevent plaster cracks, you should heed the following advice:
- Before applying the mixture to a too dry base, you need to moisten it a little with a spray bottle. It is necessary that the moisture is evenly distributed over the surface.
- When applying plaster in the room, you must maintain a constant temperature regime. Plastering cannot be carried out at temperatures above +24 degrees.
- When applying the mixture, you need to ensure that the wall is not exposed to sunlight.
- Eliminate drafts. During work and 24 hours after its completion, windows and doors must not be opened. The room must remain at the same temperature.
- When applying a thick layer of plaster (more than 2 cm), beacons must be installed. They need to be placed on every square meter of the wall so that the applied solution can easily stick to them and not slip off.
- If you plan to apply a second layer on top of the first layer, then you need to wait until the base layer dries completely.
If a gypsum mixture is used, the layer should be at least 1.5 cm on the surface; if cement is used, the layer should be at least 2 cm.
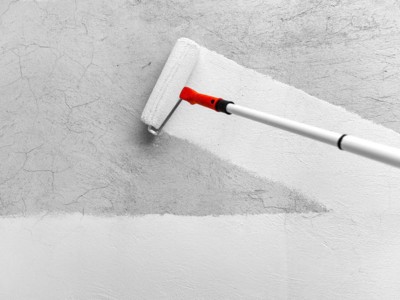
Additionally crucial are the kind and caliber of the plaster mixture chosen for the base. Before finishing, a deep penetration primer is applied. In facing work, reinforcement is a crucial step. Follow the directions exactly when mixing the solution to avoid unintended consequences like unfixed cracks and the reemergence of finishing layer defects.
When applying a multi-layer coating, it is important to pay attention to the drying time of each layer before applying the next. When the mixture is drying, outside influences shouldn’t be permitted to have an impact. It’s critical to shield the surface from wind and direct sunlight.
How to seal it yourself?
Try to locate a mixture whose brand was previously used in the work if cracks start to show. It is necessary for the room to be at least 5 degrees Celsius and not more than 80% humid when fixing flaws.
Cement plaster that has cracked is thoroughly cleaned, and any peeling materials are removed and disposed of. Get a solution ready that is comparable to the last one. The crack is moistened and covered with fresh solution prior to application. After covering the set mixture with reinforced paper, wait for the solution to solidify and settle into the old plaster, ensuring a perfect fit.
Place the tape, begin sanding, and finish after a day or two.
It’s helpful to be aware of and take into account the following:
- If there are gaps more than 5 mm wide, then before filling the defect with a solution, the space is first filled with assembly adhesive.
- Reinforced mesh is placed over large cracks to securely fix them. In this case, the solution is prevented from leaking and a thorough sealing is performed.
- To work with a crack that has appeared in concrete, add PVA glue. First, as with conventional sealing of cracks in plaster, the internal cavity is lubricated, and then it is filled with a cement mixture.
When working, you must possess:
- perforator;
- paint brush;
- putty knife;
- grout;
- hammer.
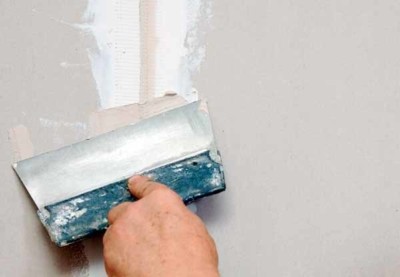
- You need to fill all the voids with a pre-prepared composition so that there is no air left in the gaps. For this purpose, the crack is evenly deepened with a perforator. The depth becomes uniform, the composition penetrates well into it.
- After checking the condition of the old plaster, the surface is thoroughly cleaned of dust and primed. When a large fracture has formed, a reinforcing mesh can be laid. You can embroider it with dowel nails. They will firmly fix the mesh to the wall and will not allow the applied layer of plaster to move.
- After mixing the required amount of the composition, fill the crack to the edges (dried excess can be removed with a spatula). After complete hardening, another layer of primer is applied and the surface is finished leveled. Then they move on to the final decoration.
| Steps | Details |
| 1. Clean the Surface | Remove dust and loose particles from the cracked area. |
| 2. Apply Primer | Use a primer to ensure better adhesion of the plaster. |
| 3. Prepare Plaster Mix | Follow the instructions to mix the decorative plaster. |
| 4. Apply Plaster | Spread the plaster over the cracks using a trowel. |
| 5. Create Craquelure Effect | Use a special tool or technique to create the crackle effect. |
| 6. Let it Dry | Allow the plaster to dry completely. |
| 7. Apply Sealant | Finish with a sealant to protect the surface. |
Adopting the craquelure style for your interior design can give your area a special charm and personality. Common cracks can be transformed into lovely, artistic features that improve the overall aesthetic by applying decorative plaster.
Applying and preparing decorative plaster requires careful thought when fixing cracks. Make sure the surface is clean and clear of any loose debris first. Next, apply a plaster base coat and then a crackle medium. Add a final layer to the top that highlights the crackle effect.
In addition to filling in the cracks, decorative plaster adds visual interest to the texture. With this technique, you can transform flaws into gorgeous design elements that give your house a unique appearance.
The craquelure style can be modified to fit a variety of tastes, whether you’re going for a more modern, artistic vibe or a rustic, vintage feel. You can create a distinctive, classic, and lovely interior with a little perseverance and imagination.


