
For smooth, seamless walls, sealing drywall joints is an essential step in any building or remodeling project. In addition to improving a room’s aesthetic appeal, properly sealed joints guard against gaps and cracks that could cause more issues down the road. Whether you’re working on a brand-new installation or fixing damaged drywall, professional outcomes require meticulous execution of a methodical process.
Start by thoroughly cleaning the drywall joints. This is using sandpaper or a utility knife to clear the joints of any dust, debris, or loose material. To guarantee that the joint compound adheres well and forms a strong bond, cleanliness is essential. After cleaning, use a putty knife to cover the joints with a thin layer of joint compound. The objective is to evenly fill the joints without using too much compound, which could necessitate a lot of sanding down later.
Then insert the drywall tape into the compound for the wet joints. Make sure the tape is flat along the joint by carefully pressing it into the compound with a putty knife. By strengthening the joint, the tape stops further cracking. In order to guarantee a smooth surface, smooth out any creases or bubbles in the tape. Before continuing, let the first layer of compound completely dry.
Apply a second layer of joint compound over the taped joints once the first layer has dried. To make the compound blend seamlessly with the surrounding drywall, extend it past the edges of the first layer. For this layer, feather the edges with a wider putty knife to create a smooth transition. Until the joints are smooth and flush with the wall, repeat this process, applying thin layers and letting each dry fully.
For a smooth finish, use fine-grit sandpaper to lightly sand the joints after the last layer has dried. Take care not to sand too much as this could reveal the tape or leave uneven areas. Use a sponge or moist cloth to remove any remaining dust. Examine the joints for flaws and use more joint compound to correct them as necessary. After the joints are smooth to your satisfaction, prime and paint them to finish the wall surface.
| Step | Instructions |
| 1 | Prepare the joint by cleaning off any dust and debris. |
| 2 | Apply a thin layer of joint compound along the seam. |
| 3 | Place drywall tape over the joint and press it into the compound. |
| 4 | Apply another layer of joint compound over the tape, smoothing it out evenly. |
| 5 | Let the compound dry completely. |
| 6 | Sand the dried compound to a smooth finish. |
| 7 | Apply a final layer of joint compound, feathering the edges. |
| 8 | Once dry, sand again for a seamless finish. |
| 9 | Prime the area before painting. |
- What are seams?
- Where are they located??
- Do they need to be sealed??
- Materials
- Tools
- Important rules and points
- Step-by-step instructions: how to seal gaps?
- Between plasterboard sheets
- Between the gypsum board and the wall
- Possible errors and difficulties
- Useful video
- Video on the topic
- Factory joints (Video course "Painting work as a system from A to Z")
- How to seal drywall joints with paper tape
- Video on sealing drywall joints
- Sealing drywall seams in one day, how to use non-shrink putty!
What are seams?
Joints, gaps, or seams between plasterboard sheets in partitions must be sealed with putty and other decorative compounds and reinforced with polymer elastic materials. This distance between the structural elements of the enclosing structure is required by GOST guidelines.
Where are they located??
Plasterboard partition joints and seams are categorized into the following groups based on where they are on the structure’s plane:
- Vertical – formed when gypsum board sheets are attached to the supporting frame of the partition in a row, between the edges of the factory-made material.
- Horizontal – formed by arranging plasterboard sheets in two or more rows, if the height of the premises exceeds 2500 – 2700 mm.
- Corner, internal and external – the joint is formed after joining the partition cladding elements in an orthogonal direction or at an arbitrary obtuse or acute angle.
- An assembly joint between different materials during the construction of a plasterboard partition adjacent to an orthogonal load-bearing or enclosing vertical structure.
Note: Manufacturers create gypsum boards with a unique cut radius or folded edge in order to create a joint with the necessary dimensions. This edge then forms an installation groove once the material is fixed on a frame composed of profile guides.
Do they need to be sealed??
Not only are the joints between civil code sheets sealed during the installation of partitions in technical rooms.
In other instances, these gaps are meticulously covered up to produce the following outcomes:
- Attractive appearance of the facing material after finishing.
- Long-term preservation of the putty structure without local delamination of the material.
- Preservation of the integrity of the surface of the enclosing structure without the formation of cracks.
- Reducing the risk of violation of the heat and sound insulation properties of the building envelope.
- Preservation of the continuous connection of the full cross-section of a plasterboard wall at the point of its joining with a load-bearing or enclosing structure made of other materials – reinforced concrete, brick, aerated concrete blocks.
After plasterboard partitions are installed, the type and material of the final finishing of the space determine which joint sealing method is best.
Materials
The following kinds of building and finishing materials are permitted for use in sealing plasterboard joints and seams following the construction of partitions:

- Putty – to seal installation gaps, a starting composition based on air or hydraulic binders with the addition of polymer additives is used. The most popular and reliable compositions are considered to be products from manufacturers such as Knauf or Vetonit.
- Dry mixtures “Uniflot”, “Fugenfüller”, as well as the finished compounds “Shitrok” are used to mask joints.
- Sirpani-sample mesh with a self-adhesive surface-allows you to avoid the divergence of the seam after painting during operation, compensates for the possible progress of drywall sheets. Indispensable when arranging a design of a structure in one layer.
- Polymer elastic acrylic or silicone sealant – necessary when facing the surface of the drywall septum with ceramic tiles.
- The overhead perforated corner of galvanized steel is used to decorate internal or external orthogonal angles during the interfacing of GKL sheets.
- Decorative overhead corners or plastic layouts that are arranged after finishing the finish of the partitions made of drywall.
It is advised to review the manufacturer’s or supplier’s album of technical solutions before selecting the appropriate material for sealing joints.
Crucial! The material used to fill installation gaps needs to have a composition that complements the partition’s finishing material and guarantee the right amount of adhesion.
Tools
After building partitions, you’ll need to seal the seams between plasterboard sheets. Any home craftsman worth his salt should have a set of these basic tools:

- Paint roller with ditch, set of brushes for applying primer.
- Spatulas with different dimensions of working surfaces, depending on the width of the seam.
- A grater with a set of abrasive pads for grinding already applied material.
- Flat iron with curved work surface.
- A construction knife with a retractable blade, necessary for cutting chamfers at the junction of plasterboard sheets, provided that such elements are not present on factory-made products.
- A chisel with a radius blade for high-quality jointing of the assembly seam.
- A hammer with a hammer weight of up to 300 grams, if necessary, use a chisel.
- Considering that this type of work with drywall is associated with increased dust formation, it is necessary to use personal protective equipment – gloves, goggles, respirators.
It is advised to only buy tools from reliable vendors. To ensure the desired outcome is achieved, all equipment needs to be of the highest caliber, strong enough, dust- and dirt-free, and in good operating order.
Important rules and points
When sealing the joints between sheets of gypsum board, several significant technological considerations must be made:
- Before starting work, you need to make sure that the sheets are securely fixed to the guides on all self-tapping screws, the heads of which are recessed into the core structure.
- If defects are detected, it is necessary to align the installation joint until a straight line is maintained, and then check the distance with measuring instruments and a building level.
- The installation joint must be completely free of any traces of contamination.
- Before applying putty, the material must be primed along the entire length of the gap to improve adhesion.
- The layer of wet composition should not exceed 2 mm to accelerate the polymerization of the substance.
- Along with sealing the joint, it is also necessary to mask the holes from the screw heads on the surface of the plasterboard sheet.
- When joining plasterboard sheets along the length, it is recommended to provide reinforcement using self-adhesive serpyanka tape.
- In the case of mating plasterboard sheets in the corners, it is necessary to use a reinforcing steel corner with perforated walls.
Note: In order to prevent mold growth, wait until the material has fully polymerized after applying each layer when using viscous, moisture-containing compositions.
A smooth, polished wall finish is achieved by sealing the joints in your drywall. This tutorial will lead you through every step of the procedure, from assembling the necessary equipment and supplies to using joint compound and tape. These easy-to-follow directions will help you to make strong, seamless joints that are prepared for painting or finishing. These steps will empower you to confidently and easily handle drywall joints, regardless of your level of experience.
Step-by-step instructions: how to seal gaps?
It is advisable to consult professionals for the responsible task of sealing the joints between gypsum board sheets.
If this isn’t feasible, you will need to closely adhere to a few algorithms, which are explained in more detail below, in order to complete the work yourself.
Between plasterboard sheets
Following the construction of partitions, seal the vertical and horizontal installation gaps between drywall sheets using the sequential instructions below:

- The plane is checked for the formation of a uniform assembly joint, corrected, and also cleaned of contamination.
- A penetrating primer is applied to the joint surface.
- Wait time for the liquid composition to dry.
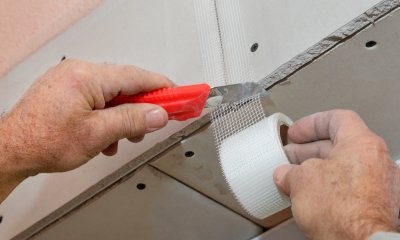
- Serpyanka mesh is glued strictly in the middle of the gap.
- Starting putty is applied to the surface of the gap, as well as to the places where the self-tapping screws are installed.
- The putty layer is polymerized, after which the procedure is repeated until the joint is completely filled with material.
- After applying and drying the putty, the surface is refined with floats and smoothers until the entire front or back side of the structure is leveled.
Depending on the partition’s type of finishing and operational characteristics, certain points of the provided technological map may change slightly.
Between the gypsum board and the wall
When joining gypsum plasterboard sheets for a partition to a vertical load-bearing or enclosing structure composed of other materials, the junction must take into consideration the following necessary nuances:
- Corner joints must be reliably reinforced with steel corners.
- The joints are cut with a chisel or a construction knife.
- The plane is cleaned and dusted.
- The first layer of material is applied to the gap – ready-made putty of the Shitrok type or pre-prepared Fugenfüller composition.
- A perforated steel corner is embedded in wet putty.
- Wait time for the lime, gypsum or cement substance to completely harden.
- After polymerization of the first layer, the second layer is applied.
- Finishing of the adjacent wall should be carried out simultaneously with puttying of the gypsum board partition.
- Internal corners are expanded with an orthogonal spatula until the radius is minimally reduced.
- Upon completion of work, the plane is processed with sandpaper.
- In the case of ceramic tiles, each of the orthogonal planes is faced separately, after which a polymer elastic sealant is placed between the ends of the cladding.
- When gluing wallpaper, it is important to select a material with elastic non-woven fibers in order to compensate for the possible movement of the two structures relative to each other.
- In the case of painting intersecting walls made of different materials with interior compositions, it is recommended to additionally provide a corner layout made of plastic, wood or metal. This is due to the fact that the service life of such a mating is short; unwanted movement will cause the formation of cracks after one or two seasons. This problem is especially relevant when constructing a partition made of gypsum plasterboard adjacent to an external wall.
Be aware that the coefficients of thermal expansion and contraction of plasterboard, brick, and reinforced concrete vary. This means that even during the partition construction phase, the frame profiles must be firmly fixed to the existing structure.
Possible errors and difficulties
When installing this kind of equipment for the first time, the home master might commit several grave errors that have unfavorable outcomes:

- Lack of reinforcement at the joint – gypsum board sheets tend to move relative to each other under load, as well as from temperature changes, which will cause the formation of cracks or other defects in the final finish.
- Lack of primer under the putty layer – possible delamination of the finishing material during use of the room.
- The gap between the edges of the plasterboard sheets is too small, or there is no cutting of the installation joint – for reliable connection of two products as part of the partition, it is necessary to apply a layer of putty with a width of at least 10 – 15 mm so that the structure of the material acquires mechanical strength.
- Applying putty or primer on the dusty surface of gypsum plasterboard – reduced adhesion force, rapid physical wear of the structure.
- Applying putty in 1 layer to speed up work – this technique is allowed, provided that quickly polymerizing compounds are used, provided that after their installation the structure will not be subjected to further finishing over the next 24 – 48 hours.
- Neglecting the need to refine the joint after applying putty – the risk of disturbing the decorative plane of the wall after painting.
- The absence of a corner at the junction of gypsum plasterboard partitions with each other, or with another enclosing structure – during operation, cracks appear in the material, which negatively affect the appearance of the interior.
Before beginning work, it is advised to study in-depth master classes from experienced finishers online in order to remove the errors mentioned.
Useful video
Watch this informative video to learn how to seal four different kinds of drywall joints.
Although sealing drywall joints might initially seem like a difficult undertaking, it’s something you can easily do on your own if you have the appropriate equipment and a little perseverance. By following these detailed instructions, you can be sure that your drywall will appear polished and seamless.
From applying the joint tape to sanding the last layer, never forget to take your time. In the long run, rushing the process can result in errors and more work. A perfect finish will come from meticulous attention to detail at every stage.
In case more sanding and mudding is required, don’t be afraid to do so. It may take a few passes to achieve a flawless surface, but the outcome will be worthwhile. A smooth, tightly sealed drywall joint is essential to a well-maintained, glossy wall.
You’ll feel confident taking on other drywall projects with your newly developed abilities. Acquiring the fundamental knowledge of sealing drywall joints is an advantageous and satisfying ability in any building or remodeling project, regardless of the size of the patch or the room being worked on.


