
Correct corner alignment is an essential component of any building or remodeling project. Ensuring that corners meet precisely can improve a project’s structural integrity and aesthetic appeal, regardless of whether it’s a new build or remodeling.
Accurately positioned corners are important for future problems like shifting and cracking, in addition to adding to the overall aesthetic harmony of an area. Precise measurements, cautious planning, and the application of the right instruments and methods are all necessary for proper alignment.
Various techniques can be employed to attain accurate corner alignment, contingent upon the kind of building materials selected. For example, in bricklaying or masonry, methods like stretcher bond or English bond help guarantee square and strong corners.
Similar methods can be used in carpentry or woodworking to achieve smooth corner alignment, such as mitering or the use of corner clamps. For each technique to be used successfully, it takes skill and attention to detail.
- Formation methods
- Work technology
- External U-turn
- Inner turn
- Video on the topic
- Corner reinforcement. Sealing cracks in corners. Which method is the most successful????
- PLASTERING THE CORNER (non-standard method)
- ALIGNING THE INTERNAL CORNER. How to align it correctly?
- How to align the internal corners of apartment walls using the Construction Rules.
- Accurate setting of the wall angle 90°. How to make MARKINGS correctly? Plastering walls.
Formation methods
In theory, the master may be faced with three different kinds of tasks. This is the alignment of an internal or external corner, or the formation of a straight or curved turn along the axis. Every single option entails the utilization of materials that provide reinforcement. The following samples could be among them:

- paper and metallized tape with longitudinal embossing in the center, some products have small holes;
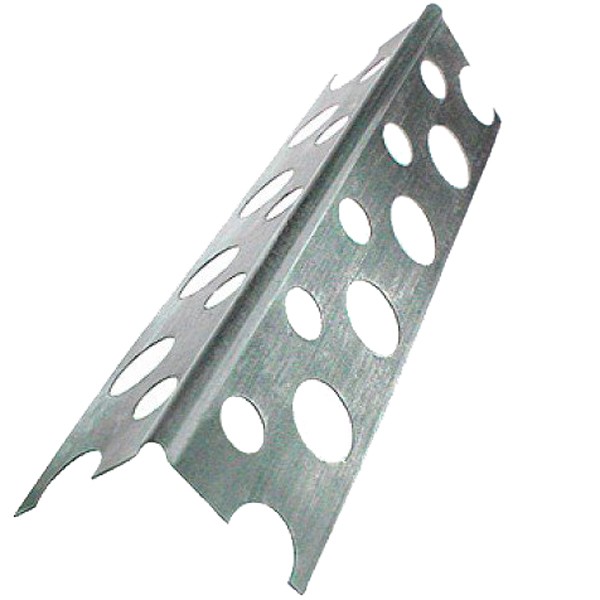
- metal and plastic corners with a stiffener along the axis and side plates with perforations that form a right angle or are in the same plane;
- plastic with an angular section of 90 degrees profile with perforated plates and slots for finishing curved structures (arched strips);
- fiberglass mesh like serpyanka with cells up to 2*2 mm for putty;
- construction bandage made of polymer fibers, which are chaotically fastened together under the influence of high temperatures.
The following painting instruments are used to level corners on walls:
- a rule for adjusting the mortar layer in the longitudinal direction, installing a beacon profile in accordance with the level;
- a set of spatulas, usually narrow and wide, for working in hard-to-reach places;
- an angle-forming trowel with a working blade that is bent at a right angle and attached to the handle on one side (depending on the type of construction: internal or external).
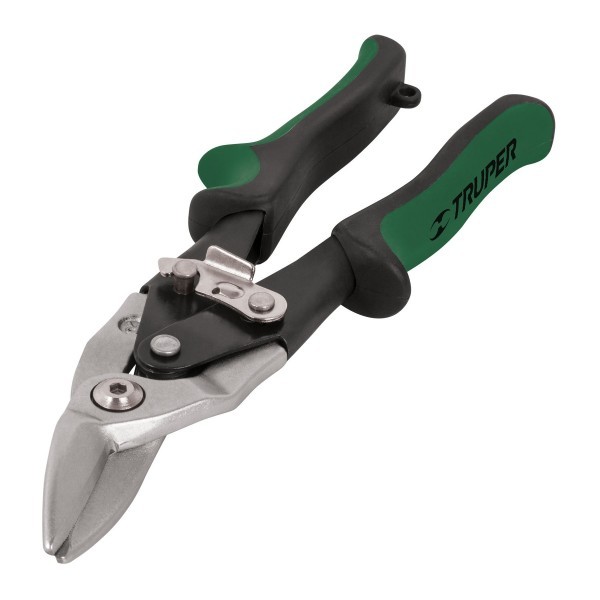
A stepladder and fixing tools might also be required to get the working solution to a homogenous mass with the right consistency. If the variations are more than three millimeters thick, preparatory work is done with a plaster mixture. Metal scissors or construction knives with interchangeable blades are typically used to cut reinforcing materials.
Primers appropriate for a given object must be applied to the surface prior to each painting step. Priming can be done with a variety of brushes and rollers. Locations where wet materials are used for repairs need to be shielded from moisture and contamination. You will need anti-corrosion and antiseptic protection of the "cured" areas with a margin of size if there are pockets of rust or fungus. Decreas and various paint solvents work well on oily and fat spots.
Achieving exact corner alignments is essential for maintaining structural integrity and aesthetic appeal in building and renovation projects. Whether you’re installing walls, laying tiles, or framing windows, this article will cover useful techniques and crucial pointers for precisely aligning corners. Learning these methods, which range from using high-quality measuring instruments to using efficient leveling strategies, improves the aesthetic coherence of areas while guaranteeing long-term stability and durability in construction projects.
Work technology
Once all the information regarding the "health" of the base has been provided and the required supplies and equipment have been set up, you can start learning and applying the guidelines for puttying wall corners. Chalk and paint coatings must be removed, as well as any loose, crumbly, flaking areas. When discussing internal turns, it is imperative to unstitch the seams more frequently. This is a widening of the already-existing fissure. The factory seams on plasterboard sheets are the only exceptions.
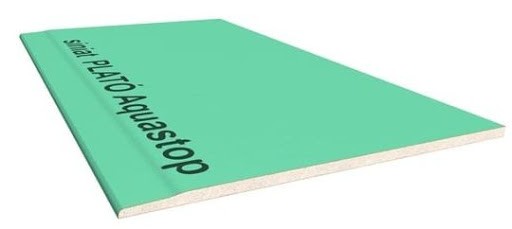
To avoid exposing the gypsum core, there’s no need to remove the paper shell here. Cardboard serves as a protective covering and reinforcing material because it is brittle and afraid of moisture.
External U-turn
Since it’s convenient to install a corner here to align the corners, working with 90-degree turns is the easiest. It is important to note the features of working with profiles right away. They are listed in the following order:
- Budget samples made of galvanized steel, especially in damp rooms, often begin to rust due to the destruction of the protective coating during installation.
A spatula’s abrasive action and the plaster’s quartz filler cause scratches to appear. Rust penetrates leveling solutions made with gypsum all the way to the decorative finish.
- Metal corners are easily deformed and it is no longer possible to restore the original shape of the profile. Subsequently, this will make installation difficult; in some places the bar will protrude.
The technology states that any metal element that is exposed to aggressive phenomena (moisture, chemical reagents) needs to be completely covered in a layer of solution in order to maximize the elimination of chemical processes. You must set aside a space in advance for storing corners to avoid cutting out inappropriate areas and wasting material.
- Plastic corner-forming elements, unlike their metal counterparts, do not corrode and exhibit better resistance to changes in humidity and mechanical stress. But they are thicker, which is important for strengthening an already drawn corner.
In this case, you will need to add more leveling layers to ensure that the wall edges blend in with the overall plane’s background. It would be more appropriate in this instance to use metallized tape with a paper backing. It’s true that this choice will help shield the corner from harm while it’s in use.

It is evident from the foregoing that careful consideration must be given to the selection of reinforcing material for external turns. You frequently have to deal with seriously damaged structures. That is, without first making the necessary preparations, it is impossible to install any corner-forming element. Plastering the wall corners level is the solution in this case. You can then take a profile and attach tape to it for both strips so that you don’t have to glue the entire area with rolled mesh. This will expedite the installation process overall and make the master’s job easier. Additionally, actions will be as efficient as technology demands.
Cement plaster is frequently used when reconstructing a corner. It is very long-lasting and does not lose quality when applied in layers of several centimeters. Furthermore, temporary markers such as a square pipe, a wooden beam, or a support or guide for a plasterboard frame may be required. Level the first side of the structure after priming and establishing the guidelines.
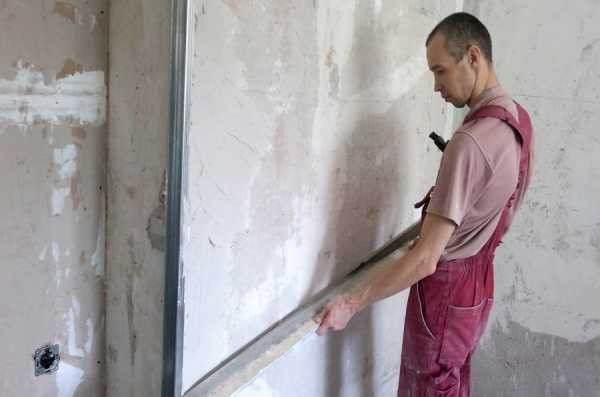
I move the beacons, trim off any extra plaster, and form the second side of the corner once the solution has solidified. After that, you’ll have to take out the new protrusions, take out the beacons, and let the new spread completely dry.
Plaster is another option that is thrown onto the work surface. Here, a facade spatula is used to distribute the composition, and a corner trowel is used to shape the working mass in the desired places on the outside. The approach is applicable to structures that initially sustained only minor damage and is convenient. The area that needs to be restored should be fully covered by the forming tool’s blade.
Once the new spread has dried completely, you must remove any protrusions and prime the surface. We’ll examine correctly puttying wall corners next. The techniques used differ based on whether the reinforcement is paper-based or hard. The first is fixed on a solution that has already been applied and then spread evenly throughout the guide.

There is a little more work involved in the second process. In the case of metallized tape, it is crucial to remove the putty underneath it with caution so as not to harm the reinforcing material. It is simpler to use the enhanced PVA glue option, universal, carpentry, or construction if there are no metal inserts. It will go more quickly and easily. Ultimately, the surface is poked again to achieve the final leveling of the turn after the applied compositions have dried.
Inner turn
Angular profiles are not used in the formation of such designs. However, a trowel, plaster, and a rule are required if you need a leveled angle. Prior to filling and priming the embroidered cracks and spaces between sheet materials, it is crucial to wait for the solution to dry. After that, the desired shape of the turn is visible and the reinforcing mesh is fixed.

Strictly speaking, a sickle suffices in the traditional fund of strengthening the angle. In new construction, it’s also advised to reinforce the turn with tape of any kind—bandage, paper, or mesh—when it comes to partitions made of plasterboard or foam blocks. It will be feasible to complete the wall corner finishing alignment in 1-2 layers following one more priming.
Proper alignment of corners is an essential aspect of construction and renovation projects, as it enhances both the visual appeal and structural soundness of the finished product. The basis for exact corner alignment is laid by beginning with precise measurements and utilizing trustworthy instruments like squares and levels.
Corners stay true and square when construction is underway because angles are regularly checked and adjusted. This stage improves the project’s overall quality while also averting further issues.
A methodical approach and close attention to detail are necessary for correctly aligning corners. Taking the time to make sure every corner is aligned correctly pays off in the long run, minimizing the need for rework and improving the professional finish of your work, whether you’re working with drywall, tiles, or framing.
Recall that corner alignment affects more than just appearances; it also has practical implications. Properly aligned corners facilitate and enhance the installation process of doors, windows, and fixtures, guaranteeing their seamless and secure operation.
In conclusion, every builder and renovator should place a high priority on learning the techniques for aligning corners correctly. Achieving accuracy and durability is just as important as attaining symmetry; doing so will ultimately result in a well-executed and fulfilling building or remodeling project.


