
It is imperative that you comprehend the function of a rack profile if you are organizing a drywall project. This vital element ensures stability and longevity by providing the framework for plasterboard. The rack profile forms the foundation of any structure, be it walls, ceilings, or partitions.
Rack profiles are made to fit a range of construction requirements and are available in multiple sizes and shapes. Usually composed of galvanized steel, they are robust and resistant to rust. The longevity and appearance of the finished product are both impacted by improper installation of these profiles, which makes it essential to the success of your drywall project.
Although it may seem simple, installing rack profiles involves following certain guidelines and paying close attention to details. Every step, from cutting and measuring to securing and aligning, needs to be done precisely. Errors can result in improperly aligned ceilings or walls, which can cause issues later on.
Notwithstanding the difficulties, becoming an expert in rack profile installation can save money and time while guaranteeing a finished product of high caliber. Even the most enthusiastic do-it-yourselfer can produce a perfect finish with the correct supplies and methods. Let’s examine what a rack profile is, how to install one, and some typical problems you might run into.
| Topic | Description |
| What is a rack profile for plasterboard? | A rack profile is a metal frame component used to support plasterboard in walls and ceilings. It"s essential for creating sturdy and straight surfaces for finishing. |
| Installation rules | Ensure the profiles are cut to the correct length, fixed securely to the floor and ceiling, and aligned properly. Use screws or appropriate fixings and double-check the level before attaching plasterboard. |
| Difficulties | Common challenges include ensuring profiles are perfectly vertical, dealing with uneven surfaces, and securely fixing profiles in place. Accurate measurement and careful handling are crucial to avoid issues. |
- What is the product?
- Purposes of use
- Requirements
- Markings and technical specifications
- How to choose the right material?
- Top 5 manufacturers
- Knauf
- Primet-M
- Gyproc
- Albes
- Kraf Synergy
- Tools and consumables for installation
- Possible errors and difficulties
- Video on the topic
- TOP-8 Plasterboard Mistakes. Don"t Repeat Them During Installation!
- The Best 7 Ways to Connect a Profile to Save Money
- Secrets of Plasterboard Installation Profile Installation
- Profile Installation and Plasterboard Installation with IVSIL
- Correct Installation of a Plasterboard Partition
What is the product?
The primary structural component of the supporting frame of the volumetric-planning element is a rack profile for a plasterboard partition. The profile is firmly fixed in a vertical position to the starting guides that are situated in the upper and lower portions of the floor slabs.
The purpose of the rack profile element is to guarantee the bearing capacity of the enclosing structure and to withstand external permanent and temporary loads applied to the partition during the operation of the premises.
Purposes of use
The most crucial component of the gypsum board partition’s supporting frame, the rack profile serves the following purposes:

- The load-bearing part of the partition frame, the perception of external loads with their subsequent redistribution through the starting profiles in the floor slabs.
- Formation of a cell with a certain pitch for subsequent fastening of the cladding elements of the building envelope.
- Basis for fastening horizontal imposts, lintels for strengthening window or door openings, decorative niches.
- Ensuring a vertical alignment of the structure due to reliable fastening at two extreme points to the starting guides.
- The basis for installing thermal insulation in the body of the future partition.
- Element for fastening hidden electrical cables and pipe communications, if these solutions are included in the project.
It is advised to create a thorough partition design that includes the development of the supporting frame and a thorough specification of every component when determining the quantity of a rack profile. This practice minimizes waste and eliminates material waste.
Requirements
The following regulatory documents govern the requirements for load-bearing rack profiles used in the construction of enclosed structures made of gypsum plasterboard sheets:
- GOST R 58389-2019 “Bent steel sheet profiles with trapezoidal corrugations for steel-reinforced concrete structures”.
- GOST 6266-97 “Gypsum plasterboard sheets”.
- GOST 24045-2016 “Bent steel sheet profiles with trapezoidal corrugations for construction”.
- SP 163.1325800.2014 “Structures using plasterboard and gypsum fiber sheets. Rules for design and installation".
The following requirements must be fulfilled by all rack profile elements in accordance with the points of these standards:
- Ensuring load-bearing capacity.
- Minimum deviations from the specified geometry.
- High surface quality, absence of dents, traces of mechanical damage, burrs along the entire length of the element.
- Uniform surface shade, which indicates the high quality of galvanized coating.
- Corrosion resistance – the galvanized layer must protect the products from rust along the entire length and at the ends of the shipping mark.
- The profile must have stiffening ribs with a depth of at least 2 – 3 mm.
- In the places where the rack is supposed to interface with the horizontal impost, holes are made using coordinate-punching equipment.
- Resistance against general deformations and local crushing under design loads over a span of 2.5 to 4 meters, without the need to install reinforcing elements.
A lot of manufacturing companies create their own albums of standard solutions and technical documentation (TS), which are used as a foundation for designing rack profiles as they are manufactured. Prototypes from each new batch of products are tested in a lab setting after they are released, and the results are used to create protocols, quality and conformance certificates, and certificates of sale for the products.
Markings and technical specifications
All certified products in the relevant category that are meant to be used for zoning purposes or for the installation of gypsum plasterboard interior partitions have the following technical features:
- Marking: PS (rack profile).
- Length: 3000 mm (standard) from 2750 to 6000 mm (non-standard, according to individual specifications).
- Shelf width: 50 mm
- Wall height: 50, 65, 75, 100 mm.
- Metal thickness: from 0.4 to 1.0 mm.
- Weight 1 m. P.: from 0.87 to 1.32 kg.
- Toxicity group: not lower than T1.
- Fire resistance: at least 15 – 30 minutes when exposed to open fire, depending on the thickness of the metal.
- Possible deviation from modular dimensions: no more than 0.3% in length and no more than 0.1% in width and height of the profile section.
The internal marketing policy of the brand, the cost of the product, the quantity of units purchased, the area in which the product is sold, and other factors can all affect average prices.
How to choose the right material?
Selecting the appropriate rack profile is an important step that will determine how well the future enclosing structure turns out. When selecting these partition sections, it is advised to consider several subtleties:

- Quality of metal and profile surface.
- Correspondence of geometric characteristics of the same goods in a batch.
- Availability of markings on the wall of the product indicating the brand and main technical characteristics.
- Availability of a certificate of conformity from the supplier or seller at the point of sale, as well as a quality certificate for the product offered.
- No dents, chips, traces of corrosion, or other mechanical damage on the profile surface.
- The price of the product, which affects the quality. If the retail price of the profile sample in question for the partition frame is lower than the market average, this indicates a defect or low quality.
Brand recognition, the year the company was founded, nomenclature, the existence of constituent documents, an official website with an online store, and positive reviews from numerous happy customers on independent Internet portals are the most significant indicators of quality.
Plasterboard rack profiles are a necessary part of constructing stable, long-lasting walls and ceilings. It gives plasterboard sheets the structural support they need to stay straight and stable. Precise measurements and cautious alignment are necessary when installing a rack profile in order to preserve structural integrity and prevent problems like uneven surfaces or weak spots. Making sure the profiles are level and correctly anchored is a common challenge that can be challenging for novices but manageable with the right tools and techniques.
Top 5 manufacturers
The TOP 5 brands in the Russian Federation that are most recognized for producing premium rack profiles are ranked below.
Knauf

The most well-known company that manufactures premium goods for gypsum plasterboard partition construction was established in Germany over 90 years ago. Two of the company’s own factories have opened in our nation, and they are outfitted with automated conveyors manufactured in Germany. This guarantees the production of rack profiles in the necessary quantity and their distribution throughout the Russian Federation. Benefits
- wide range of models;
- high quality products;
- brand guarantee for flawless operation for at least 15 – 20 years.
Inflated retail price is a flaw.
In the Russian Federation, average prices range from 500 to 700 rubles.
Primet-M
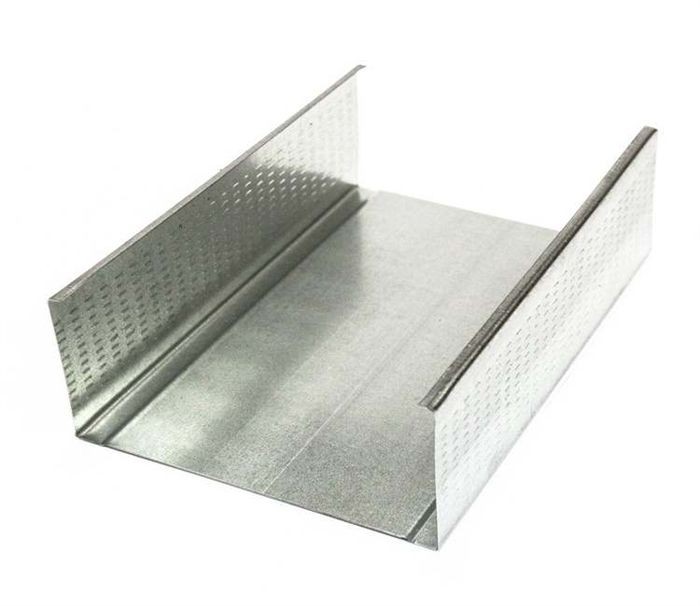
Russian manufacturing company that was founded in the late 1990s. The products are state-certified and hold a prominent position in our nation. The company offers a complete line of rack parts in addition to all varieties of galvanized profiles for gypsum plasterboard partition installation. Benefits
- optimal balance of European quality and reasonable cost;
- deep stiffening ribs ensure increased stability of the partition even with a maximum pitch of 600 mm and a height of up to 3 meters.
Drawbacks:
- installation complexity due to high perforation location errors;
- there is a risk of corrosion at the ends when trimming the element.
In the Russian Federation, prices typically range from 420 to 620 rubles.
Gyproc

A French business located near Nizhny Novgorod that operates a state-of-the-art production facility. Every product is tested on a regular basis, and every profile type has a Russian certificate. The creation of partition profiles is under the supervision of the company’s head office’s quality control service at every phase of the production cycle. Benefits
- patented technology;
- the given thickness of the product is from 1 to 2 mm, with the actual profile thickness of only 0.4 mm, due to innovative perforation.
Drawbacks:
- the most expensive product in the category under consideration;
- installation requires experience with Gyproc profiles and the use of special hardware.
In the Russian Federation, average prices range from 550 to 800 rubles.
Albes
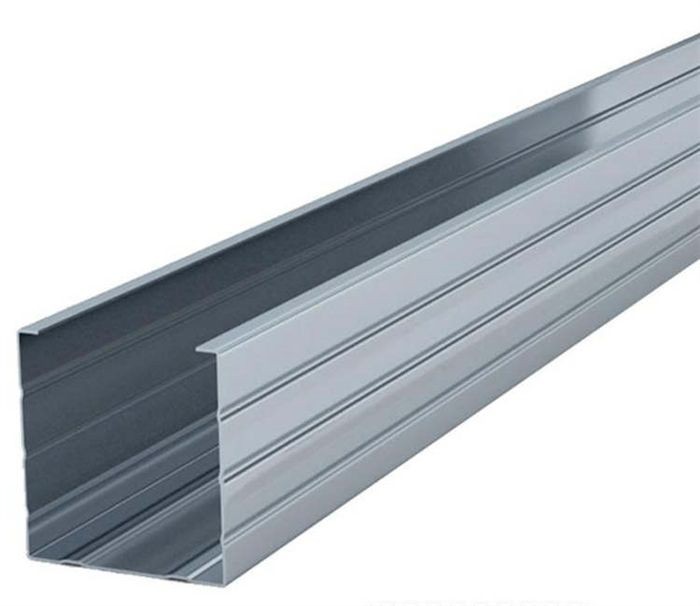
One of the most well-known factories in Russia, with expertise in producing aluminum and galvanized metal components for slatted ceilings, plasterboard structures, and facade cladding. The business produces premium galvanized profiles in accordance with European standards on a different conveyor. Benefits
- full size range of products;
- machine control of product quality;
- Possibility to order goods in any quantity.
Drawbacks:
- poor-quality perforation in the places where the posts meet the imposts;
- risk of soft metal collapsing along the length of the shelf during installation.
In the Russian Federation, average prices range from 400 to 550 rubles.
Kraf Synergy
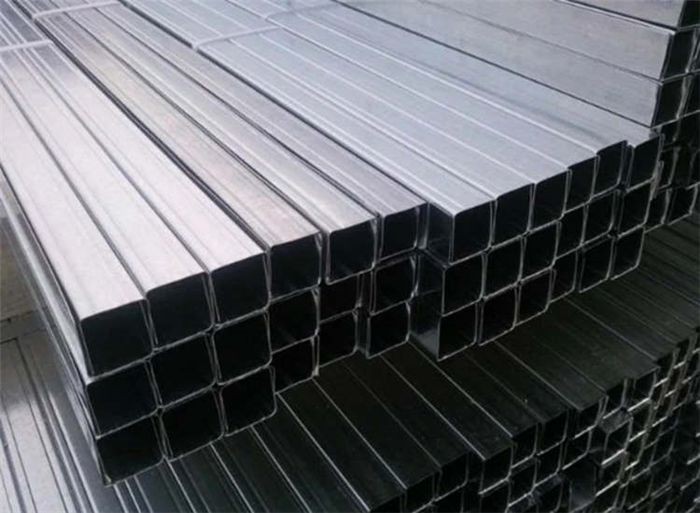
A relatively new Izhevsk-based Russian business that was established in 2010 based on the Termolife production concern. The products are of exceptional quality and frequently appear on the brand lists of numerous large development companies and government procurement services, especially given the high degree of automation of the production line. Benefits
- relatively low retail cost with excellent quality;
- high-strength galvanized coating;
- long-term brand guarantee against through corrosion of the rack profile.
Drawbacks:
- insufficiently developed dealer network;
- In some regions, products are supplied in a limited range.
In the Russian Federation, prices typically range from 420 to 570 rubles.
Based on actual customer reviews of the products in question, the rating below is subjective, not promotional in any way, and should not be interpreted as a recommendation to buy.
Tools and consumables for installation
When building a plasterboard partition, you’ll need the following supplies and equipment to install rack profiles:
- For taking measurements and markings:
- Laser roulette.
- Standard tape measure with retractable steel blade
- Metal ruler with a length of up to 1000 mm.
- Joiner"s steel corner with edge length of at least 300 mm.
- Laser and regular bubble level.
- Plumb to maintain the vertical plane of the element.
- Marker for marking before cutting.
- For cutting profiles:
- Cross-cutting machine with a rotating bed (in case of a large volume of profiles).
- Hand saw with fine teeth.
- Grinder or circular saw with abrasive disc.
- Metal scissors.
- File for finishing the end of a product after cutting.
- Pliers, if necessary, to bend the shelf during the operation of forming the mating unit.
- For installation partition frame:
- Drill for making holes (in case of mating the rack profile with the starting profile with rivets).
- Screwdriver with a set of bits.
- Slotted or Phillips screwdriver for tightening screws.
- Consumables materials:
- Self-tapping screws with a diameter from 2.5 to 3.2 mm and a length from 15 to 20 mm.
- Rivets for drawing gun.
- Metal drill for making holes for rivets.
Since building a partition frame out of gypsum plasterboard does not require wet work, any do-it-yourself craftsman can complete this production process without the assistance of a professional. Every tool needs to be of the highest caliber, sharpened, dust-free, and prepared for use.
Possible errors and difficulties
If one lacks basic installation knowledge and experience, working with a rack profile can present a number of challenges, and errors frequently result in unforeseen expenses and unfavorable outcomes:
- Incorrect marking of the starting profile in the upper and lower parts of the floors – the risk of skewing the rack, which can cause a violation of the geometry of the supporting frame.
- Incorrect positioning of the rack during installation – there is a risk of breaking the rigid assembly during mating of orthogonal elements.
- Errors when trimming a rack profile – the formation of a contact plane with insufficient area during installation.
- Selecting weak hardware when attaching the profile – possible destruction of structural elements during operation of the partition.
- Choosing the wrong pitch of rack profiles – there is an increased risk of violating the multiplicity of the gypsum board sheet during cladding, which will affect the strength of the entire partition structure.
It is advised that you familiarize yourself with master classes and video lessons from professional installers before beginning installation operations in order to avoid the mistakes mentioned above. These installers frequently share their videos with other Internet users.
Your drywall projects can be much more successful if you know what a plasterboard rack profile is and how to install it properly. Rack profiles give your plasterboard walls and ceilings the necessary structure and support to make them strong and long-lasting. Rack profile installation can be simple with the correct supplies and equipment, but it needs to be carefully planned and carried out.
Installation guidelines emphasize how crucial precise measurements and tight fastening are. Later problems, like uneven surfaces or instability, can be avoided by making sure that rack profiles are level and properly aligned. Furthermore, you can preserve the structural integrity of your building and keep your plasterboard firmly in place by using the right screws and fixing techniques.
Even though DIY enthusiasts can handle the process, there are some common pitfalls to be aware of. These include cutting accurately, handling asymmetrical wall shapes, and fastening profiles in confined areas. Knowing ahead of time about these challenges enables you to make the necessary preparations and steer clear of any potential obstacles during your installation.
You can accomplish results of a professional caliber by paying attention to possible obstacles and adhering to the installation guidelines. Whether you’re taking on a bigger building project or just remodeling one room, knowing how to use rack profiles for plasterboard is an important skill that will improve the overall quality and durability of your work.


