
Sand blocks are a popular choice for building houses because of their affordability and durability. Sand blocks provide good thermal and acoustic insulation because they are made of sand, cement, and water. However, it’s essential to comprehend the particular methods and factors to be taken into account when working with this material in order to guarantee a sound and durable structure.
Sand blocks’ weight is one of their main characteristics, which can be both a benefit and a challenge. Their weight helps keep the walls stable, but it also means that more caution must be used when building. To avoid any structural problems later on, these blocks must be handled and placed properly.
The type of mortar used to bind the blocks together is another crucial factor to take into account. Sand block characteristics should be complemented by the mortar, which should offer a solid connection while permitting small adjustments and movements. The application method and consistency of the mix also have a big impact on the walls’ overall integrity.
It’s crucial to make sure the sand blocks are level and oriented correctly. The finished walls’ aesthetic appeal and structural integrity can be jeopardized by even small deviations. To help attain the necessary accuracy, instruments like plumb lines and spirit levels can be used. Throughout the building process, routine inspections can stop small errors from becoming larger issues.
Finally, it is imperative to pay close attention to details in places like windows, doorways, and corners. To make sure that these areas can withstand the weight and strain applied to them, additional reinforcement and careful planning are needed. To keep these crucial points strong and stable, additional supports and appropriate reinforcing techniques might be required.
| Feature | Description |
| Block Selection | Choose high-quality sand blocks that are uniform in size and free from cracks. |
| Foundation | Ensure the foundation is level and properly cured before starting to lay blocks. |
| Mortar Mix | Use a strong mortar mix to bond the blocks together and ensure good adhesion. |
| Alignment | Check the alignment of each block as you go to maintain straight walls. |
| Leveling | Regularly use a level to ensure blocks are even and maintain proper wall height. |
| Joint Filling | Fill all joints between blocks thoroughly to avoid weak points in the wall. |
| Curing | Allow the mortar to cure properly before applying any additional loads or finishes. |
To ensure stability and durability when building walls out of sand blocks, meticulous attention to detail is necessary. The procedure entails picking high-quality supplies, laying the blocks according to plan, and adequately preparing the foundation. To avoid structural problems, mortar application and alignment must be maintained consistently. Furthermore, knowing the unique characteristics of sand blocks, like their load-bearing ability and thermal insulation, aids in the planning and execution of successful construction projects.
- Application
- Preparing the base
- Solution proportions
- How to cook properly?
- Consumption
- Tools
- Construction scheme
- DIY masonry technology
- Features for partitions and load-bearing
- Creating seams
- How to speed up the process?
- Bugs and difficulties
- Video on the topic
- Construction of walls | 3 Layer Wall | How to build a good house
- New method of laying cinder block (sand block)
- Building a fence from a sandblock. One of the working moments.
Application
Sand blocks are a dependable building material that are used to construct entire buildings. It offers many benefits, some of which are as follows:
- environmental friendliness;
- Long -term operating resource;
- Increased strength.
Sandstone’s technical properties make it suitable for wall construction, including internal and external partitions as well as wall support.
Preparing the base
The foundation’s quality has a major impact on the sand block wall’s technical specifications.
To attain superior outcomes, it is imperative to perform preparatory work:
- Remove uneven foundations.
- Clear the surface of debris.
- Use tools to knock down protruding fragments.
- Ensure foundation waterproofing.
A specific substance needs to be applied to the masonry site:
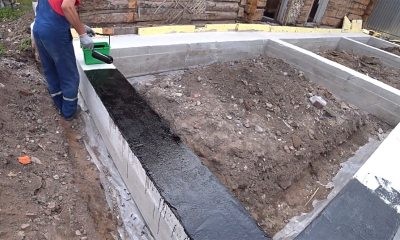
- Pasting bitumen membranes. Has high resistance to cracking and reliable protection against moisture.
- Polymer waterproof membranes. Characteristics similar to bitumen membranes.
- Polymer mastics. Resistance to cracking is lower, but otherwise good protection against moisture.
- Polymer-cement compositions. Durability at mastic level, insufficient protection from soil moisture.
Although cement compositions and impregnating waterproofing are acceptable alternatives, their qualities are inferior to those mentioned previously.
Take note: When building walls for residential buildings, it’s crucial to remove any moisture from below the sand block using a high-quality waterproofing method.
Solution proportions
The following materials are needed to make a mortar for sand block walls:
- Bucket of cement.
- Three buckets of sand.
- Half a bucket of water.
- Strength plasticizer. Not required, but improves performance.
- Detergent cap. Not necessary, but allows you to achieve better elasticity of the solution, which will facilitate interaction with it.
The water volume that is shown is not a precise measurement. Depending on how liquid and viscous the final solution is, the quantity may change.
How to cook properly?
The following are the preparation instructions for the solution:
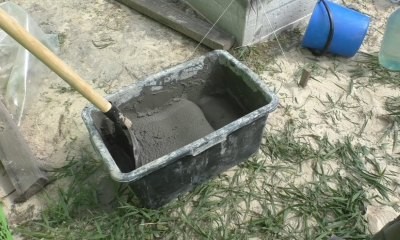
- Measure out the required amount of ingredients.
- Place cement and sand in one container, mix until smooth.
- Before adding water to the dry mixture, mix with plasticizer and detergent, mix.
- Pour water into the middle of the container with sand and cement, gradually mixing.
Note: During the final stirring stage, more water should be gradually added if the viscosity and fluid characteristics are not as required.
Consumption
When constructing a wall out of sand blocks, the ideal seam thickness is roughly 1.5 centimeters. This means that, in addition to the material’s standard width of 20 centimeters, 200–220 liters of mixture will be needed for every cubic meter of block.
Twenty to twenty-five percent of the volume of the masonry is consumed by the solution. In other words, 0.2-0.25 cubic meters of mixture will be needed for each block cube.
Tools
You will need several tools to construct with sand blocks, including:
- Master OK. With its help, the mortar is equalized, the seams are filled, and excess mortar is removed.
- Joining. Necessary for giving the seams the desired shape: triangular, concave, convex, etc.d.
- Rules-level. To control the front side of an already laid wall.
- Cord mooring.
- Small pickaxe hammer. To chip or chop blocks. An alternative option is a grinder.
- Square. Needed to check corners.
- Mortar shovel. Necessary for mixing the solution, applying it to the surface and spreading it.
- Building level. To control the flatness of the plane. Suitable options with lengths ranging from 30 to 70 centimeters.
- Roulette. To measure distances.
Please take note that the list of tools above is not comprehensive.
Moreover, additional tools that can be utilized to increase convenience while building might be needed. For instance, utilizing a concrete mixer to prepare a solution can speed up the process.
Construction scheme
There are several masonry rules that must be considered in order to guarantee the smooth construction of sand block walls:
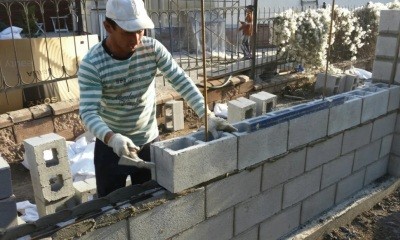
- Like any other stone, sand block has high compressive strength characteristics, but low fracture or bending characteristics. Therefore, the overlying block must rest with its entire plane on the lower layer. To do this, when laying, it is necessary to apply the solution to the entire surface, and not just along the edges or in the center.
- Separately, it is necessary to consider the correct distribution of vertical load. If the masonry seams coincide, the load is distributed along the column of blocks, which significantly increases the risk of structural failure. Each subsequent row must be shifted by 25% or 50% to prevent the vertical seams of adjacent rows from matching. In this case, the load is distributed over the entire wall.
- The location of the side faces of the blocks must be strictly at right angles to the horizon. Ignoring this rule may lead to the destruction of the masonry due to the stones acting as wedges.
- It is recommended to build no more than 1.5-2 meters of wall per day. It is necessary to give the masonry time to dry.
There are several distinct schemes for sand block masonry:
- two stones. Due to the thickness of the walls, they will be warmer;
- one and a half stone. Relevant for load-bearing and external walls;
- in one stone. More suitable for constructing partitions inside the house, but can also be used for external walls;
- half a stone. Exclusively for creating internal partitions.
Crucial! Wet the blocks every now and then when constructing a wall in the heat. As a result, the mortar and stone will adhere to one another more strongly. Every four rows, it is also advised to verify that the horizontal and vertical planes are accurate.
DIY masonry technology
It must be remembered that the first row serves as the focal point of the wall. Because it primarily determines the evenness of the partitions due to the proper distribution of the load, it must be laid with extreme caution.
The steps to build the first row are as follows:
- Place sand block beacons at the corners of the foundation.
- Find the highest angle. Normal height difference is up to 3 centimeters. Differences are subsequently eliminated due to the amount of solution used.
- Mark corner marks along the edges with chalk so as not to confuse the dimensions.
- Install beacon blocks on cement mortar strictly according to measured dimensions. Place three sand blocks at each corner. Two in the first row, one in the second.
- Pull the mooring cord and secure it to the corners of the blocks.
The next steps are as follows:
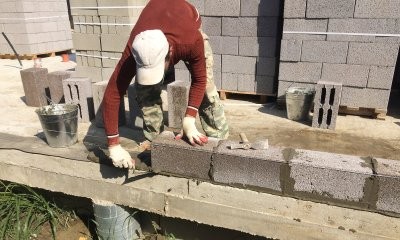
- Place cement mortar according to the size of the block on the foundation and on the end of the stone. The thickness of the solution is 1.5-2 centimeters.
- Place the sand block on the solution along a stretched cord. The first row is laid from the corners to the middle.
- Use a hammer or pick to knock the block into the same plane as the corner block.
- Measure the correctness of the horizon using a building level.
- Remove excess mortar from seams.
- Repeat laying steps until the blocks are as close as possible in the central part.
- Measure the length of the last block along the foundation. Cut it to the appropriate size with a grinder.
- Lay the block in a free plane.
Lastly, reinforcement in the form of mesh or reinforcement is required for the first row of sand blocks.
Kindly take note! After the first row has fully solidified, the second row is laid. The necessary strength can be acquired in two to three hours; the length of the wait depends on the weather.
The following guidelines should be followed when placing the second row of sand blocks:
- From the corners to the center of the row. The location of the edged sand block in the rows should always be different.
- Each upper block should overlap the lower seam.
- The side seams between the blocks should be filled with mortar to eliminate voids that allow moisture and air to pass through, which creates cold bridges.
- It is recommended to reinforce every third or fourth row.
- When laying hollow sand blocks, you need to take into account that the voids are at the bottom. In this case, so much solution must be applied so that only a small part of it falls on the voids.
If jointing is necessary, it needs to be completed prior to the solution solidifying.
See the video to learn the correct way to construct sand block walls:
Features for partitions and load-bearing
There are hardly any notable distinctions between the construction of partitions and the installation of load-bearing walls. It’s crucial to consider specific elements when putting in vibration-isolated flooring. The partition blocks in this case are set up atop a unique vibration-damping gasket, which stops noise from the supporting structures from passing through.
Crucial! Installing temporary guides for the installed floor is crucial before laying.
The chosen scheme may account for additional variations in the masonry of walls. For instance, the half-stone option is only appropriate for internal partitions. That decision, however, has no bearing on the general guidelines for building sand block walls.
Creating seams
This holds true for both deformation and the creation of seams between blocks: there are no noteworthy characteristics to sand block seams. The maximum thickness of the mortar between stones is two centimeters, and that is all that needs to be noted. Nonetheless, 1.5 centimeters is the ideal choice.
Not to be forgotten is seam stitching. You can refine and seal the jumpers between blocks with its assistance. The tool lets you get rid of extra solution, which improves the material’s durability and aesthetic appeal.
How to speed up the process?
In order to accelerate the building of walls, you need to:
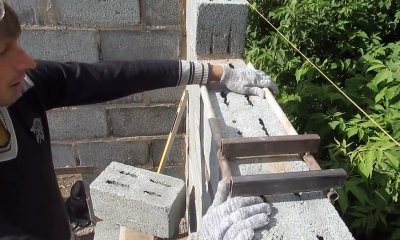
- attract 1-2 assistants and distribute responsibilities;
- use construction equipment: concrete mixer, grinder, hammer drill, etc.P.;
- clear the work area of unnecessary property;
- use a masonry template.
For novices, using a template is especially crucial. You can buy it at hardware stores or make it yourself out of metal or wood.
Take note! It’s crucial to take your time in order to expedite the procedure. It is important to maintain control over the levelness of both horizontal and vertical surfaces, measure dimensions carefully before cutting blocks, inspect seams, and so on. P.
Bugs and difficulties
The use of inferior building materials or blocks causes the majority of the problems. It is crucial that they adhere to GOST. For this reason, you ought to ask for a quality certificate when making purchases.
Furthermore, a sand block wall won’t work well if
- the requirements for the construction stages were violated;
- the foundation was not properly waterproofed;
- the need to reinforce rows of blocks was ignored.
A lot relies on how skilled the builders are. Therefore, it’s crucial to carefully consider the requirements when laying it yourself.
For many homeowners, building walls out of sand blocks is an affordable and useful solution. This material, which has a reputation for being durable and having good insulation qualities, makes sure that your house stays cozy and energy-efficient. You can make the most of these advantages and build a strong structure by adhering to the right procedures.
A crucial thing to keep in mind is to lay a solid foundation first. The foundation must be strong enough to hold the weight of the walls made of sand blocks and perfectly level. In order to keep moisture out of the building and preserve the integrity of the blocks, proper waterproofing is necessary. This is an essential step in keeping your walls sturdy.
Choosing the appropriate mortar mixture is crucial when placing the sand blocks. To ensure that there is a strong bond between the blocks, the mixture shouldn’t be either too wet or too dry. To create a tidy and clean finish, make sure the mortar is applied evenly and that any excess is removed. Aside from that, keep in mind that the weather during construction can have an impact on the curing process.
It is essential to pay close attention to the alignment and leveling of every block row. Any misalignment over time may result in structural problems. Making use of a plumb line and spirit level will aid in keeping the walls straight. Extra strength can also be added by adding reinforcing bars or mesh, especially in seismically active areas.
Lastly, it’s critical that the walls cure properly. In order to make sure the mortar sets properly, the walls must be kept damp for a while after construction. In addition to preventing cracks, proper curing increases the walls’ overall durability. You can make sure your sand block walls are long-lasting and provide a secure and cozy space for many years to come by adhering to these guidelines.


