
It is crucial to comprehend the layers and design of floor screed when building or remodeling a floor. In order to ensure a level and stable surface for different flooring materials, floor screed plays a critical role as a foundation. In residential and commercial settings, where evenness and durability are crucial, this layer is especially crucial.
Usually applied over an insulation or concrete layer, floor screed is a blend of cement, sand, and water. Its main purpose is to lay a level and smooth foundation for later flooring materials like hardwood, laminate, or tiles. This procedure improves the floor’s thermal and acoustic qualities in addition to its visual appeal.
A number of factors are taken into account when designing a floor screed. First, the type of flooring, the need for load bearing, and the state of the underlying substrate all affect how thick the screed layer should be. For example, areas where there is a lot of foot traffic or where more insulation is required may require thicker screeds.
Floor screed layers are generally divided into several types according to their application and composition. Conventional screeds provide a sturdy base appropriate for most flooring types by combining cementitious materials with water and sand. However, more recent options, like flowing screeds, have improved flow characteristics and can be installed more quickly, making them perfect for large spaces or areas with underfloor heating systems.
To ensure the longevity and performance of your flooring, it is essential to comprehend the subtleties of floor screed design. Through careful consideration of your project’s unique needs, you can choose the right type and thickness of screed to create a floor that is level, strong, and visually appealing, improving both functionality and appearance.
| Features of floor screed: | Provides a level surface for flooring |
| Layers of floor screed: | Usually include a base, insulation, reinforcement if needed, and the screed layer itself |
Anyone working on building or renovation projects needs to have a thorough understanding of the composition and layers of floor screed. In order to provide a level surface for flooring materials like tiles, wood, or laminate, floor screed plays a critical foundational role. The design consists of multiple layers, usually beginning with a sub-base, then the screed itself and any necessary insulation in between. Every layer is essential to maintaining the floor’s overall quality, durability, and thermal efficiency. Builders and renovators can achieve smoother installations, better structural integrity, and more efficient building energy usage by understanding these fundamentals.
- What does the concept of scheme or pie include??
- Requirements and standards
- Required components
- Base
- Rough part
- Waterproofing
- Thermal insulation
- Finishing
- Consequences of errors and non-compliance
- Useful video
- Video on the topic
- Screed 20 cm thick. Errors!!!
- How to make a thin layer of floor screed. Thin floor screed. Floor leveler
- Large layer of floor screed
What does the concept of scheme or pie include??
One of the strongest building types is the monolithic concrete screed. It is made up of multiple layers that collectively resemble a floor pie.
The principal components of this layout:
- Base (soil and cushion).
- Rough screed.
- Waterproofing.
- Insulation.
- Finishing screed.
- Finish floor covering.

Screed diagram: Every layer is necessary for the floor pie to operate correctly.
Requirements and standards
SP 29.13330.2011 Floors establishes requirements for the floor pie. You can expect the longevity and safety of concrete coatings put in a home or apartment by adhering to them.
The minimum thickness of a concrete floor is 120 mm.
These are the essential layers that you can’t live without if you’re on a tight budget:
- Sand and gravel cushion (for floors on the ground). It must be compacted, with the help of such preparation a layer is created that is resistant to deformation.
- Rough screed (aka concrete layer, its thickness is 80-100 mm). On floors on the ground it must be present.
- Waterproofing membrane. Acts as a protective “suit” for finishing floor screed and heat insulation.
- Insulation (50-100 mm) Material you can’t do without. Reduces heat loss in living spaces.
- Finish screed with or without reinforcement (40-50 mm). Serves as a reliable base for most floor coverings.
Depending on the intended use of the space, the concrete floor has either laminate or tile flooring already installed.
Required components
A detailed description of each screed layer can be found below.
Base
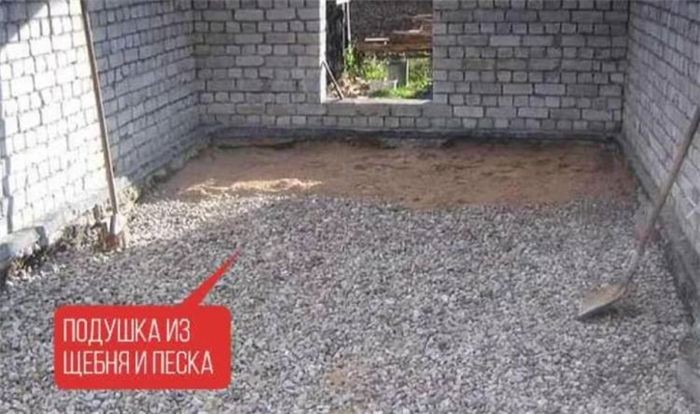
There are specifications for the bases that the covering can be installed on, per SNIP "Floors." When working, you require:
- Provide a crushed stone cushion with indentation of the mass to a depth of at least 40 microns. The thickness of the sand-crushed stone cushion must be at least 60 cm for residential buildings. Lay it in layers with a tamper, 20 cm each.
- Replace the heaving contents of the pit with non-heaving ones by preliminary excavation and backfilling, followed by compaction.
- Plan to use waterproofing if there is a risk of groundwater rising.
Because they run the risk of shrinking while in use, no natural plant soil, including peat or black soil, can be utilized as a base beneath the flooring.
Rough part
As a layer between the insulation and the soil, properly prepared concrete is essential to a floor’s strength.

Building codes require that concrete of class B22.5 or higher be used for it. 80 mm is the minimum thickness required for both public and residential buildings. The height of concrete preparation rises to 100 mm for production workshops and factories.
Moreover, the layer thickness rises by 20–30 mm if you intend to use only a rough coating and not level it with a finishing screed.
You can use concrete with a lower strength grade in specific circumstances, i.e., when there is little load on the concrete preparation. For instance, class B7.5 or M100. To arrange the floor pie in this manner, a finishing concrete screed with a class of at least B12.5 or B15 must be made. The decision is based on the finishing coating that will be applied later.
B15 concrete is used for self-leveling floors; for everything else, laminate, linoleum, or possibly B12.5.
Temperature-shrinkage joints that are at least 30% of the layer height deep must be included when laying a rough screed. Each of them is positioned perpendicular to the other. Length and dimensions vary depending on the particular construction project.
Building codes also mandate that a waterproofing layer be used to isolate the concrete preparation from the walls and load-bearing columns.
For rough screed, reinforcement is usually utilized; the structural calculations determine the pitch and rod thickness.
Waterproofing
This layer is completed twice when arranging a floor on the ground. both after the rough screed and after the sand cushion.
The purpose of the waterproofing substance is:
- Isolate from moisture located in the ground. In the case of regular flooding, this is especially important.
- Prevent excessive drying and moisture leakage from the rough screed. This method protects the strength of the concrete layer.
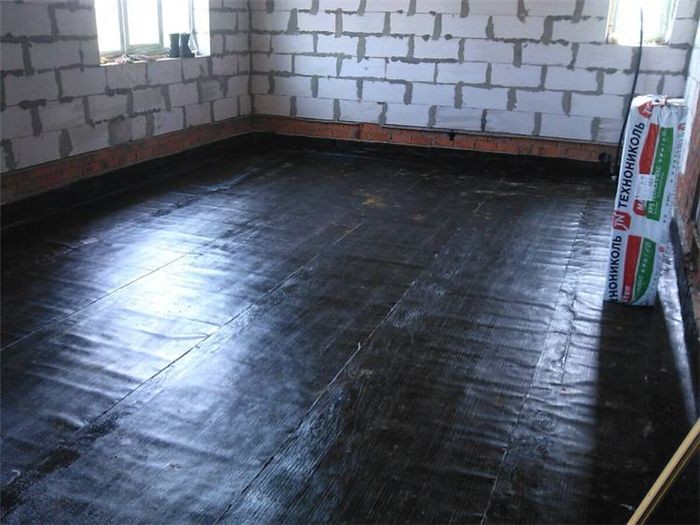
Waterproofing can be achieved with both specialty membranes and regular high-strength polyethylene films. Since geotextiles only filter water and do not hold moisture in the concrete preparation process, it is not advised to use them as an insulating layer. Additionally, they let soil vapor through.
The standards state that there should be two insulating layers for bituminous materials. Regarding polyethylene: 1.
A similar mastic that has been lightly dusted with medium-grained sand (up to 5 mm) should be used prior to applying bitumen insulation, such as roofing felt.
Thermal insulation
Between the rough and finishing coatings, insulation is applied. By calculation method, thickness is accepted as long as it is at least 50 mm. 100 mm is the maximum.
Materials that block heat can be made of both natural and artificial sources:
- mineral wool;
- Styrofoam;
- expanded polystyrene eps.

For heaving soils, the density of artificial heat insulators shouldn’t be higher than 1200 kg per cubic meter. Given that the heaviest insulation weighs no more than 600 kg per cubic meter, two layers of insulation are not possible with a standard sheet thickness of 50 mm.
Finishing
Wet, semi-dry, and dry floor screeds are used, depending on the composition and pouring technique.
Conditions for the screeds:
- Thickness of at least 40 mm when laid over thermal insulation.
- When installing pipelines, the diameter of the coating must be at least 15 mm.
- Concrete class B12.5 is the minimum. This material is used for installation of pipelines and leveling of reinforced concrete floors.
- Concrete class B7.5 when laying a concrete slab on slopes.
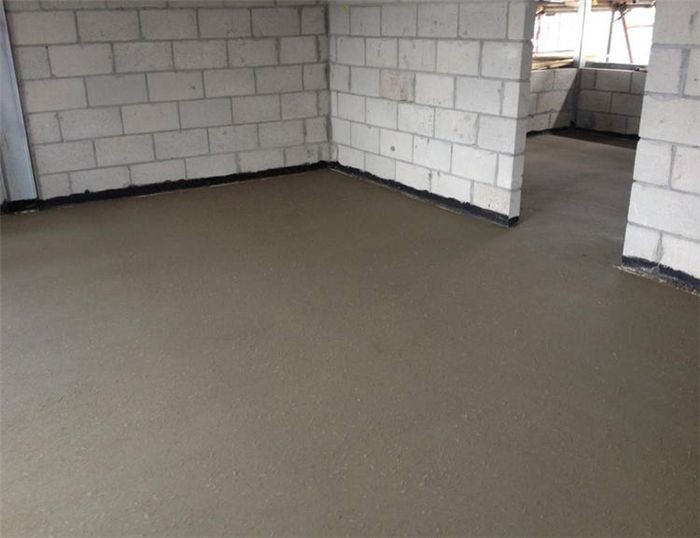
When installing a dry gypsum fiber screed, self-leveling polymer floors require sheets with a subsequent strength of at least 20 MPa, while all other floor materials (parquet or laminate) require sheets with a subsequent strength of 10 MPa.
Consequences of errors and non-compliance
The pie gender’s principal components are already listed:
- base;
- rough screed;
- water insulation;
- heat insulator;
- finishing screed and floor covering with underlay.
Many amateurs in contemporary suburban construction feel that some design elements can be omitted and that adherence to this scheme is not necessary.
For instance, if the ground is being built upon, it may not be necessary to use a rough screed; this is justified by the fact that it becomes unnecessary when compacted. Predicting the repercussions of an error of this nature is challenging.
The floor covering’s distortion is the first possibility; cracks and deformation follow. There will be space between the base and the finishing screed as a result of soil shrinkage. Furthermore, the floor itself may eventually collapse as a result of this exposed area.
It is true that you can build a solid foundation for a monolithic screed by compacting the soil, but this is only possible on non-heaving foundations and with the assistance of machines. When building something yourself, it’s best to be cautious and start with a concrete layer. And for that reason:
- It will protect against low temperatures coming from below, from the soil. In the absence of a concrete rough layer, heating energy will warm up not only the finishing screed, but also the soil underneath it. And this will lead to excessive fuel consumption.
- It will serve as a durable platform that will protect against frost heaving and those deformations that inevitably occur when the weather changes from frost to warmth and back.
Other common errors made by inexperienced builders:
- Laying thermal insulation in a layer less than 50 mm. Savings at this stage can lead to excessive consumption of solid fuel, gas or electricity, which will accordingly increase heating costs.
- Creating a floor pie less than 120 mm thick. A thin screed is not able to withstand long-term mechanical loads and will quickly lose its strength.
Another error is to use geotextiles as water resistance rather than a waterproofing membrane. This will cause the concrete coating to become wet and prematurely degrade.
Useful video
We would like you to view the following video about the subject of the article:
In order to ensure a long-lasting and practical flooring solution for building and renovation projects, it is essential to comprehend the layers and design of floor screed. The floor screed acts as a leveled base for the application of final floor finishes such as carpet, wood, or tiles.
The procedure starts with the substrate being carefully prepared. This entails cleaning the base surface completely to get rid of any dust, debris, or contaminants. By taking this step, you can guarantee good adhesion and avoid problems like uneven screed or cracking.
Subsequently, a primer or bonding agent may be used to improve the substrate and screed layer adhesion. As a result, the flooring system’s overall integrity is strengthened and the bond is strengthened.
The mixture for the screed is applied after it is ready. Usually made of a mixture of cement, sand, and water, this can also occasionally include fibers or plasticizers to increase its strength and flexibility. After the mixture is pumped or poured onto the substrate, it is leveled to the appropriate thickness.
It is crucial to keep a close eye on the drying and curing process during installation. A smooth and stable surface for the finished floor covering is ensured by proper curing, which helps reduce shrinkage and cracking. In this stage, variables like the surrounding temperature and humidity are crucial.
Ultimately, the floor is prepared for the application of selected finishes once the screed has sufficiently dried, usually over a few days or weeks depending on the circumstances. This could include heavy-duty coatings in industrial settings or ornamental tiles in homes, each selected to satisfy particular functional and aesthetic needs.
In conclusion, obtaining durable and superior flooring solutions for building and remodeling projects requires a thorough understanding of the nuances of floor screed design and installation. Builders and renovators can guarantee floors that look great and last a long time by following best practices in substrate preparation, screed application, and curing procedures.


