
The planning of a house’s foundation necessitates careful consideration of depth and width, particularly when using foam blocks. These choices are vital because they guarantee the longevity and stability of your house. Because of their insulating qualities and light weight, foam blocks have an impact on how the foundation should be built to properly support the structure.
A strip foundation’s depth is determined by taking into account various factors, including the local climate, building weight, and type of soil. Even though foam block homes are less heavy, they nevertheless need a strong foundation to disperse weight uniformly and avoid sinking over time. Deeper foundations are usually required in areas where frost heave potential exists or the soil is unstable.
The weight of the structure above and the soil’s ability to support loads both affect the foundation’s width. The width of foam block constructions needs to support the weight of the walls and guarantee stability against lateral forces such as wind or seismic activity. More surface area for load distribution is provided by a wider foundation, which increases the overall stability of the structure.
There are various steps involved in the general installation schemes for foam block house foundations. It is important to first excavate to the necessary depth and width and then to place formwork to contain the concrete. Then, in accordance with engineering specifications, reinforcement bars are positioned to ensure strength where it is most needed. The foundation is finally completed by pouring and curing the concrete, which makes it ready to firmly support the entire house.
| Aspect | Details |
| 1. Depth of Strip Foundation | Determine based on local frost depth. Typically, 1 meter is common for stability. |
| 2. Width of Strip Foundation | Depends on load-bearing capacity of soil and weight of the house. Usually, 0.6 to 1 meter wide. |
| 3. General Installation Scheme | Prepare the trench, level the bottom, add gravel for drainage, place reinforcement, pour concrete. Allow curing before continuing construction. |
- Strip foundation for a house made of foam blocks
- Kinds
- What should be the depth for aerated concrete?
- General installation scheme
- Cushion under the foundation
- Brand of concrete and reinforcement
- Installation of formwork
- Reinforcement and knitting
- Fill
- Final stages of work
- Issues of waterproofing and insulation
- Useful video
Strip foundation for a house made of foam blocks
Any external and internal load-bearing walls are supported by a continuous strip (tape) of concrete or other piece materials, known as a strip foundation. In order to create a strip of a specific height and width on top of a layer of sand backfill, a trench must be dug for construction.
Preliminary calculations based on a site survey, hydrogeological situation analysis, and other factors are applicable to all foundation parameters.
The lightest of all comparable materials is foam concrete. A building constructed of it weighs between two and five times less than a brick house of the same size. As a result, you can construct a foundation that can support less weight.
For a building of this type, the strip foundation can be greatly decreased in terms of both depth and tape width. This enables you to use less building material and perform less excavation work.

Kinds
Strip foundations come in a variety of design options.
- Monolithic. Manufactured by casting reinforced concrete directly on site.
- Made. Constructed from piece materials, from large special blocks (FBS), to bricks or other similar materials.
Furthermore, there are choices with varying depths:
- Non-buried. It is built practically on the daytime surface of the soil, without deepening. Requires an optimal combination of conditions, so it is rare.
- Shallow. The tape is immersed in the ground to a relatively small depth, not exceeding the freezing level. A common type of design that allows you to significantly reduce costs and labor with a very high-quality result.
- Recessed. Used to create support structures for massive multi-story buildings that are heavy. The tape is immersed in the ground below the freezing level, which eliminates the occurrence of heaving loads directed from bottom to top, but creates conditions for the appearance of lateral horizontal forces applied to the outer lateral surfaces of the tape. Requires careful calculation and consideration of all impact factors.
The recessed kind of tape is usually unnecessary for a foam block house. Only prefabricated or shallow monolithic options are used in construction.

This tutorial will show you how to precisely determine the width and depth of a strip foundation that is appropriate for a foam block home. We’ll dissect the procedure in detail, emphasizing workable approaches to ascertain these vital metrics. We’ll also give you a general installation scheme so you can comprehend the foundational setup needed for your building project.
What should be the depth for aerated concrete?
The hydrogeological characteristics of the site, the depth at which snow covers the ground in the winter, the makeup of the soil layers, etc. all affect the strip foundation’s depth. Since these indicators are primarily influenced by climatic features, they vary greatly amongst regions.
While some indicators are found by direct site inspection, other data is derived from SNiP tables.
It is important to remember that the primary measure of depth is the soil’s composition. In order to balance the pressure of construction and lessen vertical buoyancy loads, the depth must be increased if clay is present.
Therefore, it is thought that 1.6 meters is the ideal depth for applying tape on clay soils in Moscow and the surrounding area.
The situation is made more complex by the tape’s width. Typically, it should be 10 cm bigger than the wall’s thickness. Since aerated concrete blocks have a width of approximately 30 cm, it is necessary to create a strip that is at least 40 cm wide; however, this is not always done.
The rationale is that the tape’s weight itself matters; if it is heavier than the load, the foundation may sink. This poses a risk because the house might be destroyed as a result. As a result, the tape is made 20 centimeters narrower overall, but the top portion is longer to offer waterproofing.
For calculations, you can also use the online calculator.

General installation scheme
Construction of a shallow strip foundation follows these steps:
- Removing the top layer of soil, planning and marking the site.
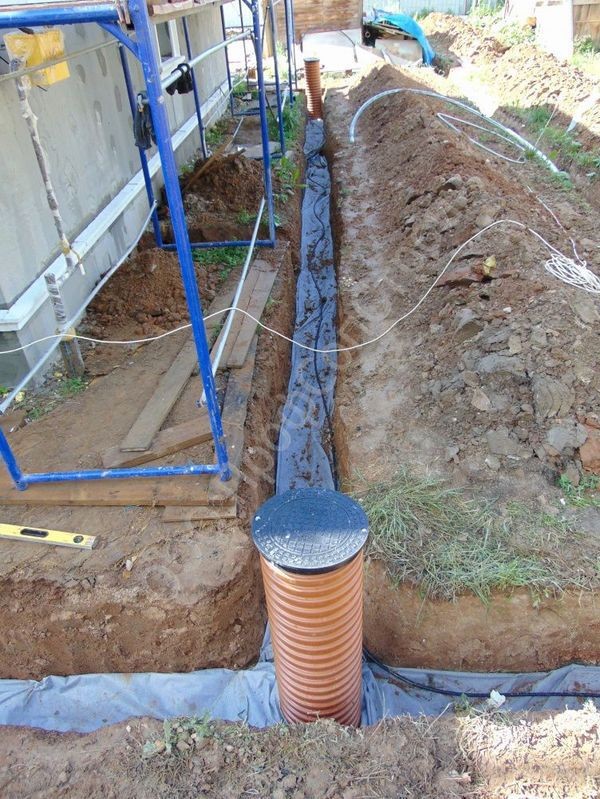
- Digging a trench to a certain depth and width.
- Creating a sand cushion.
- Assembling and installing formwork.
- Knitting the reinforced belt.
- Pouring concrete, curing until the desired degree of hardening.
- Completion of work.
Every step, without fail, needs to be completed in the right order.
Cushion under the foundation
In order to create a drainage effect and level the bottom of the trench, a layer of sand backfill is required. It is best to use river sand that has been screened, without adding any clay (this is crucial!). Backfilling is done up to a 20 cm thickness.
The pillow is thoroughly compacted and its horizontal position is checked. The quality of the seal determines whether tape subsidence is possible. Thus, reaching maximum density is essential. If there are no signs of tampering, the quality of the tamper is high. This can be determined by walking over the pillow.

Brand of concrete and reinforcement
The main application for M200 concrete is pouring strip foundations. Although concrete with a lower density is not advised, this material is strong enough to support larger buildings.
Although the material’s quality varies, in this instance, it won’t hurt to have a little margin of safety.
The working reinforcement rods for the tape beneath the foam concrete have a thickness of 12 mm, and 8 mm rods can be used for vertical (smooth) reinforcement. Considering the small size of the tape, this is more than sufficient.
The rods should have the same diameter when using composite (fiberglass) reinforcement because a smaller diameter can cause deformations when the concrete is poured.

Installation of formwork
You must stock up on wooden-edged boards in order to create formwork.
Because the tape is so small, 25 mm thick lumber works well, but if the foundation’s dimensions are sufficiently large, 30 or 40 mm thick boards would work well.
The formwork is put together gradually:
- Next to the trench, shields are assembled with a width of no more than 10-15 cm than the height of the tape.
- The shields are lowered into the trench, aligned along their axes and connected with crossbars. Their size determines the width of the tape.
- From the outside, the shields are fixed with inclined stops and vertical support bars.
It’s important to keep an eye on how tightly the panels are assembled. No more than 3 mm of gaps should exist because they will allow concrete to leak out. Should any gaps be discovered, they need to be filled with wood or hammered with wooden slats.
Reinforcement and knitting
The reinforcement frame is assembled in accordance with the prescribed plan. Four working rods—two at the top and two at the bottom—must be arranged in a spatial lattice with a 2 to 5 cm concrete immersion depth. Installing vertical elements (clamps) occurs in 40-cm increments.
Carefully thought-out corners are where extra rods are inserted to reinforce the joints.
Electric welding can be used to join the rods, but annealed steel wire (1–1.5 mm) is typically used for reinforcement of this size. A 25–30 cm long piece of wire is bent in half, and the rod connection is then seized diagonally from below.
The ends rise up, seize the loop with a unique hook, and tightly pull the rods together by twisting it four or six times. There is a strong connection, and operating skill picks up quickly.


Fill
Filling has to be completed all at once. This is crucial because freshly poured concrete cannot be joined to already-set concrete sufficiently; if a break lasts longer than a day, you will need to stop pouring and wait until the concrete has fully set.
Simultaneously, the ability to produce a complete monolith will diminish, necessitating the organization of work to be completed in one sitting.
Ordering ready-made concrete is advised as it will be delivered right to the construction site.This will help obtain material with guaranteed and uniform quality while also freeing up workers.
To ensure that the concrete spreads uniformly along the whole length of the formwork, pouring is done from various points. Use a regular fork or a vibrating machine to remove air bubbles.
Once the pouring process is finished, the tape’s surface is smoothed, and the formwork is covered with polyethylene to keep out rain and sunlight.

Final stages of work
For 28 days, the cast tape is cured. Watering it needs to be done every four hours for the first three times, and then every eight hours for a week. By doing this, you can balance the tape’s inner and outer layers’ humidity and stress.
After pouring, the formwork is taken down ten days later.
Even if you think the concrete is already fairly hard, you shouldn’t try to shorten the lengthy curing period. One essential component of the structure that prevents a free-for-all approach to technology is the foundation.
Issues of waterproofing and insulation
Each and every surface of the tape is waterproofed. For horizontal ones, bitumen mastic is applied in between two layers of roofing felt for insulation. Before the tape is poured, the bottom layer is put in place beneath the formwork, and the top layer is laid once it has reached technological hardness.
Bitumen mastic, hot tar, or another material is used to coat the side surfaces. Contemporary impregnations that isolate concrete’s moisture at the capillary level have shown good results. Roofing felt can be applied to walls by taping it onto a layer of bitumen mastic.
Additionally, the tape needs to be insulated from the inside as well as the outside. Liquid polyurethane foam or polystyrene foam are used for this purpose. The owner’s financial situation and material availability are taken into consideration when choosing a material.

Useful video
You will discover how to install a strip foundation by watching this video:
To ensure the stability and longevity of a foam block house, it is essential to comprehend the width and depth of the strip foundation. The soil’s composition and the weight of the building affect the depth of the foundation. A minimum depth of 1.2 meters is generally advised for foam block structures in order to offer sufficient support and avoid settling over time.
In order to determine the width, the load-bearing capacity needed to evenly distribute the house’s weight must be taken into account. This computation accounts for variables like the size of the house, the kind of foam blocks utilized, and regional building codes. To prevent uneven settling and help spread the load, use a wider foundation.
After the depth and width are determined, the installation plan calls for digging the trench to that depth and width while making sure the bottom is level. The trench will then need to be reinforced with steel bars or mesh and covered in a layer of gravel for drainage. The foundation is then formed by pouring concrete into the trench. The foam blocks are placed directly on the foundation after curing to make sure they match the structural blueprints and layout of the house.
Homeowners can guarantee their foam block house has a sturdy foundation, is resistant to soil movement, and will maintain its structural integrity for many years by adhering to these guidelines.


