
Correct wall puttying is necessary to create walls that are flawless and smooth. Whether you’re painting a surface or trying for a flawless finish, knowing how to do this can greatly improve the look of your house. Filling holes, leveling uneven surfaces, and making sure the texture of the walls is consistent are all part of wall puttying.
Start by giving the walls a thorough cleaning. Sandpaper and a scraper can be used to remove any loose paint, dust, or other debris. To guarantee a smooth base for the putty, clean the surface with a damp cloth. This is an important step because it improves putty adhesion and guards against unevenness or future cracks.
Next, decide which kind of putty is best for your walls. There are various formulations available, including putties based on cement or gypsum. Choose one that complements the type of material on your wall and the desired degree of smoothness. If you’re not sure which type to use, speak with professionals at your neighborhood hardware store.
Using a trowel or putty knife, apply the putty in thin layers. To ensure even coverage, begin at the top of the wall and work your way down. To distribute the putty uniformly throughout the surface, use firm, smooth strokes. A layer that is applied too thickly all at once should be avoided as this can cause uneven drying and cracking.
| Step 1: Prepare the Surface | Clean the walls thoroughly to remove dust and debris. | |
| Step 2: Apply Primer | Use a primer to en Cleaning Up | Remove dust and clean the area before painting or applying wallpaper. |
- How to get a smooth surface?
- Types of mixtures
- How to make a choice?
- Calculation and necessary materials
- Tools
- Instructions for applying putty
- Surface preparation
- Starting layer
- Lighthouse method
- Finishing
- Clothing of cracks
- Alignment for painting
- Expert advice
- Video on the topic
- Wall putty for painting
- Master class: puttying walls under wallpaper
- How to putty walls without having to sand. Notes, recommendations.
- HOW TO PUTTY WALLS (Beginner, Easy and Simple)
- A professional master paints the walls perfectly with putty
- Putty as a rule #repair #apartment renovation #master #finishing #diy #construction #plaster #stroydvizh
- This is how you putty the walls! Using Losev"s lamp #shorts
- How to quickly PUTTY A LARGE VOLUME VERY EASILY #recommendations #diy #repair
How to get a smooth surface?
You must correctly prepare the base for finishing work before you can create a flat surface on your own. Puttying and priming must be done correctly. The puttying process is easy. It’s crucial to follow the steps in order to handle construction tools properly. We will reveal the techniques of proper wall puttying in this article.
Types of mixtures
For non-professionals, selecting from the wide range of compositions available on the building materials market can be challenging. The material varies in terms of composition, grain size, application method, and other factors.
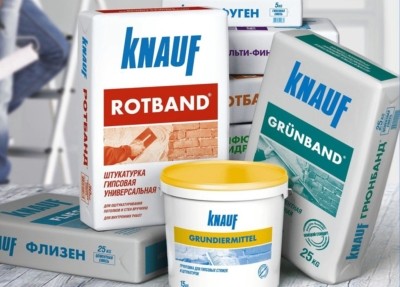
- Types of putty by purpose are as follows:
- starting (leveling);
- finishing (decorative);
- universal.
The material’s grain size is what distinguishes each kind of putty from the others.
-
Starters have high grain size, excellent strength and adhesion. They are needed to level the base with visible defects up to 10–15 mm, applied in a layer from 3 mm to 2 cm. They can be used as an independent leveling agent.
- a dry mixture that requires dilution with water in certain proportions;
- ready mix.
- Dry compounds are the most popular, as they are inexpensive and have a long shelf life.
- Ready-made formulations can be purchased in small jars or buckets. The shelf life is shorter than that of the dry semi-finished product, the price is significantly higher.
- cement base;
- plaster;
- polymer (acrylic, latex, polymer-cement compositions).
- Cement ones are characterized by high strength, moisture resistance, low price, and resistance to low temperatures.
- Gypsum is suitable for painting walls. An ideal surface is ensured when using it.
- Polymer ones give ideal results, but the price is very high.
How to make a choice?
Puttying can be done with any kind of material. Gypsum can be used in bedrooms, hallways, living rooms, offices, and other spaces with typical humidity levels. Cement or acrylic should be used if the project will be done in a bathroom.
You’ll be guided through a methodical procedure that yields polished results in our putty wall guide. Everything you need to know will be covered, from prepping the wall surface to selecting the appropriate tools and materials. Before painting or applying wallpaper, make sure your walls are perfectly smooth by following expert tips on methods like sanding and applying multiple layers. This article offers helpful guidance that anyone can implement, whether they’re working on a small repair or a whole room, to help them achieve a smooth finish that improves the appearance and longevity of their walls.
Calculation and necessary materials
Consumption of materials is dependent upon:

- on the condition of the walls (are there any cracks and how deep are they, roughness, curvature);
- further processing (gluing, painting, whitewashing);
- does the master have experience?.
The manufacturer’s label will indicate the putty mixtures’ ideal consumption rates. Typically, they are given based on a starting layer thickness of 1 cm and a finishing layer thickness of 1 mm.
You must estimate the necessary layer thickness and assess the base’s quality before you can perform the computation. Consider whether to putty the entire thing or just the flaws. A 1 mm starting putty and a 0.5 mm finishing putty will be sufficient if the wall is smooth.
For instance, a 2.6 x 3 = 7.8 m2 flat wall has some flaws and tiny cracks. The starting putty’s approximate layer is 3 mm (3 kg per m 2). The dry material amount is calculated as follows: 7.8 × 3 = 23.4 kg. About 8 kg are needed to complete.
Tools
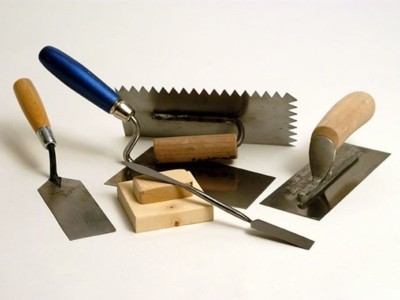
The bare minimum of puttying tools:
- Mixer (drill with attachment). Required for dry mixture, not ready-made mass.
- Set of spatulas. Spatulas of any size can be useful – both small and large, 40–50 cm. Having one wide spatula, it will be difficult to putty behind pipes, radiators, etc. d.
- Rollers, primer brushes. To improve adhesion, you need to pre-prime the base. You can do this very quickly with a roller.
- Rule. To putty a thick layer or level the walls, you will need a long metal rule. You can use it to level the layer to get an even base.
- Level or plumb line for installing beacons (starting putty). To level the base level with the starting composition, take this tool.
- Sandpaper for grouting after drying. The finer it is, the more beautiful the surface will be. Fine sandpaper is for grouting the finishing mixture, coarse and coarse sandpaper is for starting.
- Manual skinner. Handle and clamp with a plane on which the sandpaper is attached.
- Container for stirring the solution.
Instructions for applying putty
If the work is being done inside, the space needs to be dry and have a temperature between +5 and +25.
Surface preparation
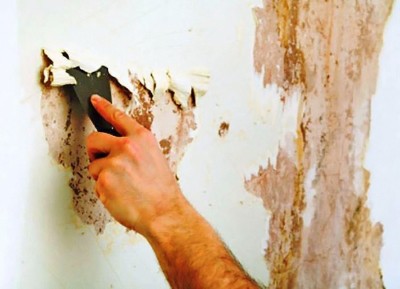
Use a spatula to wipe down the walls. Treat corners, spaces close to the floor, and the ceiling with caution. The aircraft needs to be level.
Prepare the foundation using any concentrated deep impregnation primer. Pour it into a bucket or bath after diluting it as directed. Apply a thick layer to all corners, surrounding areas, and walls using a brush or roller. A day or so should pass before the surface is totally dry.
Dilute the putty as directed on the package. Using a mixer, blend until smooth. Add the dry mixture if the resulting mass slides off the spatula, and vice versa. Elasticity is required; a very thick solution is not possible. Wait three to four minutes after the initial stir, then stir once more. The solution should have a thick, sour cream-like consistency.
Starting layer
The plastered surface is coated flawlessly with the starting solution. Each layer’s thickness should not exceed 10 mm, and the total thickness should not exceed 30 mm.
You can spread the putty solution over a painting mesh that has been installed to get the best possible putty surfaces. The walls will have more smoothness and strength.
- Use a spatula to scoop up a lot of solution and apply in broad strokes;
- you need to act confidently and quickly;
- when applying, the tool is pressed firmly against the base at an angle;
- spread the sagging with an empty spatula or remove.
Large irregularities are treated with the solution and given time to solidify. After that, you can finish leveling the surface. A layer one millimeter thick can be made smooth. One square meter will require 0.8–0.9 kg. The consumption will increase tenfold if there are anomalies and cracks up to 10 mm. Sandpaper is used to smooth the surfaces after the solution has solidified.
Lighthouse method
A lighthouse is a vertically positioned strip of metal, plaster, or wood that is leveled to ensure it is vertical. A fast-drying gypsum solution has beacons attached to it.

Arranged horizontally. This is the point at which the rule is useful. For this reason, this approach is far less common. Because it is more expensive.
Pulling together from the bottom up, the contents of the bucket are arranged in the space between the lighthouses. There could be visible air bubbles on the surface. They must be taken out; use a spatula to break them apart and a rule to level the surface. You should account for the fact that defects will overlap and not continue after you reach the ceiling.
Following leveling, apply the rule top to bottom for thirty to forty minutes. The beacons are placed in place by this action.
Finishing
They start with the finishing work after completing the initial puttying. After them, the tiniest pores and fissures will be removed, leaving the surface flawlessly smooth. Apply a very thin layer of the solution.
Clothing of cracks
Use mixtures of gypsum to cover up cracks. Santegips is a more elastic material, but it requires a lot more time to harden. Apply a primer, putty, and then a knife or other sharp object along the entire length of the surface to increase roughness.
Alignment for painting
The alignment process is a strenuous task. It will be simple to paint in the future if the surface has the perfect structure. Frame structures and drywall are used in tandem to align the base.
You must get ready in order to fix them:
- drywall;
- galvanized profile;
- screws;
- dowels;
- screwdriver;
- gypsum -plate knife.
Towards the end, putty will be necessary. To use a raw method (plaster, putty), you’ll need:
- beacon profiles;
- primer;
- a net for reinforcement;
- screws;
- plaster;
- trowel for processing internal corners;
- putty.
How to make the base level:
- determine the alignment method;
- if it is drywall, choose the method of fastening the sheet: frame or glue;
- when choosing the wet method, clean everything from old materials, install beacons, apply plaster in 2 layers, smooth out irregularities and seams, treat the base;
- After all stages, the surfaces will become smooth, then paint can be applied.
Expert advice
You should heed the following professional advice in order to putty the walls smoothly:
- remove old finishes;
- prime the surface and let it dry;
- work with two spatulas: narrow and wide (putty with the second, put the mixture on the spatula first);
- keep the spatula at an angle to the surface;
- the uniformity of the layer should be maximum;
Use a thin layer of the mixture and move the spatula in semicircular motions as well as in one direction to prevent streaks.
In order to get the best outcome possible, you should adhere to the advice provided in this article. Your walls will be the smoothest if you select the proper mixture, properly prep the surface for work, and adhere to the instructions.
One of the most important steps in creating a perfect finish for your interior spaces is smooth wall puttying. You can improve the overall appearance of your home by making sure your walls are prepared for painting or wallpapering by adhering to a thorough procedure and professional advice.
First, give the walls a thorough cleaning. This entails clearing away any loose particles, dust, or debris. Use the appropriate filler to fix any holes or cracks, then let it dry fully. Using sandpaper, level out uneven surfaces to provide a consistent base for the putty.
Select the appropriate putty type for the task. Use a setting compound for larger areas or a ready-mixed filler for smaller repairs, depending on the surface and depth of the imperfections. Using a putty knife, evenly apply the putty, building up coverage in thin layers so as to avoid ridges or bumps.
After applying the putty, let it dry in accordance with the manufacturer’s recommendations. Do not rush this step because adequate drying provides a strong base for the subsequent finishing steps. Once the surface has dried, lightly sand it once more to create an even and smooth texture that will prepare it for painting or applying wallpaper.
Although it takes patience and attention to detail to putty walls smoothly, the results are well worth the effort. A polished finish that accentuates the beauty of your interior spaces is ensured by taking the time to plan and carry out each step with care.


