
One of the best ways to finish your home with a smooth, long-lasting, and attractive finish is to lay tiles on a self-leveling floor. Self-leveling floors offer a level surface that makes tiling easier, lessens the possibility of uneven tiles, and guarantees a polished appearance. Knowing the steps involved can help any DIYer, no matter how experienced, make the project more fun and manageable.
It’s critical to correctly set up your self-leveling floor before beginning. To avoid interfering with the tile adhesive, make sure the floor is dry, clean, and free of any debris. When the tiles are prepared properly, they will stick better and last longer, preventing problems like lifting or cracking over time.
Next, decide which tile and adhesive are best for your project. Because different environments require different tiles and adhesives, take into account things like moisture content, foot traffic, and aesthetic preferences. As soon as your supplies are prepared, carefully consider how to arrange the tiles. Planning ahead is essential to creating a tidy and balanced look, particularly in areas that are visible, like bathrooms and kitchens.
Work methodically as you start to lay the tiles, making sure to apply the adhesive evenly and place each tile precisely. To keep uniform spaces between tiles for grouting afterwards, use spacers. Here’s where taking your time will pay off with a perfect finish. Before grouting after the tiles are installed, let the adhesive cure in accordance with the manufacturer’s instructions.
The last step that completes the picture is grouting. To fill in the gaps between your tiles, carefully apply grout that matches the color of your tiles. After the grout has dried, give the tiles a thorough cleaning to get rid of any remaining grout, then enjoy your gorgeous new floor. You can install tiles on your self-leveling floor to a professional-grade standard with perseverance and attention to detail.
- What is self-leveling floor
- Which is better: concrete screed or self-leveling floor
- Varieties
- How do tiles dry?
- Video on the topic
- We poured the self-leveling floor and started laying 120*60cm porcelain tiles.
- Is it possible to lay porcelain tiles and tiles on a gypsum self-leveling floor, yes or no? What will happen?
- Laying tiles in 2 minutes on a self-leveling floor in the bathroom
- Tiles and self-leveling floor
What is self-leveling floor
In order to lay tiles on the floor, a good base must be provided. For this, cement screed is frequently utilized. It doesn’t always give the surface enough smoothness. When installing tiles, using self-leveling material as a base enables you to achieve a more uniform coating that satisfies the strictest specifications.
Polymer materials are used to make this base. It serves as the foundation for the finishing coat. Self-leveling material makes it possible to remove unevenness from the surface it is placed on, providing a foundation for further work.
It possesses the following qualities:
- It is usually designed to correct irregularities up to 80 mm in size.
- The surface is self-leveling.
- The material is resistant to moisture and low temperatures.
- Self-leveling floors provide high mechanical strength of the coating.
- When laying, the minimum layer thickness is 1 mm.
- When installing heated floors, the technology in question can be used to replace cement screed.
- This material is suitable for indoor and outdoor use.
Many polymer mixtures go by the common name "self-leveling floors." They are offered for sale as powder. The polymer mixture is applied to the floor base after being poured with water. The owner makes the independent decision about whether self-leveling flooring is required for tiles.
Which is better: concrete screed or self-leveling floor
The following are the benefits of this mixture:
- Relatively short drying period. In just a few days the surface will be ready to continue work. Concrete takes four weeks to dry completely.
- Universal use available: the mixture can be used for concrete, wood and other types of coating. You can also use previously laid tiles as a base.
Occasionally, a cement screed is selected. The procedure’s low cost is this option’s primary benefit. It must be considered when determining whether tiles require a self-leveling floor that this layer cannot be any thinner than 3 cm, as this will cause it to lose strength.
Beacons are used to guarantee that the cement-concrete screed has a smooth surface. Their use calls for a great deal of labor and close attention. Floors that level themselves do so without the aid of beacons. Additionally, the employee doesn’t need any specialized knowledge. They prepare far more quickly than they would with a screed.
Another factor is how long the drying process takes. Only a few weeks from now can the next phase of work start. Thus, self-leveling floors are typically the preferred option among builders when selecting a suitable base.
The installation of tiles on a self-leveling floor is a simple procedure that guarantees a level, steady, and long-lasting surface. By eliminating irregularities and imperfections in the subfloor, this technique makes preparation easier and produces a longer-lasting, professional finish. Your renovation project will be simpler and more effective if you follow these simple steps, which include pouring the self-leveling compound and waiting for it to set, to create the ideal base for your tiles.
Varieties
Self-leveling floors come in a variety of forms and can be mineral or polymer based. The rules governing their use are determined by the unique qualities of each of them.
In the first instance, the composition is based on epoxy resins, methyl methacrylate compounds, and polyurethane compounds. Not only do these floors let you install tiles, but they also qualify as a type of finishing coating. The cost of mineral is far less than that of polymer coating. It isn’t typically the foundation for tile coverings.
Mineral self-leveling floors are used for this purpose. Cement is the main component. Different plasticizer additives are also used. They increase the liquid content of the mixture, enabling it to spread equally across the surface. These mixes fall into the following categories:
- Basic compounds are used in cases where there are significant irregularities. These are considered protrusions, pits or cracks up to 80 mm high.
- Medium mineral mixtures are used if the size of irregularities does not exceed 30 mm.
- Finishing compounds directly create a smooth surface for laying tiles.
The properties of the surface to be treated are taken into consideration when selecting the best option.
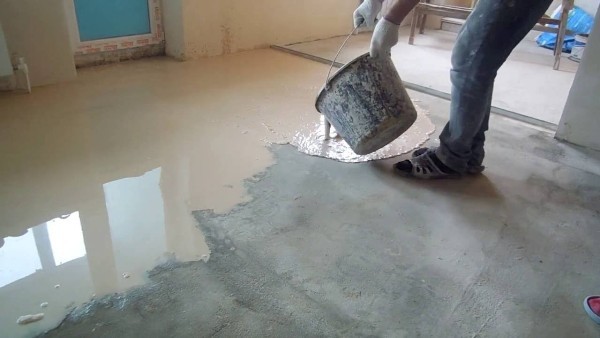
How do tiles dry?
In contrast to mineral compositions, polymer compositions dry much more quickly. In this instance, 3–4 days are sufficient for full hardening. Following that, you can begin tiling the floor. The composition’s chemical characteristics govern such a high setting rate.
Cement serves as the foundation in mineral mixes. It undergoes two stages of hardening:
- Setting occurs first. It is a consequence of the hydration reaction and the formation of a colloidal gel. The composition gradually increases viscosity and then hardens. This process begins after 30-40 minutes and lasts for 2-12 hours depending on the specific composition. Once this process is complete, the surface can be walked on, but it will not yet be ready for tiling.
- Hardening occurs due to the formation of crystalline structures in the material. The floor hardens slowly over a period of time.
The surface will be 60%–80% strong after one to two weeks. In 14–28 days, the hardening process will be finished. To reduce the amount of time that the composition must dry, additives are added. Gypsum is utilized as a base in certain mineral mixtures. In this instance, setting takes place in just 30 minutes, and full hardening takes 7–14 days. Read the instructions for the particular mixture to determine how long it takes to lay tiles on a self-leveling floor. It gives an estimate of the number of days needed for it to fully solidify.

| Step | Description |
| 1 | Prepare the floor |
| 2 | Apply primer |
| 3 | Mix the self-leveling compound |
| 4 | Pour and spread the compound |
| 5 | Allow to dry |
| 6 | Lay the tiles |
| 7 | Apply grout |
Any space can be transformed by adding tiles to a self-leveling floor to give it a polished, polished look. Making sure the floor is level creates the perfect surface for the tiles to stick to, which lowers the possibility of uneven tiles and other problems in the future. This technique improves the finished look while streamlining the tiling process.
The secret is to prepare. Ensure that the floor is primed and cleaned before using the self-leveling compound. As instructed by the manufacturer, let it set completely. This produces a stable, smooth base that facilitates and enhances tiling.
Start in the middle of the room and work your way outwards when laying the tiles. This preserves the pattern’s symmetry and eye-catching appearance. As you go, make sure the tiles are level and leave consistent gaps between them by using spacers. Check alignment frequently, and correct any issues as soon as they arise.
Prior to grouting, allow the adhesive to completely dry after all of the tiles are in place. Grout should be applied carefully, filling in all joints equally. Clean the tiles to get rid of any leftover grout after it has dried. The lifespan of your tiled floor can be increased by properly sealing the grout to keep it safe from moisture and stains.
You can have a long-lasting, aesthetically pleasing tiled floor by following these steps. Even a do-it-yourself enthusiast can achieve a professional-quality finish on a self-leveling floor with perseverance and close attention to detail.


