
Selecting the appropriate plaster can have a big impact on the durability and aesthetics of finishing walls and ceilings. Volma plinth plaster is a well-liked product on the market because of its adaptability and simplicity of use. This article explores the main features of Volma plinth plaster, providing information on its advantages and disadvantages, financial considerations, and crucial application instructions.
Because Volma plinth plaster can give surfaces a uniformly smooth finish, it is preferred by both professionals and homeowners. This plaster is made to give outstanding adhesion and coverage, guaranteeing a polished appearance whether you’re finishing a freshly built area or remodeling an old one. In order to achieve a seamless finish, its formulation usually contains additives that improve workability and reduce cracking.
The simplicity of application of Volma plinth plaster is one of its best qualities; it can be used by both experienced contractors and do-it-yourselfers. Plaster is typically applied evenly to surfaces that have been prepped by first mixing it with water to the appropriate consistency. This ease of use not only saves time but also makes it possible to finish projects quickly, regardless of how big or small they are.
There are considerations with Volma plinth plaster, just like with any building material. Although it has good adhesion and coverage, to get the most out of it, the surface must be properly prepared. To improve adhesion and stop problems like peeling or cracking over time, surfaces should be cleaned and primed. Furthermore, Volma plinth plaster’s durability and aesthetic advantages frequently make the initial cost more reasonable than that of less expensive alternatives.
To sum up, Volma plinth plaster is a highly adaptable and dependable option for attaining sleek, long-lasting surfaces on walls and ceilings. Its superior adhesion and coverage, along with its ease of application, make it a top choice for a variety of building and remodeling projects. Both professionals and homeowners can choose plaster for their next project with knowledge of its advantages and disadvantages, costs, and application best practices.
- What kind of material is this?
- Specifications
- For what purposes is it suitable??
- What tools will be needed to complete the work??
- Rules for preparing walls
- Recipe and technology for preparing the solution
- How to calculate the required amount of dry mixture?
- Stages of work execution
- Surface treatment after application
- Possible errors and ways to eliminate them
- Price
- Advantages and disadvantages of raw materials
- Video on the topic of the article
- Video on the topic
- VOLMA-Aquaslayer / Instructions for using cement plaster
- VOLMA-Akvaplast / Instructions for using cement plaster
- VOLMA-Layer / Instructions for using gypsum plaster
- VOLMA-Socle / Instructions for using high-strength cement plaster
- Gypsum or cement plaster, which is better??
What kind of material is this?
Choosing the right material before beginning plastering work can be difficult at times. Among the greatest finishing building materials available in Russia, VOLMA holds a prominent position.
The company makes other building mixtures besides plaster, but this one is especially well-liked by builders. The material’s primary benefit is its adaptability.
Benefits

- There is no shrinkage even with dense application of the material.
- High levels of adhesive properties, that is, adhesive abilities that help to finish the surface with decorative materials.
- Excellent composition, harmless and non-toxic.
- Preliminary preparation of walls before application is not required, only treatment with a primer for degreasing.
- After drying, it forms a glossy surface that does not require additional finishing.
- Elastic material, easy to apply, pleasant to work with.
- Does not form cracks, does not peel off, even after several years.
The Volgograd Gypsum Plant produces the plaster used in VOLMA plinth. The business was founded in 1943. The enterprise was founded in the aftermath of the Battle of Stalingrad, when the city needed to be restored immediately.
Since then, there have been numerous management changes. The current legal entity was established in 2005 and renamed as "Volgograd Gypsum" in 2007. 2008 saw a change in the corporate identity and the approval of the VOLMA brand.
Specifications
A cement-reinforced plaster mixture is called VOLMA-Socle. The substance is primarily Portland cement mixed with a variety of mineral additives intended to enhance its technical and functional properties. withstands moisture penetration, is long-lasting, and does not fracture even after many years of use.
The goal is to level walls in order to protect the building’s foundation and the integrity of the materials used to construct it beneath the plaster. used as a covering for the foundation, first floor, or basement of a building.
Suitable for use in high-humidity areas (saunas, showers, unheated cellars, etc.) and the basement. Suitable for painting, this substrate is used for decorative coatings, tiles, and real and artificial stone.
The mass is gray in color, has a F35 frost resistance, absorbs no more than 8% moisture, operates between -40 and +50 degrees, and has a maximum layer thickness of 3 cm.
For what purposes is it suitable??
VOLMA-Tsokol mixture suggested for the subsequent categories of foundation materials:

- monolithic concrete;
- slag concrete;
- from gas blocks;
- brick, both regular red and ceramic;
- natural and artificial stone;
- expanded clay concrete;
- rubble concrete;
- hollow ceramic slabs;
- sand-lime bricks;
- rubble stone.
What tools will be needed to complete the work??
You’ll require:
- Scraper for removing dust and unevenness from the mortar on the plinth wall.
- Wire brushes to remove dirt.
- Sandpaper for cleaning the surface.
- Spatulas.
- Bucket or basin for construction mixture.
- Mixer or drill with an attachment for stirring the mixture.
- Grater for scribbling material.
- The rule is to control the plane of the wall, maintain the degree of angle.
- Trowel, mix and spread plaster on surface.
- Primer brushes.
- Level and plumb.
Supplies you’ll need:
- primer;
- dry plaster itself VOLMA-Sokol;
- water.
Rules for preparing walls
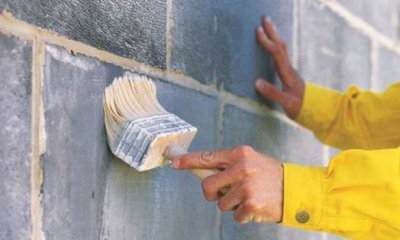
The working surface needs to be cleared of any debris, dust, and extra connecting mortar—if any—before applying the plaster, if it was used during construction.
Efflorescence is removed from the brick base. Eliminate oils and bitumen, as their consistency keeps the plaster from sticking to the surface.
Any separations or imperfections in the wall are mechanically eliminated by using a scraper or spatula to knock them down.
Anti-corrosion liquids are applied to the material to prevent rust when fittings or other metal structures are present. In the event that the base has cracked or if any building material has broken off, these areas need to be reinforced with cement and left to dry completely. Reinforcing mesh (cell size 5*5) is used to cover vents and openings.
In order to prolong the material’s lifespan and prevent water from the plaster mixture from seeping into the base wall, the wall must be primed before plastering.
For surfaces made of brick, cement sand, or lime, the manufacturer advises applying a single coat of primer bearing the VOLMA-Universal brand. Two to three layers will be needed if the surface is porous and absorbs a lot of moisture.
You must wait an hour after applying the first layer before applying the second. We suggest using a sprayer to apply VOLMA-Contact primer on concrete bases.
Primers are worked on in dry, warm weather. The solution should dry for longer than the one hour recommended by the instructions if there is high humidity or extremely cold weather outside (check the condition).
Recipe and technology for preparing the solution
To get the solution ready, you’ll need:
- large container (basin or bucket),
- dry plaster mixture VOLMA-Sokol,
- water at room temperature.
180–200 grams of liquid are calculated for every kg of dry mixture. Verify the consistency and add plaster or water if needed to get the right shape for the solution.
The solution is combined with a mixer to ensure that there are no lumps left. The final mixture ought to flow off the trowel and have a moderate density. Wait three to five minutes after the initial stir; the mixture’s ingredients ought to have dissolved by then. Next, stir once more.
It is not advised to make a large amount of the solution because it solidifies two hours after mixing. Cover the base and cook in small batches.
How to calculate the required amount of dry mixture?
You must measure the area of the surface that needs to be treated before you begin. Use a building level two meters long or a plumb line to measure the smoothness of the walls. The task is to determine the average thickness of the plaster layer and the degree to which the surface deviates from the strict vertical.

The dry plaster mixture formula is X = (Pop * C) * T, where:
- X is the required amount of mixture;
- Pop – area of the treated surface;
- C – mixture consumption at a standard layer thickness of 10 mm;
- T – average layer thickness required in a particular case.
The obtained result is divided by the mixture volume contained in a single bag. This yields the quantity of bags needed to plaster the base.
In this post, we examine the Volma plaster for plinths, covering its advantages and disadvantages, evaluating its financial viability, and offering helpful application tips. We’ll talk about how Volma plaster improves plinths’ visual appeal, toughness, and ease of upkeep. We’ll also go into common problems users might run into and offer solutions. Whether you’re thinking about using Volma plaster for a renovation or new build, this review tries to give you the knowledge you need to make an informed choice.
Stages of work execution
Phases of the project:
- As a rule, the base has unevenness. To level the surface, plastering is carried out along the beacons. To do this, prepare a small amount of solution and apply it vertically along the base wall with slaps. The distance between the “marks” should be approximately 30 cm.
- Press the beacon profile into the resulting plaster marks. Level its position. Install profiles at the corners of the building in the same way. Then wait 4 hours until the mixture dries completely.
- Afterwards, gradually apply plaster to the surface using the same slaps using a trowel, grater or spatula. Places where beacon levels are installed should be moistened with water for better adhesion of materials.
- The applied solution will be leveled using the rule (its length should be 10-20 cm greater than the distance between the beacon levels).
- Check vertical deviation. To do this, use a building level 2 m long, the permissible deviation is no more than 5 mm.
Rainy weather is not a good time to work with plaster.
Surface treatment after application
The blend solidifies within 4 to 7 hours. The surface should then be rubbed and misted with water. Felt or polyurethane film are used for grouting (using it will result in a rough surface).
The plaster ought to air dry. Using heat guns or any other device that dries out the surface is prohibited. Cracking and work permitting could result from this.
Since the work is being done outside the building, it is advised to use a canopy to protect against potential precipitation and excessive UV radiation exposure. It will shield you from hypothermia in the winter.
In accordance with the manufacturer’s instructions, complete drying takes place in 28 days. A smooth, perfect surface for additional cladding and decorative processing is the outcome of properly executed technological processes.
Possible errors and ways to eliminate them
Typical errors

- The consistency of the solution does not meet the requirements. If there is a lot of water, the mixture slides down; if there is not enough water, it forms lumps. To fix, add the missing ingredient.
- Do not add water to a dry mixture that has been completely emptied from the bag. Mix the ingredients gradually so that no lumps form.
- Do not use water instead of primer. After the liquid evaporates, no properties that hold and protect the wall will remain. Use only a primer; give preference to those recommended by the manufacturer of the plaster mixture.
- If the plastered surface exceeds 80 cm in height (for example, it is a basement floor with a height of 1.5 meters), it is necessary to use a retaining mesh along the entire height. Then the material does not deform under the weight, and the shrinkage of the building will not affect the coating in any way.
- The plaster should lie flat under the beacon levels; there is no need to level it. Otherwise cracks may appear. Do not remove beacons.
- Apply the plaster from top to bottom so as not to spoil the finished surface.
If you miss the drying period, all of your hard work will be lost. As directed, let each coat of primer and beacon levels dry separately for as long as is required.
Price
The price of a 30 kg bag of dry plaster VOLMA-Tsokol starts at 259 rubles. The seller’s markup determines the price difference.
Advantages and disadvantages of raw materials
Benefits
- affordable price;
- uniform color;
- durable;
- fine grinding;
- minimal shrinkage;
- can be stored for a long time under proper conditions.
Drawbacks:
- according to reviews, they come across a low-quality mixture from a plant in Chelyabinsk;
- short shelf life of the finished solution.
This section contains all of the most crucial and practical information regarding plaster finishing a basement.
Video on the topic of the article
Review of Volma-Tsokol plaster in video form:
Selecting the appropriate plaster for your Volma plinth necessitates considering several aspects. For remodeling projects, Volma plasters are renowned for their high caliber and adaptability. They provide a variety of choices to meet various functional and aesthetic requirements. Volma plasters offer versatility in creating the ideal aesthetics for your house, ranging from smooth applications to textured finishes.
The longevity of Volma plasters is one of their main benefits. Because of their formulation’s resistance to wear and weathering, they can be used in both interior and outdoor settings. Because of its resilience, your plinth will require less upkeep over time and stay beautiful and weatherproof.
Efficacy in terms of cost is an additional consideration. Although Volma plasters may initially cost more than some alternatives, their durability and effectiveness frequently make the investment worthwhile. They improve the appearance and structural integrity of your property, adding to its overall value.
It’s important to follow the manufacturer’s instructions when applying Volma plasters. The best results are ensured by correctly preparing the surface and applying the material. In order to enhance adhesion, surfaces must be sufficiently cleaned and primed. Plaster must then be applied evenly to produce the desired smooth or textured finish.
To sum up, Volma plasters are a dependable option for improving the durability and visual appeal of your plinth. They offer a durable solution that raises the value of your home thanks to their assortment of finishes and strong performance. You can choose the one that best meets your renovation needs if you are aware of their advantages and application requirements.


