
When you first start a water heated floor, it can be exhilarating but also a little scary if you don’t know what to expect. This system functions differently from forced-air or conventional radiators because it is made to provide efficient and comfortable heating. It’s important to follow a few steps when you first turn on your water heated floor to make sure everything goes as planned.
Make sure everything has been installed in accordance with the manufacturer’s instructions before starting. This involves making sure that any control mechanisms are configured correctly and that the pipes or cables under the floor are firmly connected to the heating source.
The initial startup of the system entails progressively raising the water flow temperature once you’re comfortable with the installation. This methodical approach guarantees that the floor heats up evenly and without any problems, helping to prevent any sudden stresses on the materials.
Give the water time to warm up and circulate after turning on the system. When the system is adjusted and air pockets in the piping are cleared during the first use, this process might take a little longer. This first warm-up phase is essential to the overall functionality of your heated floor, so take your time.
When starting a water heated floor for the first time, thorough planning and component knowledge are necessary. You will be guided through all of the necessary steps, such as bleeding air from the system and checking the thermostat settings. These easy-to-follow but essential steps will help you make sure your heated floor works well and heats your house comfortably, improving energy efficiency and comfort.
- Starting a water heated floor
- Which coolant to choose
- Filling the underfloor heating system with water
- Video on the topic
- Starting a warm water floor.
- First launch of underfloor heating with thermostat.
- HOW TO START A WARM WATER FLOOR. HOW TO OPEN AND ADJUST THE FLOW METERS ON THE HEATED FLOOR COLLECTOR
- Setting up a water heated floor | Adjusting and starting the comb | How to properly set up a heated floor
Starting a water heated floor
A multilayer device that heats the floor with water. As a result, even the seemingly straightforward commissioning procedure has unique qualities. Read the operating instructions and become familiar with filling and turning on a warm water floor before starting to assemble the structure.
Filling, cleaning, draining, adjusting the system, heating up, and drying the screed are all part of the initial start-up. The principle of operation can be either closed or open, depending on the type of heating and coolant used. Additionally, making sure there is fluid circulation and clearing any air pockets from the circuit is crucial when starting the floor.
The output collector needs a specialized crane in order to start the water warm floor device correctly. You can rent the crimping machine that is required to inspect the floor.
However, having your own device is preferable if water—rather than antifreeze—is pumped into the pipeline. As it is advised to replace the coolant once a year, you will need to use the device frequently in order to test the system.
Which coolant to choose
The water-heated floor’s pipes are filled with liquid coolant. It is available in various forms:
- Plain water is the cheapest option. It is environmentally friendly and does not harm humans. Transfers heat well. In case of leakage, its volume can be easily replenished.
Water does, however, have some drawbacks, though they are minor:
- contains salts that settle inside the pipes, and this reduces heat transfer, but since the same liquid moves in the circuit, the amount of salts is not large;
- it contains oxygen, it leads to corrosion, but not much of it;
- It freezes, while increasing in volume, and can harm the pipeline;
- it needs to be replaced once a year, but this does not require financial investment.
- Antifreeze – made on the basis of ethylene glycol and propylene glycol with the addition of additives, they reduce the activity of the fluid. Their main advantage is that they practically do not freeze in winter, or only at very low temperatures.
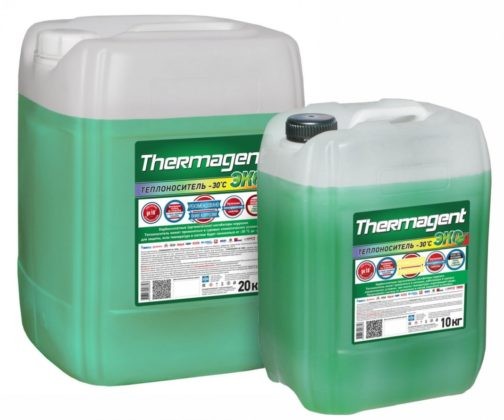
One drawback is the expensive price, particularly for liquids made of propylene glycol. Ethylene glycol is a fluid that is toxic, prone to corrosion, and intolerant of excessive heat.
- Distilled water is a good option, but only if you live in an apartment permanently, or if the floor is only turned on in the summer, as it freezes quickly.
In summary, filling the "warm floor" system with tap water is the best course of action. In addition to being inexpensive and safe, water works well as a coolant.
Filling the underfloor heating system with water
It is necessary to fill out the highway before beginning the warm water floor. The coolant type and system type have an impact on the filling technique. We’ll use the most common kind in this instance, which is water.
In the event that water is used, it must be replenished with fresh water once a year. Prior to every usage, the water floor pipeline needs to be flushed. The main line receives water; it needs to be drained in order for clean water to emerge.
Water can be added to a heated floor in two different ways. Let’s examine how to add water to a closed floor heating circuit step-by-step using a manifold:
- All taps open, such as:
- manifold valves;
- closing valves on pipes;
- three-way valve of the distribution unit;
- all air vents.
The highest value needs to be set if the three-way valve has a thermostatic head. Additionally, the valve is unscrewed to the aisle in situations where there is no head.
You ought to hold off until the highway is completely devoid of air.
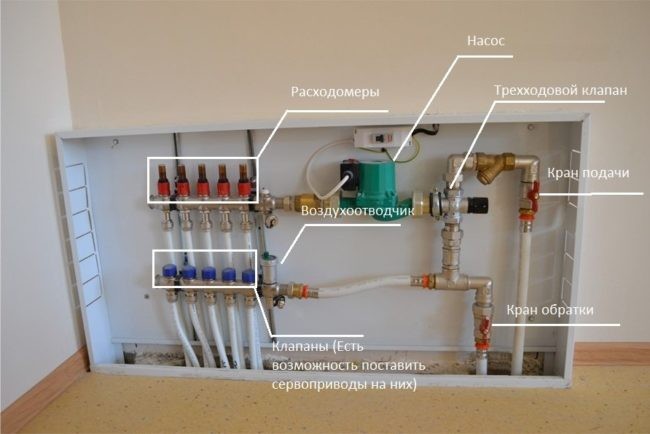
You will hear the sound of water running through the pipes and air escaping when you open the taps.
- The circulation pump turns on. The air vent starts up again and a noise will be heard from the air passing through it. The pump should run for 3 minutes – this is enough for the bulk of the air to come out.

- All taps are closed, and only one remains open. This is required to concentrate the pump on one circuit so that all remaining air leaves it.

- When the air has left this loop, the next loop opens, and this one closes. This action is carried out with all valves.
- Once the air has been released from the entire system, the pump is turned off.

- The taps on all circuits (input and output) are unscrewed, the water is pumped until the last remnants of air come out.
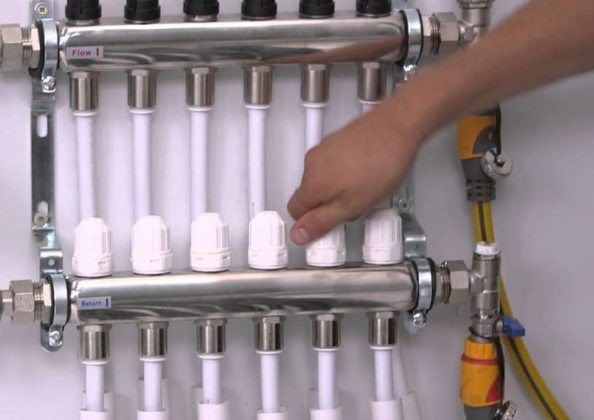
The heating floor system is full after this process is finished, and you can start configuring and using it.
The completion of an open-type highway is an additional choice. This device has a unique tank that allows you to add coolant while it’s evaporating. Additionally, a cream tap at the bottom allows a hose to be used to fill the floor with water from the supply.
But first, a collection tap that is hose-connected to the pipes should be used to fill the floor. It operates on the same principle as if it were a closed design. The technology is typified by the lack of a pump, and the water supply system’s air is released under pressure.
One of the most crucial steps in guaranteeing comfort and effectiveness from your home heating system is turning on a water-heated floor for the first time. The system must be filled with water after installation is finished, and there are a few crucial steps in the initial start-up procedure to make sure everything runs properly.
First, make sure all pipes, valves, and connections are in good condition and free of leaks before turning on the system. By taking quick action to resolve these problems, you can guard against future water damage and guarantee proper system operation.
The water in the system should then be gradually heated. Let the floor warm up gradually by starting at a lower temperature. This lessens the chance of thermal shock and aids in the acclimatization of the materials, both of which can shorten the flooring materials’ lifespan.
During the initial heating phase, keep a close eye on the system. Inappropriate water flow or air pockets may be indicated by strange noises or temperature swings. To guarantee uniform heating throughout, it might be required to drain the system of any air pockets.
Maintain this temperature for a while after the system reaches operating temperature, which is normally between 80°F and 85°F (27°C and 29°C) to guarantee that the floor and the surrounding area reach thermal equilibrium. This makes it easier to assess whether any modifications are required before frequent use.
When starting a water heated floor for the first time, close attention to detail and supervision are required. By taking these precautions, you can make sure that the start-up procedure goes smoothly and efficiently, improving the comfort and effectiveness of your home heating system.


