
Perfectly flat walls are not about construction, but about feeling. They create a foundation on which any renovation and interior look expensive and neat. But what if the prospect of long and dirty plastering with beacons is not inspiring, and the curvature of the corners does not give you peace?
The good news is that you can achieve visually smooth walls faster. Professional designers and finishers know many tricks that help hide unevenness without spending months on it.
This article contains six practical design techniques. It is not about how to perfectly level a wall, but about how to make it look flawless. We will talk about materials, structures, and lighting techniques that can save the day and spare your nerves.
1. First, assess the degree of unevenness
Before starting to level the floor, repair workers need to assess the scope of the work. The easiest way to determine the evenness of a wall is with a spirit level. To do this, you need a straight slat (rule) that is the same height as the ceiling of the room. The tool should be placed against the corners of the walls so that they are parallel, and the presence or absence of a gap will determine the evenness of the surface. If the wall being assessed is in very poor condition and has very large deviations, it will be easier and faster to dismantle this partition and rebuild it (if possible).
2. Choose a leveling compound
When choosing a leveling compound, it is important to pay attention to the maximum thickness of the layer to be applied. In case of minor surface defects, I recommend using plaster weber.vetonit TT, which is ideally applied in a layer of 2-10 mm and helps to avoid overuse of material. This plaster is also suitable for damp rooms where only cement plasters can be used.
To hide significant surface irregularities, use plastic gypsum plaster. weber.vetonit profi gyps: it can level differences of up to 50 mm in one layer (locally – up to 100 mm). For layers thicker than 30 mm, it is necessary to use reinforcing mesh for additional adhesion of the surface to the plaster layer due to the heavy weight of the plaster layer (in particular when using cement plaster weber.vetonit TT40).
3. Prepare the surface
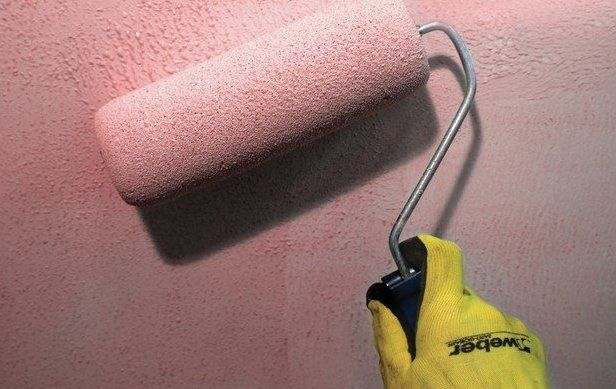
When working on smooth concrete or monolithic substrates, treat the cleaned surface with a bonding primer weber.prim contact to create a rough surface. This will allow a thick layer of plaster to adhere better to a smooth base. For rough surfaces (such as foam blocks or bricks), a primer is suitable. weber.prim multi.
4. Use beacons
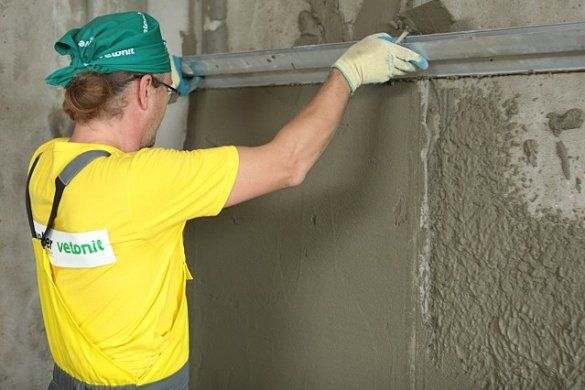
Before plastering, you need to set the final leveling plane — a regular or laser level will come in handy here. Use metal, plastic, or painted beacons for this purpose — set them at the width of the rule. Keep in mind that metal and plastic beacons will need to be removed from the wall after the plaster mixture has dried: during the work, part of the protective layer is removed from the beacons, after which the beacon is subject to corrosion in a humid environment — traces may appear on the final finish.

Smooth walls are the foundation of a beautiful interior, but achieving their perfect geometry is time-consuming and expensive. Fortunately, designers have simple and quick techniques that visually hide irregularities and make walls look neat without lengthy plastering. From proper lighting to smart finishing choices, these six tricks will help you save time, money, and nerves, while making your room look like something out of a magazine.
5. Apply the mixture from bottom to top
Level the mortar from bottom to top. Add the mixture until the plaster layer reaches the level of the beacons. After that, carefully remove the slats and fill the remaining space with mortar. Corners form at the junction of the walls and ceiling, and it is important to make them absolutely even. This can be done using a level. Pay special attention to the areas where the baseboards and door frames meet: unevenness is particularly noticeable in these areas.

6. Don't forget about the final leveling
Once the plaster layer is completely dry, all you need to do is remove any minor unevenness in the wall using a finishing filler for dry rooms weber.vetonit LR+. For damp rooms, use cement putty. weber.vetonit VH and weber.vetonit VH Grey. Apply the filler to the wall by hand using a metal trowel or mechanically in a thin layer of 1 to 5 mm. Apply each subsequent layer to the completely dry previous one: drying time is about a day. If you plan to paint the walls, you will need an additional finishing layer of ready-made super-finish putty. weber.vetonit LR Pasta.

As you can see, it is not necessary to undertake a long and dusty major renovation to achieve smooth walls. Often, the problem can be solved with a little ingenuity and the right decorative techniques.
The main thing is to honestly assess the extent of the unevenness. For serious differences in height, it is better to consult a plasterer. But if the defects are minor, feel free to use these design hacks. They will help you save time, money, and nerves by turning the flaws in your walls into the highlight of your interior.
Choose the method that best suits the style of your room and your personality. Even simple painting or well-chosen wallpaper can work wonders, creating the impression of a perfectly smooth surface.


