
Have you ever pasted wallpaper carefully only to have ugly bubbles and wrinkles appear right away? This annoying occurrence frequently results from using incorrect application or preparation methods. When it comes to your home improvement projects, knowing why wallpaper wrinkles and how to fix these problems effectively will save you time and effort.
A number of things can cause wallpaper to wrinkle, but insufficient surface preparation is the main culprit. These flaws can be caused by uneven walls, paint or wallpaper residue from the past, or inadequate drying time for the wallpaper paste. The room’s humidity levels at the time of application also have a significant impact on how well the wallpaper sticks to the wall.
The secret to overcoming these obstacles is exact application combined with careful planning. Before applying wallpaper, give the wall a thorough cleaning and smoothing. Make sure the wall is even and dry, and that all traces have been removed. This foundation creates the opportunity for a more polished, wrinkle-free finish.
Moreover, the application technique is very important. Using a wallpaper smoother or soft brush, begin in the center of the wall and work your way outward, gently pressing the paper onto the wall and smoothing out any air bubbles along the way. Take extra care around edges and corners, as these are common places for wrinkles to appear. By taking your time, you can drastically lower the chance of wrinkles during this procedure.
| Issue | Solution |
| Wallpaper wrinkles when pasted | Ensure the wall surface is smooth and clean before pasting. Use a good-quality wallpaper adhesive and allow it to soak into the paper for the recommended time. |
| Wrinkles form in corners | Pre-fold wallpaper strips gently before applying to corners. Smooth out wrinkles immediately with a wallpaper smoother or soft cloth, working from the center to the edges. |
- Why does this happen when pasting?
- When pasting on a wall
- In the corner
- What to do?
- Non-woven base
- Vinyl
- Video on the topic
- HOW TO FIX JOINTS ON WALLPAPERS if they have come apart or overlapped?
- The joints came apart after gluing the wallpaper? I"ll show you how to fix it!
- Poor quality interlining? Wallpaper bubbles when applied
- What to do if the wallpaper is swollen?
- How to glue wallpaper without the seams coming apart?
- How to make a joint invisible on PROBLEM wallpaper
- Sophisticated wallpaper. How to cut, what to glue on. Ready glue.
Why does this happen when pasting?
Generally speaking, low-quality wallpaper is the cause of air bubbles and wrinkles on the surface. When non-woven fabric gets wet, it usually swells. Good canvases make it nearly invisible, but cheap wallpaper strips can "accordion" on the walls’ flat surfaces as well as in the corners.
When wallpaper comes into contact with adhesive on a non-woven base, it expands. When pasting, this needs to be considered and the appropriate correction needs to be made.
When pasting on a wall
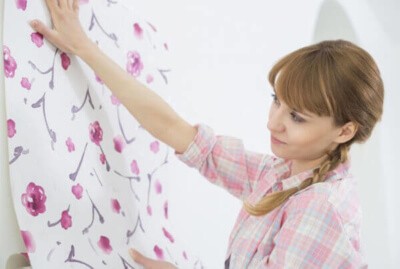
There is only one way to determine the quality of the material you have encountered: adhering a test strip. Feel free to use the remaining rolls if it lays down flawlessly and there are no visible flaws after 24 hours (while the glue has completely dried). It is best to exchange the remaining canvas in the store for others of the right quality if it is swollen or if very noticeable wrinkles appear.
This method’s main disadvantage is how time-consuming it is. However, if you use a unique technique to glue the sheets together, you can avoid defects altogether and make due with rolls that already exist.
In the corner
Wrinkles may appear on the inside and very rarely on the outside corners as a result of poorly sealed joints between panel slabs or concealed cracks. They are filled with air, the temperature of which is considerably different from the room’s created microclimate.
Consequently, some of the adhesive composition dries a little quicker and peels off the wall, while the remainder adheres to the wall more firmly. Wrinkles are a result of this unequal sizing area distribution.
Because parts of the canvas stretch even when joining the strips, low-quality wallpaper causes uneven gluing, which can be fixed while gluing. However, there are wrinkles on the glued wallpaper that need to be removed using a different method.
The article’s central claim is "Why does wallpaper wrinkle in corners and on walls? The most effective methods for getting rid of flaws will center on comprehending the typical reasons why wallpaper wrinkles, especially at corners and edges. It will examine the ways in which these problems are influenced by elements such as inadequate surface preparation, inappropriate adhesive application, and ambient circumstances. Additionally, the article will offer helpful advice and detailed instructions on how to prevent these issues when installing wallpaper. Through addressing these factors, readers will gain practical advice on how to apply wallpaper flawlessly and smoothly, improving the overall look of their interior spaces.
What to do?
In order for vinyl or non-woven wallpaper to adhere without any issues, the following guidelines need to be followed:
- Buy finishing material only in construction stores that work directly with the supplier or even the wallpaper manufacturer. It is best to verify the quality of the material from the seller by asking to present documents for finishing products.
- Select an adhesive composition of the brand and manufacturer recommended by the company that produced the wallpaper. If the brand of glue is not specified exactly, take mixtures with the recommended composition and properties.
- Carefully prepare the surface to be glued: there should be no obvious differences in plane level, defects, foreign debris and similar troubles. Prime the base and let it sit for the recommended time (usually from 6 to 12 hours).
- Follow all instructions on the roll labels exactly. Any deviation from them may result in the appearance of blisters or wrinkles.
- Choose tools that suit a specific type of wallpaper. If the manufacturer specifies a rubber roller, a soft wallpaper spatula, or thick terry cloth without texture as a smoothing device, then you need to choose these items.
- Avoid drafts or temperature changes in the room while the glue is drying.
Non-woven base
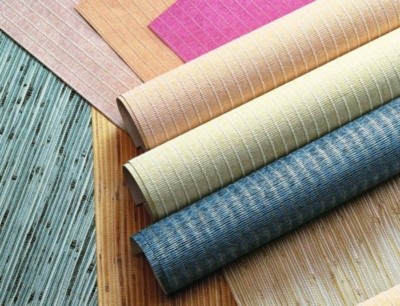
Non-woven fabric is known for its durability and plasticity, but it can expand and lose its hardness when it comes into contact with wet glue. To avoid damaging the strip, the adhesive composition must be applied to the canvas very carefully.
Wrinkles can be eliminated by straightening the canvas when hanging wallpaper on a non-woven basis. Redirecting it in a different direction and pealing it off right away are preferable to fixing flaws after the glue has dried.
Alternatively, you could keep adhering while adjusting the width of the strip by using a wallpaper or stationery knife to trim off any "unruly" sections along the whole length. When the wallpaper is wrinkled in a corner or in an area no wider than 5-7 cm, you can save material by using this rarely used method instead of discarding the canvas entirely. This will not show up on a meter-wide roll with a big pattern. If the creases are limited to the corner, the rolled material can be precisely joined in this spot by applying glue. To accomplish this, you’ll need:
- Glue the first strip directly to the corner on the left or right side (depending on the movement from the starting point) so that about 2-3 cm protrudes.
- Using a 30cm metal spatula and an upholstery knife, trim away excess material. To do this, you need to attach the tool tightly with the metal part to the glued wallpaper, pressing it as much as possible against the wall with the decoration. Then, without lifting the knife and smoothly moving the spatula in 25 cm increments, move the blade along the material. From the bottom, in order not to lift the wallpaper, you need to cut it towards the top.
- Glue the second strip on the wall adjacent to the corner so that approximately 2-3 cm extends onto the glued wallpaper, carefully smoothing it out with a rubber or plastic soft spatula.
- In a similar way, cut off the protruding material, wipe the joint from the protruding glue with a damp sponge.
Take note! When non-woven wallpaper is soaked in glue, it can easily tear, so you should use a metal spatula to cut it rather than a regular knife.
Vinyl
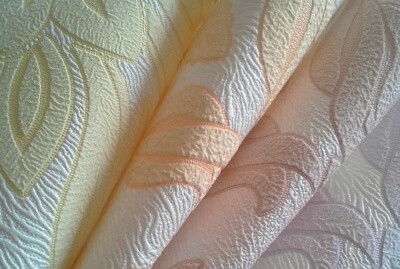
The most common way to produce this heavier roll material is in meter rolls. As such, it is less convenient to work with than a non-woven analogue measuring 50 centimeters. Even with an adhesive composition applied, lifting heavy vinyl to a height of up to three meters is not so simple. If workers are not hired, careful gluing preparation and the assistance of an additional person are needed.
Compared to non-woven wallpaper, it is more difficult to remove wrinkles that arise when applying vinyl wallpaper. After joining and creating a level sheet on the wall, imperfections must be fixed using smoothing tools.
You can attempt to rectify the unevenness by using a steam generator or a regular iron with a vertical steam function if it persists for a day or longer. After that, use a rubber or plastic spatula to gently press the desired area against the wall until it is smooth.
You can seal the wallpaper with a suitable piece of rolled material if steaming has no effect or if a strong impact has damaged it. As such, you should only attempt this method after fully understanding the potential drawbacks.
Of course! This is a succinct wrap-up for your wrinkled wallpaper article:
Although overcoming wallpaper wrinkles can be difficult, knowing why they occur is the first step to getting a smooth finish. Every problem has a different solution, regardless of whether it’s the result of poor surface preparation, inadequate adhesive application, or the kind of wallpaper that was used.
Prior to applying the wallpaper, make sure the walls are smooth, clean, and adequately primed to avoid wrinkles. In doing so, you create a stable surface that will aid in the wallpaper adhering evenly and without creases or bubbles.
If wrinkles do show up, don’t freak out. Small wrinkles can often be eliminated by gently repositioning and smoothing with a wallpaper brush or roller. For more difficult wrinkles, lift the affected area carefully, add more adhesive if needed, and carefully reposition the wallpaper to get the perfect finish.
With careful planning and knowledge of the typical reasons behind wallpaper wrinkling, you can apply wallpaper to your walls with style and accuracy, giving your room a polished appearance.
This conclusion should wrap up your article effectively, providing practical advice for your readers.


