
Puttying on foam is a common option for building and repair projects, and it has a number of noteworthy benefits that can improve the productivity and effectiveness of your work. Knowing the advantages of using putty on foam can help you accomplish smoother, more polished results whether you’re building a new project or remodeling an existing one.
Putty’s superior adhesion properties are among its primary advantages when applied to foam. It forms a solid bond that guarantees longevity and durability on foam surfaces. Because of its durability and ability to withstand a range of environmental conditions, it is perfect for projects that require finishing on both the interior and exterior.
The fact that foam is lightweight is an additional benefit. This lightweight quality makes the material easier to handle and apply when mixed with putty. You won’t have to handle bulky, heavy materials, which can greatly lessen the physical strain on your project and expedite it in its entirety.
Moreover, putty on foam is incredibly flexible. It can be applied in many different ways, such as filling in cracks and spaces and producing even, smooth surfaces that are ready for finishing or painting. Because of its adaptability, it’s a useful tool for any builder’s toolbox, giving your projects more flexibility.
In addition, the puttying on foam preparation method is simple and easy. Applying putty to foam surfaces can be done quickly with the correct tools and supplies. To ensure the best results, preparation is essential. By taking the right steps, you can avoid common pitfalls and achieve a flawless finish.
Finally, putty application on foam is a reasonably easy process. Expert-looking results can be achieved even by inexperienced do-it-yourselfers with a little practice and attention to details. Once you get the hang of it, there are a few simple steps in the process that can greatly improve the caliber of your building and repair work.
| Advantages of Putty on Foam | Preparation and Implementation |
| 1. Smooth Finish: Provides a smooth and even surface for painting or wallpapering. | 1. Clean Surface: En Lightly sand the dried putty to achieve a perfectly smooth finish before final treatment. |
Putty on foam has six main benefits that make it a great option for both building and maintenance tasks. This method is not only easy to apply, resists moisture, and produces a smooth, long-lasting surface, but it also improves insulation. Choosing the appropriate materials, making sure the surface is dry and clean, and using the appropriate tools are all part of getting ready for this process. Anyone can achieve professional results and ensure their construction or repair work is long-lasting by following simple steps.
- Is it possible to apply putty on foam insulation?
- Advantages of this procedure
- How to glue ceiling tiles and seal seams?
- How to prepare materials and tools?
- DIY puttying instructions
- For painting
- On the street
- Indoors
- Video on the topic
- Super grater, for removing irregularities on foam plastic #shorts
- FASAD-Preparation of the surface of penoplex
- Mechanized puttying of walls | Mechanized putty Moscow
- Preparing a wall for applying putty
Is it possible to apply putty on foam insulation?
It can be used, but only on slabs that are glued and construction umbrella-secured. Other fastening techniques are not appropriate for this finishing technique.
There shouldn’t be any solvent or other chemicals in the putty itself that would erode foam. You must take a mixture as soon as possible; the packaging should specify that it is safe for polystyrene.
Advantages of this procedure
For room insulation, foam is finished on the exterior (and, less frequently, the interior) walls of homes. Typically, putty is used on top of the slabs because it offers the following benefits:
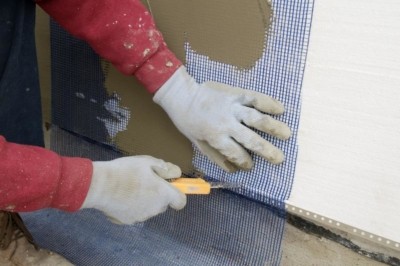
- Its thermal insulation properties are preserved for a long time.
- The material becomes stronger, the risk of damage is greatly reduced. If left unprotected, the granules will swell and stick together in high summer temperatures. On the contrary, it will become even more fragile from cold and frost, and will simply crumble with minimal damage.
- Increase fire retardant properties – sensitivity to high temperatures and the risk of fire are reduced, although the foam itself is very flammable. Modern high-quality putties contain substances that prevent fire penetration.
- Hindering moisture penetration. Although foam is not afraid of water, it still gets wet, and then takes a very long time to dry. This significantly reduces its thermal insulation properties, and when exposed to dampness for a long time, its structure is destroyed, increased fragility appears.
- Protection from ultraviolet rays, gusts of wind. In the open sun, the surface will turn yellow, the material will begin to crumble excessively, and a strong wind can completely tear off part of the insulation.
- Preparing the wall surface for finishing, improving its appearance.
The slabs’ surface needs to be primed with a specific polystyrene foam or PVA glue mixture before putty is applied.
How to glue ceiling tiles and seal seams?
The spaces between the ceiling tiles require sealing. This is a good use for the finishing mixture because it applies better and results in a smoother surface. It is supplied as a ready-to-use or dilution-ready dry mixture. Just load a fingertip with the solution, apply it to the joints, and smooth it out gently.
Acrylic putty can be used to attach the tiles to the ceiling if necessary. Because of its viscous structure, the glued tiles will become fixed as soon as they come into contact with the mixture, saving you time and effort.
Use a sponge dipped in water to easily remove any excess putty from the foam.
How to prepare materials and tools?
The following supplies must be ready before construction work begins:
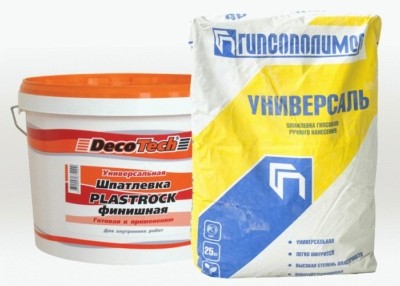
- putty – universal or for working with polystyrene foam boards, as well as finishing;
- polyurethane foam;
- a primer with adhesive properties – it is sticky;
- glue – for foam plastic or regular tile;
- mesh for reinforcement – fiberglass, plastic or metal;
- decorative plaster or paint depending on the coating.
What you’ll need from your inventory is:
- a clean bucket or deep basin for diluting the putty mixture;
- rule;
- reinforced corners;
- drill with a mixer attachment for preparing the solution;
- spatulas of different widths;
- foam grater;
- mounting knife;
- short pile roller;
- measuring tape.
It’s best to choose materials from reputable, well-known companies and to pay attention to the expiration date—no more than two or three months should elapse after the date of manufacture.
DIY puttying instructions
In order to prevent the entire dried cement mortar from falling off later, puttying must be done precisely step by step.

- Surface preparation. The process is as follows:
- Clean the foam from dust and dirt, if any.
- Check it for unevenness, and if found, remove them with a construction float. Fill the seams between the slabs with foam.
- Deepen the protruding caps of the umbrella dowels that hold the foam. In some cases, it is permissible to cut off part of the cap.
- Apply adhesive to joining seams and dowel heads.
- Fix reinforced corners on slopes and external joints of walls.
- Coat the prepared surface with a primer with adhesive properties, but without containing substances that corrode foam plastic.
Since the putty layer lies more evenly on it, 140–160 g/m2 is the ideal mesh density. Nevertheless, since this kind of mesh does not bend well, you will need to adjust the corners. Furthermore, glue-sealant (also known as liquid nails) can be applied to the corners, and a reinforcing mesh can be attached to it.
For painting
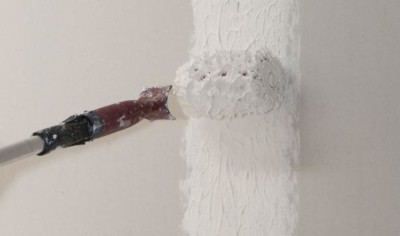
- If you plan to paint the surface, then you need to put a layer of grain-free primer on the putty. It is more convenient to apply it with a short-nap roller.
- After drying, apply a second layer.
- Then you need to coat the wall with the finishing mixture, level it over the entire surface using the rule, and after complete drying, sand the roughness in a circular motion using a jointer with a P120-P150 mesh.
- After sanding, wipe the surface from dust with a damp cloth. Now it"s ready for painting.
On the street
You need to wait for specific weather conditions, such as temperatures between 5 and 25 degrees and humidity levels up to 70%, in order for the finishing work to go flawlessly. The weather is supposed to be calm. You must use well-known adhesive facade putties, like Ceresit CT83 or CT85, if you plan to work outside.
It is worthwhile to prime again with a solution containing quartz grains if you intend to cover the outer walls with decorative plaster on top of the soil.
Indoors
Since polystyrene foam does not "breathe" and releases harmful substances when heated, it is rarely used as insulation indoors. However, the use makes sense if it’s an apartment and one of the walls faces a chilly entrance.
The wall should be prepared as described in the above step-by-step instructions, with the exception that glue can be used in place of polystyrene foam putty and reinforced mesh can be replaced with glue. Sandpaper should be used to polish the wall surface after it has dried before applying paint or wallpaper.
Puttying on foam surfaces is a great option for building and repair projects because it has many advantages. You can finish tasks more quickly and efficiently thanks to its quick drying time and ease of application. Furthermore, putty’s flexibility on foam guarantees a smooth and long-lasting finish—a crucial component of both long-term functionality and visual appeal.
It is essential to prepare properly before beginning the puttying process. Verify that the foam surface is dust- and debris-free, dry, and clean. By doing this, the putty will adhere correctly and produce a smooth finish. To save time and prevent hiccups, prepare all required equipment and supplies in advance.
Putty application on foam requires a few steps, starting with properly mixing the putty. Spread it evenly over the foam surface using a putty knife or trowel, taking care to work in small sections for control and accuracy. To get a flawless, smooth finish, give the application enough time to dry completely before sanding.
All things considered, applying putty to foam will improve the caliber and endurance of your building and maintenance tasks. You can achieve long-lasting, professional-looking results with careful application and preparation. Learning how to use this method can be a useful addition to your skill set, regardless of your experience level or level of do-it-yourself interest.


