
In any building or remodeling project, priming surfaces is an essential first step. It makes sure the primer goes on as intended, giving paint or other finishes a smooth, long-lasting base. Correct surface preparation can make a big difference in the finished product, whether you’re working on furniture, walls, or ceilings.
Cleaning is the initial stage of surface preparation. Clear the surface of any debris, oil, grease, or outdated paint. A basic soap and water solution works well for most surfaces, but stronger cleaning agents may be needed for stains that are more stubborn. Let the surface fully dry after cleaning before proceeding to the next step.
Sanding the surface is crucial after it has been cleaned and allowed to dry. Sanding leaves the surface slightly rougher, which improves primer adhesion by eliminating any last traces of imperfection. For surfaces that are smoother, use sandpaper with a finer grit; for areas that are rougher, use sandpaper with a coarser grit. Make sure to always sand in a circular motion and to remove any dust that may have collected along the way.
Check the surface for any damage, such as holes or cracks, after sanding. To fix these flaws, use a suitable filler and adhere to the application and drying time recommendations provided by the manufacturer. To guarantee a smooth finish, sand the area once more after the filler has dried.
It’s a good idea to use a tack cloth to remove any leftover dust or debris from the surface before applying the primer. This last stage makes sure that nothing prevents the primer from adhering. Now that the surface is smooth and clean, you can apply the primer, which will prepare the surface for a finish of expert caliber.
It is advised by experts to take your time when preparing the surface. Ignoring these steps in haste may result in paint chipping or uneven finishes later on. With the correct tools and materials, along with this algorithm, you can accomplish outstanding results for your building or remodeling projects.
In order to achieve a smooth and durable finish in any building or renovation project, surfaces must be primed. This article provides a straightforward algorithm for surface preparation, including cleaning, sanding, and repairing any imperfections, to create the ideal foundation for primer application. Experts provide their helpful guidance to avoid typical blunders and produce polished results alongside these steps, simplifying and enhancing the process for both novice and seasoned renovators.
- Types of priming mixtures
- Glypthal compounds
- Alkyd
- Acrylic
- Perchlorovinyl compounds
- Adhesive
- Cataphoretic priming
- Algorithm: how to prepare?
- Required Tools
- Consumption per square meter
- How long does it take to dry?
- Video on the topic
- How to ruin paint! The nuances of painting metal. Degreasing. Primer enamel 3in1.
- Coloring. Part 1. Surface preparation. Deep penetration soil.
- How to prepare a car for priming.Gradation of abrasive under the ground.
- The main mistakes when preparing for painting. How to avoid subsidence, contouring and explosions.
- Preparing for painting, in as much detail as possible, for beginners
- Preparing a metal surface for painting
Types of priming mixtures
Glypthal compounds
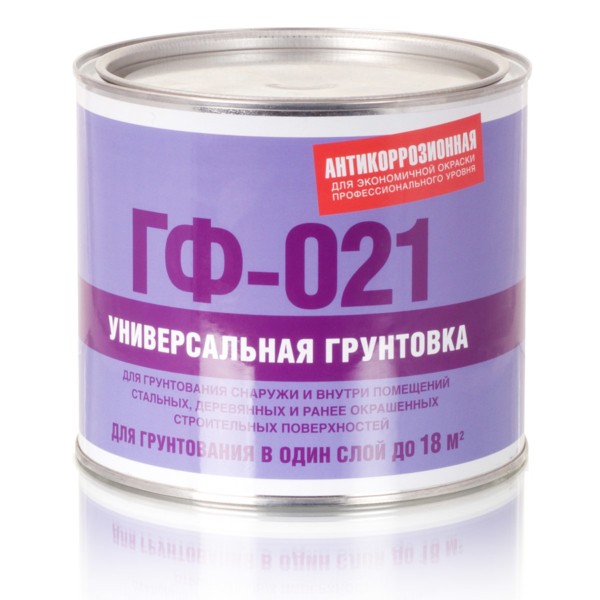
Wood and metal surfaces are primed with this mixture so that alkyd-based paint can be applied later. Alkyd resins are used to make Glypthal paint primer. These compositions are of the highest caliber, are very simple, and can be applied in many ways. Surfaces take on an enameled sheen once painted.
Glypthalic primers go by several names:
They all possess the following qualities:
- have increased penetrating ability;
- create the most reliable basis for finishing;
- increase the adhesion of the wall surface to the applied material;
- reduce the consumption of the last layer of finishing;
- create a uniform finish;
- protect the surface from the formation of mold and mildew.
The primer material now includes the following additions to its composition:
- Anti-corrosion additives, driers. Typically phosphoric acid, recycled wood.
- Pigments – iron and zinc oxides. Thanks to them, the powder acquires a red-brown color.
- Another component of glypthal primers is solvents, thinners. The viscosity of the composition is adjusted by adding these components in a 20% ratio to the entire mass.
The soil mixture is thoroughly mixed with a construction mixer prior to use. The ideal working temperature range is between 5 and 30 degrees. Humidity: not to exceed 80%. A matte or semi-gloss film forms after drying.
For a period of six months to two years, the glyphthalic composition is kept tightly sealed and away from heat sources. The range of acceptable temperatures is minus 40 to plus 40 degrees. Avert direct sunlight and moisture exposure.
Alkyd
The properties of the alkyd composition are distinctive; it forms a protective layer on substrates made of steel, concrete, metal, and wood. Potential coating for products made of galvanized steel. Such soil has a composition that contains polymers that seal surface pores and fissures, giving surfaces more mechanical protection.
Characteristics of alkyd materials:
- improve the adhesion of the base material to which the surface layer of another coating will be applied;
- increase the water resistance of the surface;
- due to the antiseptic effect, the formation of mold and mildew is excluded;
- increasing the resistance of substrates to abrasion and chemicals;
- under the influence of moisture, wooden surfaces do not swell or shrink;
- no resin appears on the surface of the wood.
Alkyd primers can be purchased entirely assembled. However, a lot is dependent on how well the surface is prepared. For instance, the primer will lose half of its properties if the wall is not thoroughly cleaned of dust. A spotlessly clean surface has a considerable lifespan.
Gloves are used when applying alkyd compounds. Shake the solution thoroughly before using it, and if needed, dilute it with xylene, solvent, or white spirit. A viscosity of 21–24 poise is ideal.
Apply in one or two layers using a brush, roller, or spray. To ensure that they all dry out completely, you must keep the room temperature at or below 20 degrees Celsius. 70% relative humidity. With this kind of weather, the starting primer will take about a day to dry.

Acrylic
Special components and a dispersion make up acrylic solution. These primers have good protective qualities as one of their features. With a porous structure, the mixture absorbs into the surface remarkably well, shielding it from moisture and other environmental factors. A film that is formed on top by the dried solution increases adhesion while using less glue or paint.
Even so, the properties and composition of acrylic solutions vary. However, the components of acrylic have certain constant characteristics:
- the surface becomes durable when treated with a deeply penetrating and strengthening mixture;
- reliable protection is created from moisture, since the penetrating ability is greatly reduced;
- adhesion increases due to strong adhesion of the material to the surface;
- the consumption of finishing when coated with a primer is reduced;
- vapor permeability.
Organic solvents or water are required ingredients in all acrylic compositions. Any soil mixture of this kind starts with this. Binding elements are added, such as drying oil, resins, and polymers, which impart viscosity.
The composition contains the following:
- dyes;
- drying accelerating catalysts;
- additives that give the solution foaming properties (biocides, agents).
Ready-made acrylic primers are available; however, they need to be thoroughly mixed and applied to the wall. However, some dry mixes need to be diluted with water. You can also purchase primer mixtures in cans. The cost-effective application technique is where they diverge.

Perchlorovinyl compounds
Although they are not as widely used as their analogues, perchlorovinyl compounds are nonetheless employed. Given its excellent resistance to the base and comfort, this material is the least expensive.
One of this primer’s major drawbacks is its volatile organic solvent. Hazardous substances are released when it evaporates. Many of them pose a fire risk and are extremely flammable.
Primer made of perchlorovinyl has good adherence to concrete and brick surfaces. The background color’s high saturation is a distinguishing feature. However, because they are more ornamental, they break more readily. Under the sun’s rays, the resin-containing excess chlorine is released as the film rapidly fades.
Artificial pigments such as these are used in their manufacture.
- mumiyo;
- iron red lead;
- umbra;
- ocher;
- chlorine oxide;
- monostral.
With this composition, the paint facade’s color is maintained for a much longer time and retains its original pigments. The surface will have a beautiful finishing layer for six to eight years with proper use. It won’t need any more painting or cosmetic fixes.

Adhesive
On a surface treated with this kind of composition, adhesive primers create a thin coating. Qualities of a primer derived from basic PVA glue:
- repeatedly increase the level of adhesion;
- good protection against moisture;
- Applies evenly, so less topcoat or other coating is required.
Making your own PVA-based primer will save a ton of money. For the final painting, this material can serve as a trustworthy foundation. It will be evident that there are savings in consumption because the layer is even thinner than that of a purchased solution.
Primer adhesive compositions work best when applied to small, constrained spaces in cramped spaces, at a steady, unchanging temperature. The same rules apply to relative humidity: there shouldn’t be any significant jumps. If not, after drying, the fit to the base will be significantly worse.
Craftsmen typically make the primer on their own. Take a few liters of PVA glue and some warm, soft water. The use of primer is very cost-effective. 10 to 15 square meters can be treated with one liter. The consumption should double when using the product in two layers.

Cataphoretic priming
Better suited for metal surfaces, but it needs to be completely oxide-free cleaned. When covering with this soil, the interaction of the active particles will increase as a result. An even more intriguing and lucid outcome will be obtained if the surface preparation line for cataphoresis priming is also degreased. By triggering them at the metal’s base, particle attachment becomes more dependable.
Additionally, the surface should be free of any oil particles or impurities. By degreasing, oils and chemical compounds must be totally removed. Typically, spraying is used to solve the issue prior to applying cataphoresis coating.
It is essential to give the surface a thorough rinse before using such primer. Alkaline solutions are the easiest and most readily available material. These are helpful active ingredients that offer basic protection and a good cleaning effect when combined with degreasing enhancers. You will need to use specific products if the concentration of fat is high.
Algorithm: how to prepare?
Required Tools
Tools for surface priming:
- the soil itself, which is purchased in a store or made independently;
- container for mixing the solution;
- rollers of different sizes;
- brushes of different configurations;
- rags;
- safety glasses, gloves, work clothes.
To guard against leaks or excess solution spills, stock up on tape and covering materials. Primers can be purchased ready to use or dry. The composition needs to be diluted in water in accordance with the package’s instructions if it is dry. The quantity of primer used is determined by the number of layers used.
Consumption per square meter
Consumption is contingent upon the type, qualities, and attributes of the base. The kind of primer used, how it is applied, the temperature, and the humidity of the air all matter. It is advised by experts to multiply the coefficient by 1.15, the standard norm. The product package lists the consumption rates.
Prior to priming the walls, it is necessary to ascertain consumption per square meter. The numbers for primers and materials differ, and they should be computed in accordance with GOSTs. Rates of primer consumption:

- concrete contact – up to 350 g per 1 sq. m;
- deep penetration with a strengthening effect – from 0.1 kg per 1 sq. m, sometimes a little higher;
- special primer for working on decorative surfaces – up to 0.2 ml per 1 sq. m;
- alkyd mixture – up to 0.12 kg per 1 sq. m;
- façade with an alkyd base – 0.15 kg per 1 sq. m;
- wallpaper – 0.12 kg per 1 sq. m.
How long does it take to dry?
Primer drying times are influenced by the primer’s quality, composition, and extra additives. The climate is also significant. Respecting the following environmental requirements is essential: temperature range: 5 to 35 degrees Celsius for paint drying and priming. This is the best indicator to watch so that drying results happen quickly.
Humidity: 80% or higher. In the event of a deviation, heating and ventilation systems must be turned on to restore the environment to normal. The primer may take a few hours to a day to dry.
Oil or contact compositions take a full day to dry, whereas acrylic compositions can dry in as little as eight hours. Quick-drying primers are preferable for expedited work because they dry in 6-7 hours. Alkyd primers take 10 to 12 hours to dry.
A video demonstrating the drying time of primers:
| Step | Expert Advice |
| Clean the Surface | Remove dust, dirt, and grease with a damp cloth or mild cleaner. |
| Repair Damages | Fill cracks and holes with filler, then sand smooth. |
| Sand the Surface | Use fine-grit sandpaper to create a smooth, even texture. |
| Remove Sanding Dust | Wipe the surface with a tack cloth or damp rag to remove all dust. |
| Mask Areas | Use painter"s tape to protect areas you don"t want primed. |
| Ensure Dryness | Make sure the surface is completely dry before priming. |
| Prime the Surface | Apply primer evenly using a brush or roller. |
For any building or remodeling project to have a smooth, long-lasting finish, surfaces must be properly primed. You can make sure that your surfaces are spotless, smooth, and prepared for the next steps of your work by adhering to a step-by-step algorithm. To begin, give the surface a thorough cleaning to get rid of any grease, dust, or dirt. Depending on what kind of material you are working with, use a solution of soapy water or an appropriate cleaning solution.
It’s critical to check the surface for flaws, holes, and cracks after it’s been cleaned. To fix these areas, use putty or filler, being careful to smooth out the patches so they blend in perfectly with the surrounding surface. The next crucial step is sanding. Sandpaper can be used to make a surface that is even and smooth so that the primer will stick to it properly. Before continuing, always use a moist cloth or vacuum to remove any remaining sanding dust.
It is advised by experts to take your time when masking off areas that you do not want to be primed. Painter’s tape can be used to shield other surfaces, trims, and edges. When the primer is applied, this will give you a neat, polished appearance. Finally, before you begin priming, make sure the surface is totally dry. Moisture can hinder the primer’s proper bonding, which could eventually cause peeling or flaking.
Through meticulous surface preparation and heeding professional guidance, you can attain an enduring high-quality finish. These steps are critical to the success of any project, whether you’re working on a big construction project or a small do-it-yourself renovation. Recall that a small additional preparation effort can have a significant impact on the outcome.


