
Plastic window installation can significantly improve the comfort and energy efficiency of your house. But after installation, a common problem that many homeowners encounter is how to handle the gaps and cracks that still exist around the windows. If these areas are not addressed, they may result in reduced insulation, drafts, and moisture issues, which could offset some of the advantages of your new windows.
It is essential to select the appropriate resources and methods in order to effectively close these gaps. Because it can expand to fill even the smallest crevices and has excellent insulating qualities, foam is frequently used. To guarantee longevity and efficacy, foam must be covered and sealed; applying it alone is insufficient.
After installing windows, you can follow this article’s instructions to cover the gaps and cracks in the foam. We’ll go over the best supplies to use, how-to guides, and pointers to guarantee a tidy and durable finish. You can increase the insulation in your house, guard against potential problems, and keep your new windows looking stylish by adhering to these recommendations.
| Question | Answer |
| What materials can be used to cover foam in gaps and cracks? | Use silicone sealant, acrylic caulk, or expanding foam for small gaps. For larger gaps, consider using backer rod before applying sealant. |
| How do you prepare the area before applying the sealant? | Clean the area thoroughly, removing any dust, dirt, or loose particles. Make sure the surface is dry before applying any sealant. |
| What are the steps to apply silicone sealant? | Cut the tip of the sealant tube at a 45-degree angle, place it in a caulking gun, and apply a steady bead along the gap. Smooth it out with a damp finger or a caulking tool. |
| How long does it take for the sealant to cure? | Most silicone and acrylic sealants take about 24 hours to fully cure. Check the manufacturer"s instructions for specific drying times. |
| Can you paint over the sealant? | Yes, you can paint over acrylic caulk once it is fully cured. Silicone sealant is not paintable, so choose a color that matches your window frames. |
- What are seams and gaps?
- Where exactly is sealing required after installation??
- Why do you need to seal and close knots??
- What materials are best??
- Silicone
- Acrylic
- Liquid plastic
- Butyl or polyisobutylene sealant
- Theocol sealant
- Steez A
- Steez B
- Steam and waterproofing tapes
- TOP-5 funds
- Cosmofen 345
- Quelyd 007
- Soudal fix all high tack
- MasterTeks ProfiMaster
- Moment
- Tools
- Step-by-step instructions for sealing
- Possible difficulties and errors
- Prices for services of masters
- Video on the topic
- WHY CLOSE THE GAP UNDER THE WINDOW SILL ON THE BALCONY AFTER INSTALLING A PLASTIC WINDOW
- How to SEAL foam after installing plastic windows? MASTER CLASS
- Builders are silent about this: how to preserve polyurethane foam on windows
- How to cover the foam between the wall and the frame. Slopes (platband) on the loggia
- How to cover the mounting foam under the windowsill🤔
- Is it possible to plaster polyurethane foam?
- Cover with polyurethane foam. Saving polyurethane foam from sun damage
- CLOSE THE FOAM. METHOD No. 1.
What are seams and gaps?
The window design’s slightly smaller size than the technological opening in the wall causes the gap to appear between the wall and the frame. The technological map and GOST specify these specifications for installing a PVC window block in order to allow for the window frame’s thermal expansion. Such seams should ideally be foamed, waterproofed, and sealed using sealant and putty.
Advantages of installing PVC windows with foam filled mounting gaps:
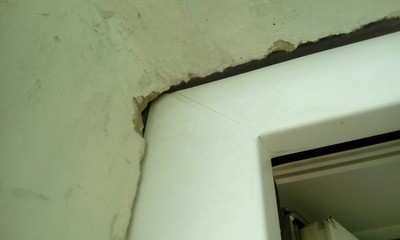
- high level of free space filling;
- ability to bear high loads;
- high characteristics of moisture, noise and thermal protection;
- low cost;
- high speed of work;
- simple application process;
The following are some drawbacks of using polyurethane foam to seal installation joints:
- Its high susceptibility to UV rays, therefore, after hardening and removal of excess, it must be covered with finishing and protective waterproofing materials.
- Foam at high temperatures can expand up to 10%, and at low temperatures, on the contrary, it can shrink.
Where exactly is sealing required after installation??
The following cracks form if the technical instructions for installing a PVC window in the wall are followed correctly:
- between the frame and the top and vertical walls;
- between the window sill and the frame.
If the installers adhere to the block installation technology, these gaps shouldn’t be larger than 2 cm, which should be sufficient to guarantee the window frame’s thermal expansion. If the foam was properly installed during the installation process, putty solutions and sealant are used to finish sealing the window block.
Why do you need to seal and close knots??
Construction foam is the primary material that can be used to seal mounting cracks in window openings, but it needs to be protected from the elements because it can be destroyed by precipitation and UV light. The foam layer has to be leveled to prevent sagging before finishing materials and waterproofing can be applied. Failing to do so will cause the foam to collapse rapidly, exposing holes.
Technology developed during the installation of PVC windows for technological seam sealing:
- When installing the block, try to ensure that the distance from the wall to the PVC frame does not exceed 2 cm. This is achieved as a result of accurate measurement of the wall opening before ordering the window block.
- Fill the seams with polyurethane foam, purchased according to the outside temperature in the area of installation work.
- Trim off excess foam after it dries
- Install a vapor barrier layer.
- Plastering.
- Paint the plaster layer.
Following this, slopes, drainage, and window sills are installed. They also seal the frame, window sill, drainage, and small openings up to 5 mm in diameter between the frame and the wall.
What materials are best??

Even with the most meticulous execution, there will still be tiny gaps that are sealed with sealants after the polyurethane foam is applied and the window sill, drainage, and slopes are installed.
You can buy a number of dozen highly effective PVC window sealants from the trading network. They have specific qualities because of the different polymers they contain.
Implementation form: tubes, usually white, with a plastic mass that is pasty. The sealant forms an airtight and moisture-resistant layer on the leaking surface as it gradually hardens after application.
Let’s look at the most widely used sealants for filling the spaces between PVC window structural seams.
Silicone
Obtainable as an all-purpose paste containing organosilicon compounds that can be applied externally or internally. available in neutral and acidic varieties.
Benefits
- high elasticity and good adhesive properties;
- ease of surface treatment and affordable cost;
- the resulting seam does not shrink;
- does not lose elasticity or color over time.
- Sanitary silicone sealant is used for interior spaces, which resists the formation of mold and other biological damage, so it always remains white.
Regarding the drawbacks:
- the presence of the smell of vinegar in the room when applying acidic compounds;
- over time the smell dissipates.
Acrylic
Sealants are applied externally.
Benefits
- increased elasticity;
- moisture resistance;
- resistance to UV rays;
- low cost.
Among the drawbacks are:
- high moisture absorption;
- in a liquid state it is easily washed away by water, in a solid state it absorbs room vapors, after which it darkens, so it is not recommended for indoor installation.
Liquid plastic
The material is made using MS polymers and PVC as a basis.

Benefits
- excellent adhesion and increased viscosity, as a result, after application with the base material, it forms an integral system;
- After the sealant has hardened, it can be coated with a layer of varnish or paint.
Drawbacks:
- high price;
- cannot bear the load.
Butyl or polyisobutylene sealant
Produced using a material that resembles rubber.
Benefits
- high characteristics of elasticity and resilience, which are maintained at temperatures from -55 to +100 C;
- endurance of ultraviolet exposure;
- environmental and biological safety;
- high vapor permeability, therefore, in addition to sealing installation joints;
- additionally used for repairing double-glazed windows;
- is highly water resistant;
- does not swell.
Low strength composition is a flaw.
Theocol sealant
Made with polysulfide ingredients.
Benefits
- hardens at any air temperature and humidity;
- indispensable for external work;
- can be used in frost and precipitation.
To the drawbacks Among the sealants of this kind are:
- high price due to the large number of components that give it rubber-like characteristics;
- bad smell.
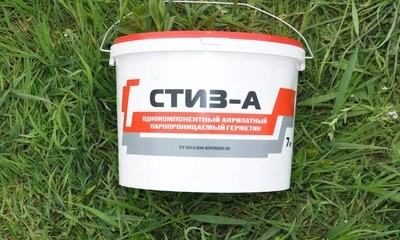
Steez A
One-component acrylic sealant intended for outdoor applications.
Benefits
- highest adhesion to a variety of building materials;
- resistant to ultraviolet radiation, natural precipitation and shrinkage deformation processes;
- can work at T=-20 C;
- high vapor permeability;
- can be painted in the desired color;
- resistance to mechanical loads;
- durability up to 20 years;
- minimal shrinkage and the presence of antibacterial components.
Drawbacks:
- insufficiently high elasticity lower than that of silicone analogues;
- porous structure;
- unpleasant odor;
- short shelf life of the prepared mass from 6 to 12 months.
Steez B
One-component acrylic sealant for use in interior projects.
Benefits
- high adhesion to any type of wall;
- highest vapor barrier;
- wide range of application in temperature from -40 to +80 C;
- resistance to deformation;
- can be stained after drying;
- lower price than modification A.
Drawbacks: It can only be used for interior work in a pair with Stez A because it cannot remove moisture from the seam.
Steam and waterproofing tapes
Materials for vapor permeable self-expanding sealing tape (PSU) should be used to build a warm seam system.
What are the benefits of the Euroband PSU?
- waterproofing and vapor barrier protection closes the inner seam and does not create mold;
- has a high level of elasticity;
- During operation, they do not harden;
- Takes any form resistant to UVs, with a 5-multiple of expansion;
- water resistance up to 600 RA;
- fills various cracks;
- removes moisture from the structure of the wall;
- unable to maintain combustion;
- Chemically neutral.
One drawback for its users is that it is very expensive.
It is essential to cover any gaps and cracks in the foam when installing plastic windows to ensure insulation and keep moisture and drafts out of your house. In addition to improving energy efficiency, properly sealing these regions also adds to the overall strength and aesthetic appeal of the window installation. The best methods for covering foam will be walked through in this article, along with the kinds of materials to use and the precise steps to follow in order to achieve a polished finish.
TOP-5 funds
The buying behavior of major trading platforms determines the popularity of a specific sealant. additionally depending on client feedback. The most widely used sealants for caulking PVC window seams are the ones listed below.
Cosmofen 345
Plastic liquid produced by a German company. Location of sealing: from the outside, between a quarter of the brick wall and the frame; PSUL + finishing + Cosmofen 345 are the options.
Benefits
- excellent adhesion to all wall materials;
- increased resistance to ultraviolet radiation and atmospheric moisture;
- long service life of more than 20 years with preservation of original properties;
- efficiency and convenience of work;
- low shrinkage;
- capable of sealing seams up to 7 mm, ready in 24 hours.

A drawback is that it can only be used outside due to its potent, toxic odor. A 310 g tube costs 590 rubles.
Quelyd 007
French universal sealant for both exterior and interior use. Installation location: inside side walls, top wall, and window sill; scheme: vapor barrier tape + finishing + Quelyd 007; option: PSUL + finishing + Quelyd 007: outside side and top walls.
Benefits
- multifunctionality;
- high moisture resistance;
- neutral smell;
- does not float;
- has minimal shrinkage.
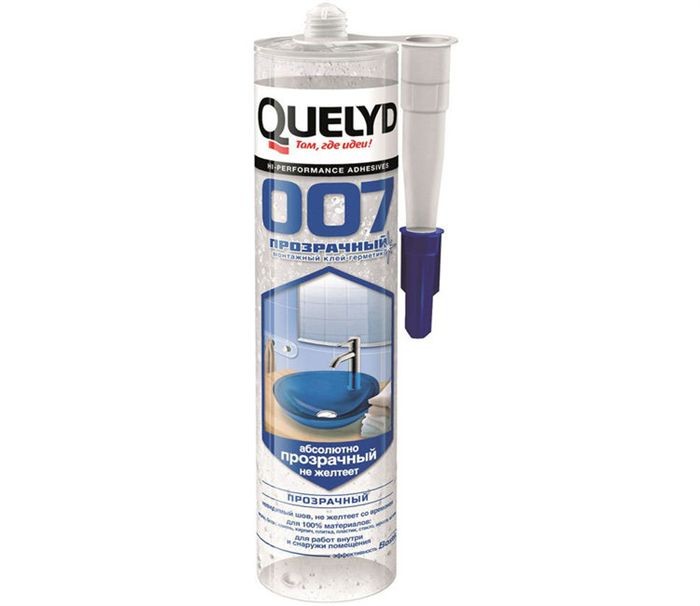
The cost is the only negative aspect. The cost of a 430 g tube is 650 rubles.
Soudal fix all high tack
All-purpose synthetic rubber sealant from Belgium. Location of installation: inside side walls, top wall, and window sill; scheme: vapor barrier tape + finishing + Soudal fix all high tack; options: PSUL + finishing + Soudal fix all high tack.
Benefits
- high water resistance can glue even wet surfaces;
- instant gluing effect;
- high resistance to aggressive environments;
- wide range of operating temperatures;
- long service life.
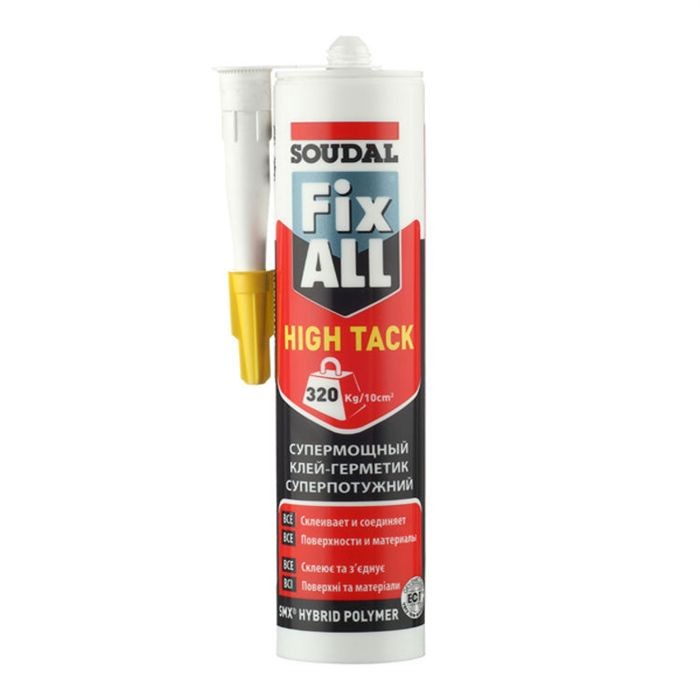
One drawback is the price; a 290 g tube sets you back 950 rubles.
MasterTeks ProfiMaster
Polish acrylic sealant, universal clear. Location of installation: inside the side walls, top wall, and window sill; scheme: vapor barrier tape + finishing + MasterTeks ProfiMaster; outside the side surfaces and the upper portion of the opening; option: PSUL + finishing + MasterTeks ProfiMaster.
Benefits
- high antibacterial resistance;
- highest adhesion;
- the widest range of permissible temperatures from -20 to +80 C;
- can be painted;
- reaches elasticity within an hour after application;
- is easy to correct;
- relatively low price;
- long service life.
Drawbacks:
- becomes transparent when drying from white;
- requires painting.

One tube costs 570 rubles.
Moment
Russian-made white silicone sealant is universal. Location of installation: inside side walls, upper wall, and window sill; scheme: vapor barrier tape + finishing + moment; outside side surfaces and upper portion of the opening; option: PSUL + finishing + moment.
Benefits
- high resistance to chemicals;
- high degree of protection up to T + 150 C;
- good adhesion to all types of wall materials and PVC;
- does not provoke corrosion processes in contact with metal.
The term "to the disadvantage" describes an odor that is present when applied but eventually goes away.
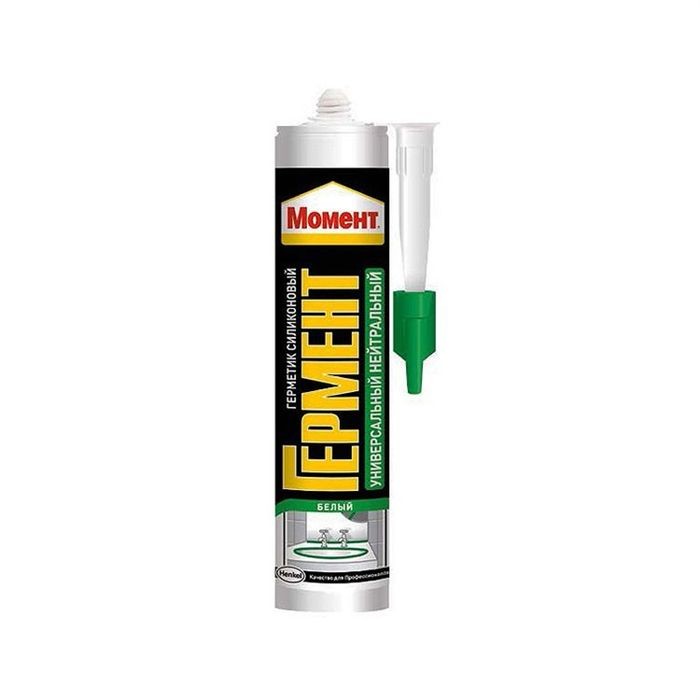
Each tube costs 350 rubles.
Tools
You will need a variety of tools to seal seams and cracks; the list may grow based on the processing technology chosen and the width of the cracks.
The following instruments, extras, and supplies are needed if the frame is installed in accordance with the project, with a 20 mm space between it and the wall opening.
- Master OK.
- A set of spatulas, including an angular one.
- Mortar capacity.
- Construction level, plumb line.
- Soft wide brush.
- Construction float.
- Electric drill with mixer attachment for preparing finishing slopes.
- Gun.
- Container with water.
- A towel or piece of clean cloth.
- Degreaser.
- Construction foam.
- PSUL.
- Vapor barrier tape.
- Sealant or liquid plastic.
- Primer composition.
- Reinforcing fiberglass mesh.
- Construction tape.
- Sponge and napkins.
Step-by-step instructions for sealing
The chosen consumables, window design, wall material, and amount of work all influence the mounting joint sealing technology. When sealing mounting joints and spaces between surfaces of structures, the following are the primary tasks that the contractor must complete:

- After fixing the frame and installing the window, all mounting gaps are foamed with construction foam.
- PSUL is installed between the quarter and the frame.
- Diffusion tape is installed between the frame and the ebb.
- Vapor barrier tape is installed between the frame and the window sill.
- Duplicate vapor barrier tape is installed between the frame and the internal slopes.
- Slopes are installed with insulation and waterproofing.
- Then they begin to seal the gaps between the PVC window frame, slopes, ebb and sill board.
- Prepare a syringe for sealant, a container with water.
- Construction tape along the edge of the seam is used to protect all mating surfaces.
- Before starting work, clean the work area from dust.
- Window sealant is applied with a syringe at an acute angle, squeezing it into the cracks and at the same time using the spout, smoothing the seam.
- The protruding areas of the seam are smoothed with a wet finger, trying to evenly distribute the sealant along the entire length.
- Excess sealant is collected with a damp sponge, which must be constantly cleaned of glue in a container with water.
Work is done in sections to ensure that the sealant does not harden. Acetone should not be used to degrease the frame or window sill surface if this is the first step in the process.
Possible difficulties and errors
When cold weather arrives, the owner of the window will notice the first mistakes caused by inadequate sealing right away. The window will start to siphon from under the installation seams, condensation will appear both inside and outside the building, and the slopes will turn black with mold.
In the event that the owner discovered these indications on PVC windows and a specialized company installed them, their representatives must be contacted immediately to fix the issues.
If the work was completed independently, then it’s likely that serious errors like these were made when caulking seams and sealing cracks:
- incorrect installation, excess thickness of the gap, for which the protective “pie” was incorrectly selected and installed;
- unprepared surfaces for sealing seams;
- Incorrectly selected polyurethane foam for temperature application;
- protective heat and waterproofing layers have not been installed before the external finishing of the mounting slots;
- the sealant was selected incorrectly, without taking into account the area of application: external or internal;
- the surface is not prepared for application of sealant;
- The sealant is placed unevenly on the protected surface with gaps.
Prices for services of masters
The width of the seam, its total length in linear meters, the degree of surface preparation, the number of floors the window is on, and the protection technology used all affect how much sealing a seam will cost. Complete work can be done, for instance, when installing a PVC window or performing specific technological tasks.
Average cost of seam sealing services following PVC window installation:

- Comprehensive sealing of PVC windows after installation, RUB 2,000. per set.
- Sealing external seams – 600 rubles./P.m.
- Sealing internal seams – 300 rubles./P.m.
- Sealing seams between PVC frames and slopes RUB 300./P.m.
- Filling empty technological gaps between the frame, walls, ebb and window sill with foam – 150 rubles./P.m.
- Installation of PSUL – 250 rub./P.m.
- Seam protection with steam and water protective tapes – 300 rubles./P.m.
- Preparation of surfaces for sealing – 300 rubles./P.m.
After installing plastic windows, it is imperative to fill in any gaps and cracks with foam for both practical and aesthetic reasons. It guarantees a clean finish, improves insulation, and keeps moisture out of the house, which can cause mold and other problems. By taking the time to properly cover the foam, you can increase the energy efficiency of your home and extend the life of your windows.
There are various options available, including caulk, trim, and specialty foam coverings. Every approach has benefits and is appropriate in certain circumstances. For instance, caulk creates a seamless seal, and trim gives off a polished appearance that can be painted to match your decor. If you’re searching for a simple and rapid fix, specialized foam covers are great.
In the end, the approach you select should be determined by your unique requirements and tastes. Take into account the degree of exposure to the elements, your desired look, and your financial constraints. You can guarantee that your plastic window installation is finished and that your house stays cozy and energy-efficient with a little bit of work.


