
Doing laminate flooring yourself can be a satisfying and affordable way to update the interior of your house. With the correct advice and supplies, installing laminate flooring is a doable project for both novices and seasoned do-it-yourselfers. With the help of this guide, you’ll be able to accomplish results that look professional at every turn.
It’s crucial to gather all required tools and materials before you begin. The laminate planks, spacers, a saw, measuring tape, underlayment, and a tapping block are all included in this. A well-planned approach will facilitate the process and assist you in avoiding typical pitfalls.
It takes patience and close attention to detail to install laminate flooring successfully. Every stage, from laying the first row to preparing the subfloor, is essential to achieving a smooth and long-lasting finish. You will quickly be able to transform your space with gorgeous new flooring by following these easy-to-follow instructions.
Recall that your greatest allies for this project will be precision and patience. If you take the proper approach, installing laminate flooring can be a simple and pleasurable task that will greatly enhance your home.
| Step | Description |
| 1. Prepare the Room | Clean the floor, remove baseboards, and make sure the surface is even. |
| 2. Lay Underlayment | Roll out the underlayment to cover the entire floor area. |
| 3. Plan the Layout | Arrange the laminate planks to determine the best layout and minimize cuts. |
| 4. Start Laying | Begin at a corner, placing the first plank with the tongue side facing the wall. |
| 5. Continue Laying | Lock the planks together, row by row, maintaining a 10mm gap from the wall. |
| 6. Cut to Fit | Measure and cut planks to fit at the ends of rows and around obstacles. |
| 7. Install the Last Row | Cut the planks of the last row to fit, ensuring the final gap from the wall. |
| 8. Add Finishing Touches | Reinstall the baseboards and any trim pieces to cover the gaps. |
- Laminate structure
- Preparing the room
- Step 1 must let the laminate be acclimatized
- Step 2 Clean the floor
- Step 3 Install waterproofing
- Step 4 Substrate under the laminate
- Step 5 Lay down the first board
- Step 6 Place Spacers
- Step 7 Lay down the next board
- Step 8 Laying the second row
- Step 9 Continue laying boards
- Step 10 Trimming the boards at the end of the room
- Step 11 Don"t forget to remove your spacers
- Step 12 Installing skirting boards
- Video on the topic
- Laying laminate. Step-by-step video instructions.
- Laying laminate. Various nuances and tools. Master Class.
- The best way to install laminate flooring. Before installation for the first time – a must watch.
- 🔥 DO NOT INSTALL LAMINATE WITHOUT WATCHING THIS VIDEO
- Laying laminate flooring – step by step INSTRUCTIONS with explanations of ERRORS
Laminate structure
The laminate is a four-layer material with a significant role for each layer in its structure. The goal of the top layer is to protect against various mechanical stresses and damage. enhances heat and light resistance and combats laminate’s electrification.


Please make sure the laminate is appropriate for the operating conditions before you plan to install it. Learn more about the laminate selection. Its service life will directly increase as a result.
It goes without saying that laminate flooring is exquisite and looks fantastic throughout the apartment. However, it is not recommended to install it on a balcony; instead, lay it in the bathroom. Infrared or film floors are the best options if you intend to place heated floors beneath the laminate because they won’t warp it. Installing laminate flooring in high-humidity areas is generally prohibited.
There are currently a number of techniques available for installing laminate flooring. Since they are all distinct, they each have a legal claim to exist.

"Click" is the most widely used installation method because it’s simple and practical. After the first row is fully laid, place the next row’s tenon at an angle into its groove. Snapping the components into the lock after inserting is done by aligning the row horizontally. A hammer or mallet can be used. We splice adjacent sections together until the seam almost disappears and makes the distinctive clicking sound.
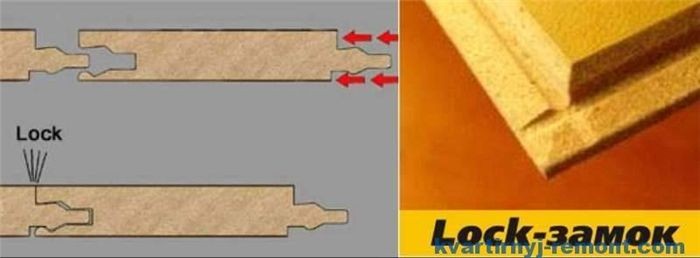
The "Lok" approach is different from the "Click" method in that the subsequent board is positioned precisely horizontally and is hammered or mallet-driven into the lock of the preceding board. A hammer used too forcefully could harm the joining edges, so use caution. Proceed with extreme caution.
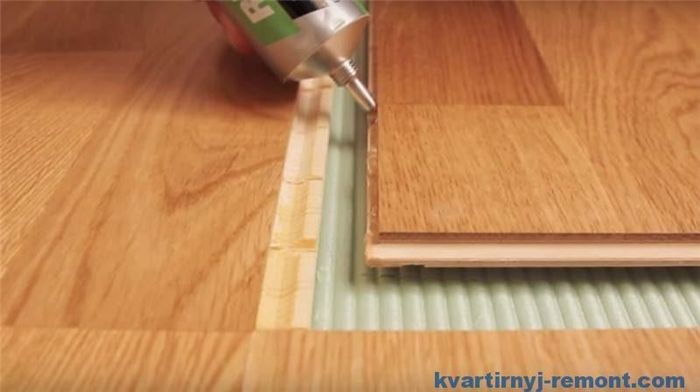
The tacky technique is less popular. The only difference between this method and the original "Click" method is that glue is applied to all joining edges. As a result, the seams will be stronger and more resistant to moisture. However, using this method will prevent you from removing the flooring if necessary, and the glue might eventually dry out.
What is the best way to join laminate boards??
Preparing the room

Firstly, it should be mentioned that half of a high-quality laminate floor installation is skillfully and accurately preparing the base for the flooring. The longevity of your flooring will depend on how carefully and responsibly you complete this step of the project.
Taking into account every small detail for installation, the following supplies are required:
- primer;
- glue;
- laminate;
- baseboard;
- fastenings intended for baseboards;
- foamed polyethylene or film;
- wedges for technological gaps.
Only the areas where the edges and hooks are provided are sealed with glue.
A modest supply is needed to purchase laminate flooring. Ultimately, even with an easy installation method, not everyone will be impervious to errors that could cause a few boards to be damaged during the process of sawing or cutting a bend in a wall or pipe outlet.

The styling tool is very easy to use:
- roulette;
- knife;
- corner;
- pencil;
- wooden block;
- hammer;
- electric jigsaw or hacksaw.
Next, we’ll go over the laminate flooring installation procedure in its entirety, covering all the key aspects and challenges. Use our calculator with the laminate installation diagram to determine the quantity before making a purchase.
Step 1 must let the laminate be acclimatized

The laminate’s undamaged packages should be placed in the appropriate rooms. This must be done at least 48 hours before laying; this will give it enough time to adjust to the operating temperature. By doing this, the deformation caused by heating or cooling the wood will be reduced.
Step 2 Clean the floor
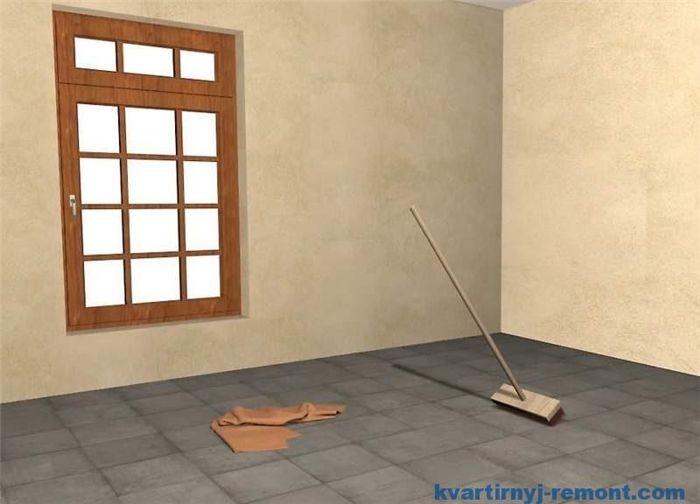
Dust must be removed from the screed or any other surface that the laminate will be laid on. Sinks and floors can be set. The surface is primed so that all of the unevenness and hollows that are hidden from view are filled with primer.
Anything that is appropriate for styling can be used as a concrete screed or a regular smooth wooden floor, with height variations limited to two millimeters per square meter. Nonetheless, the floor needs to be leveled if there are any uneven areas. Cover all crevices and indentations with putty or specific concoctions. Repairing the concrete screed is required if the base is made of concrete and has numerous cracks in it. The floor covering will quickly deteriorate if you don’t do this.
If the area where the laminate will be installed has plank flooring, start by looking for moisture and mold beneath the boards. Scraping can remove any unevenness that may be present on the boards. If there is squeaking on your boards, you will also need to go over and replace any missing self-tapping screws. An effective antiseptic is also applied to wooden floors.
Step 3 Install waterproofing

Cover the floor with a waterproof material; plastic film works well for this. Cover the base with a plastic film that is at least 200 microns thick before beginning to lay on the concrete floor. Tape the joints after layering the film strips on top of one another, overlapping by about 15 centimeters. It is advised to extend the film 4 centimeters onto the wall, since the baseboard will cover it.
Step 4 Substrate under the laminate

The waterproofing is covered with a substrate, which greatly improves sound and heat insulation. The most popular underlay is 3 mm thick polyethylene foam, which makes the floor perfectly flat and eliminates small imperfections like small pebbles or dimples. By softening impacts on the laminate, this kind of substrate can greatly increase the decorative coating’s service life. After being positioned end to end, the backing is taped in place.
There is a laminate with a soundproof backing built right into the base. The polyethylene lining in this instance should never be left lying down. The only thing we form when installing on a concrete base is waterproofing.
The floor will be insulated by the underlay as well. On top of that, we install laminate boards. The substrate is laid underneath where you will be working right now, and it is covered as you proceed. This allows you to see the entire base because you can never be sure if a pebble has fallen or something else. Further information is available here.
Step 5 Lay down the first board
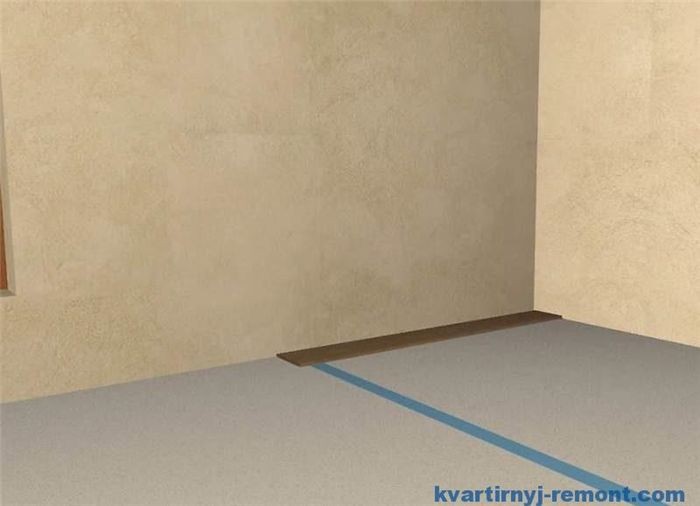
Starting from the left corner, laminate is laid; in this instance, the locks are positioned correctly to allow for additional board fastening.
Step 6 Place Spacers

The laminate boards and the wall are separated by a wedge. Although wedges can be purchased, making your own is simpler. The width ought to be about one centimeter. You can use a saw to cut a piece of plywood or remove the laminate. For you, 5–6 pieces should be sufficient.
You can use any material for the wedges, as long as the thickness and size are the same, such as laminate or drywall pieces. However, you can also purchase them; they are one penny.
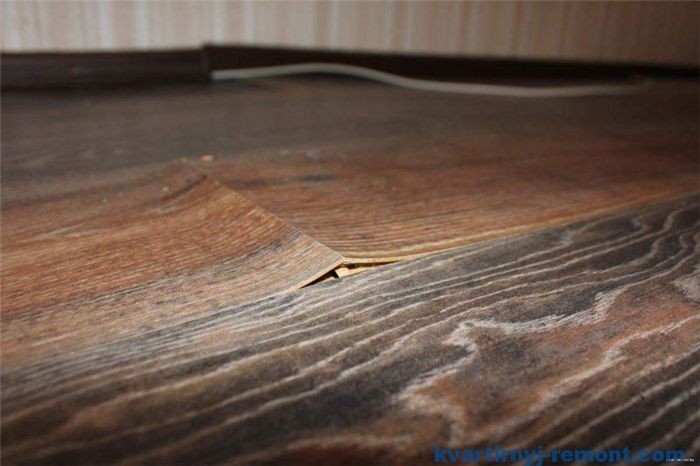
Having wedges is essential! Because laminate is made of wood, it reacts differently to changes in humidity and temperature. If laminate is placed near a wall, it may warp and become unbearably hot.
Step 7 Lay down the next board

At a 45-degree angle and below, slide the subsequent board into the lock of the preceding one. We start mounting each board that supports the wall in a row. Ensure that the laminate is correctly connected at the same time. If the entire board does not fit at the end, cut it off, leaving a 15 millimeter gap against the wall; the remaining piece will start the next row.
Step 8 Laying the second row
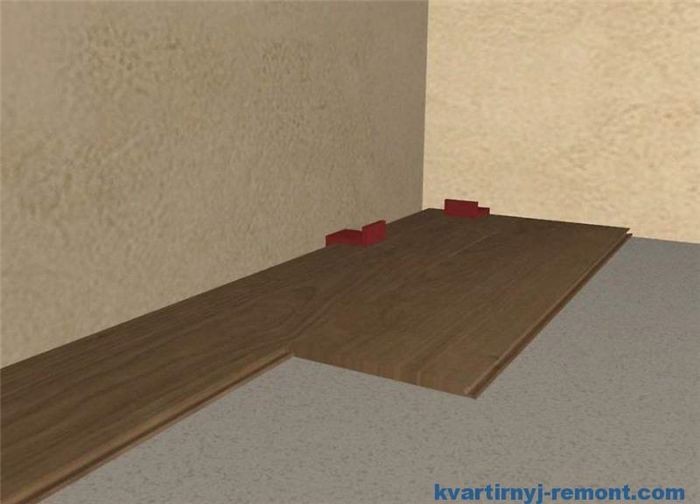
To make the boards in the second row staggered in relation to the first, trim a laminate board and use that piece. Using the pieces that remain from the previous row, a new row must be laid. The boards’ ability to stick to one another will be greatly improved by this.
Without snapping into the groove, we arrange every component in the second row close to the first row, only touching the outer edge of each element. Only after the second row is fully put together should you carefully lift it, slide it into the groove, and snap the lock.

Apply a block to the edge and carefully hammer the entire row into the lock if the row fits into the groove but there are still some errors. And in this manner, we keep going until we have covered all the required area. The areas with multiple wall bends or protrusions, as well as the outlets for communications and heating pipes, need the greatest caution.
Step 9 Continue laying boards
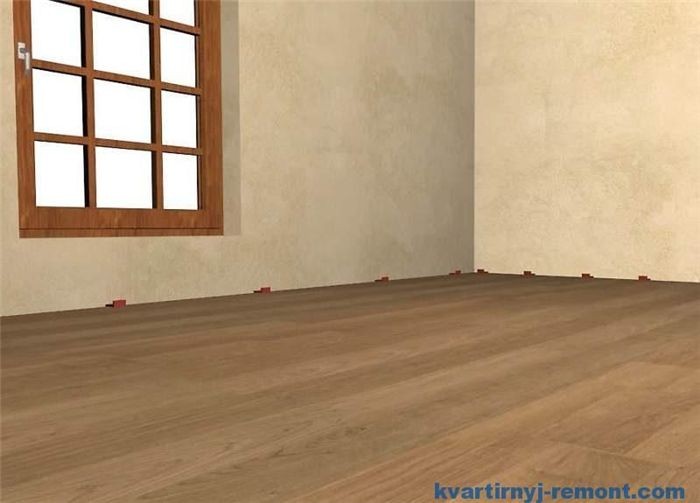
Until the entire floor is completed, one by one. Ensure that there are no spaces or divisions among the rows.
Step 10 Trimming the boards at the end of the room
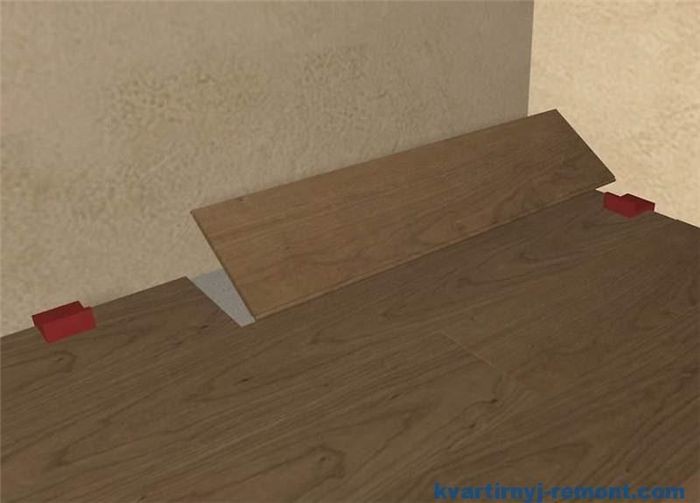
You will need to cut off every detail in this section once you have filled the entire space in the room and only need to lay one row along the wall. Make sure to account for the possibility of uneven walls when sawing, and factor in one and a half centimeters for the defragmentation seam.
If you follow the proper instructions, installing laminate flooring yourself can be a simple and satisfying home improvement project. This article offers a comprehensive guide that will assist you in achieving professional results. It covers all the bases, from choosing the appropriate equipment and supplies to prepping the subfloor and putting in the planks. If you follow our simple, uncomplicated instructions, you’ll transform your area with gorgeous, long-lasting laminate flooring while also saving money and feeling like a job well done.
Step 11 Don"t forget to remove your spacers

When the entire floor is prepared, we remove the pegs around the entire perimeter. Allow the laminate to remain in place for the entire night. After installation, delay wet cleaning. Should you choose to carry out additional improvements in the space, make sure to tuck the remnants of the backing beneath the legs of any chairs or tables to prevent scratches on the laminate.
Step 12 Installing skirting boards

You will need to install thresholds, hammer down skirting boards, and finish other small details to finish your floor. Hardware stores carry special construction chalks in various colors that can be used to cover small holes or rough spots.
Skirting boards can be fastened using screws or glue. Every fastening is made straight into the wall. Thermal expansion may cause swelling if you begin fastening the baseboard to the floor through the laminate.

Consequently, it is crucial to remember that the plinth is fixed to the walls regardless of the installation technique. Additionally, you will be able to quickly remove the skirting board structure as a whole and, if necessary, quickly disassemble the needed portion of the floor for small repairs thanks to this fastening method.
If you do not plan to perform any repairs or change the floor covering in the future, you should use the adhesive fastening method.
It is preferable to use plastic plinths because they follow the contour of the wall around the perimeter and walls are frequently uneven. Avoid letting wires hang between the wall and the laminate when installing them.
You can improve your home at a reasonable cost and with great satisfaction by installing laminate flooring yourself. Without hiring a contractor, you can accomplish professional-looking results with a few simple tools and a little perseverance. You can follow these easy-to-follow instructions to complete the process, from laying the last plank to preparing the subfloor.
First, assemble all required supplies, such as spacers, underlayment, laminate planks, and a saw. To ensure a seamless installation, make sure your subfloor is dry, clean, and level. Proper underlayment installation will offer cushioning and sound absorption, enhancing the comfort and quietness of your floor.
Using spacers to keep an expansion gap around the edges, start laying the laminate planks in the room from one corner. The flooring can expand and contract in response to temperature variations thanks to this gap. To create a more natural appearance, make sure the planks are positioned at the end of each row and around obstacles by carefully measuring and cutting them.
Make sure the planks fit tightly together and the rows are straight as you go. To secure the joints without causing damage to the edges, use a pull bar and tapping block. It might be necessary to trim the planks lengthwise to fit when you get to the last row. To finish your project, take out the spacers and install baseboards to cover the expansion gaps.
You can successfully install laminate flooring that raises the curb appeal and value of your house with perseverance and attention to detail. Take your time, follow these instructions, and savor the satisfaction of a job well done. Cheers to your renovations!


