
Although applying wallpaper adhesive may appear simple, doing it correctly can significantly alter the way your walls will look in the end. Whether you’re remodeling a room or your entire house, using the right tools and methods will guarantee a polished and seamless outcome.
It is crucial to select the appropriate type of glue for your wallpaper before beginning. Knowing which adhesive to use is essential because different wallpapers require different types of adhesive. After you have the appropriate glue, you must set up your workspace and collect the required supplies. This preparation will help you avoid common mistakes and streamline the process.
We’ll walk you through every step of applying glue to wallpaper in this article. We’ll go over every crucial step, from choosing the best adhesive to spreading it evenly and making sure it fits your walls perfectly. Even if wallpapering is your first experience, you can still turn out a professional-looking result with the help of these tips.
| Stage | Description |
| 1. Prepare the Walls | Ensure the walls are clean, smooth, and dry. Remove any old wallpaper, dirt, and debris. |
| 2. Measure and Cut Wallpaper | Measure the height of your wall and cut the wallpaper into strips, leaving a few extra inches at the top and bottom. |
| 3. Mix the Glue | Follow the instructions on the wallpaper glue package to mix it properly. |
| 4. Apply Glue to Wallpaper | Use a roller or brush to evenly apply glue to the back of the wallpaper strips. Be sure to cover the edges well. |
| 5. Book the Wallpaper | Fold the glued sides of the wallpaper onto itself, glue side in, to allow it to soak and become pliable. |
| 6. Hang the Wallpaper | Start at the top of the wall and align the wallpaper strip with your starting point. Smooth it onto the wall, working from the center outward to remove air bubbles. |
| 7. Trim Excess Wallpaper | Use a sharp knife to trim any excess wallpaper at the top and bottom. |
| 8. Smooth the Seams | Use a seam roller to ensure the edges of each strip are firmly adhered and smooth. |
| 9. Clean Up | Wipe away any excess glue with a damp sponge and clean your tools. |
Using wallpaper adhesive correctly is essential to getting a smooth, long-lasting finish. This post will walk you through every step of the procedure, from choosing the best glue to priming your walls and putting the adhesive on. We will go over every step in detail, including what tools you’ll need, how to mix and spread the glue evenly, and how to make sure the wallpaper adheres correctly and doesn’t wrinkle or burst. You’ll be able to tackle this home improvement project with confidence and produce results that look professional with the help of clear instructions and helpful advice.
- Application of adhesive composition
- Is it necessary for vinyl?
- Tools and Process Steps
- Vinyl
- Non-woven
- Paper
- Video on the topic
- How to apply glue to wallpaper or a wall, how to choose wallpaper
- How to quickly apply glue and cut wallpaper? Mechanical application of wallpaper glue. STORCH Tapetomat E
- How to hang wallpaper yourself. Stages of work.
Application of adhesive composition
It is impossible to say with certainty whether applying glue to walls or canvas yields better results. The kind of wallpaper affects the technology. Some require time to fully submerge. Others only need to touch the adhesive once; it is already applied to the wall. The best course of action is to adhere to the directions. Standard specifications based on the type:
- Paper base. They need to be coated with glue and rolled in a special way for impregnation. Then apply glue to the wall where you plan to mount the paper sheet. Wallpaper from some manufacturers does not require such a procedure; there is a note about this in the instructions.
- Non-woven base. Glue cannot be applied to such materials, especially to heavy non-woven fabrics. Only apply glue to the wall. There are some exceptions: some manufacturers indicate in the instructions that glue can (but not necessarily) be applied to these non-woven wallpapers.
- Vinyl. The technology for working with these materials depends on their basis. Can be applied to both roll and wall.
Following the directions from the instructions will therefore be the most effective course of action. The label’s unique symbols will aid in your understanding of the technology:
- vessel with water and roll – just moisten the reverse side with water;
- tassel and vertical stripe – means the need to apply only to the wall;
- horizontal strip (in the form of a roll) and brush – apply glue to the wallpaper and let it soak.
Is it necessary for vinyl?
The base of the finish determines where the composition is applied when adhering vinyl canvas. Different technologies may exist.
It’s crucial to carefully read the instructions:
- Vinyl on paper backing – require application to a roll and not to the wall (what are the features of gluing vinyl wallpaper?).
- Non-woven base – placed on a wall already coated with adhesive mixture, the canvases themselves do not need to be coated (how to properly glue wallpaper on a non-woven base?).
- Self-adhesive – rare view. These must either be moistened with water or the protective film on the back side must be peeled off.
Tools and Process Steps
You’ll need the following equipment to work:
- Brush. It is used to apply glue to narrow strips or along the edges.
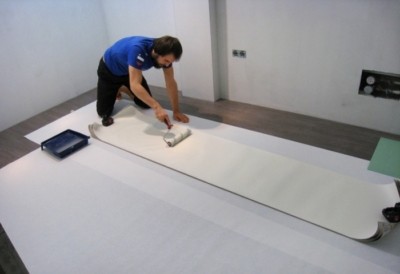
- Foam roller. Rollers with artificial or natural fur are suitable as a replacement, but the most comfortable one is just this one. The quality of the pasting largely depends on which roller is used for the job. Before first use, it must be well saturated with water.
- Bath. Necessary for rolling out the roller; it"s easier to use than a whole bucket of glue.
- A rag or foam sponge.
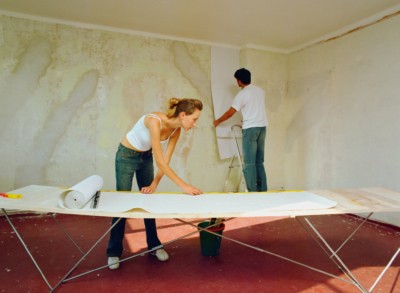
Gluing stages:
- Carefully study the instructions, all symbols on the roll. Determine application technique.
- Prepare the composition according to the instructions on the package. It is important to follow the recommendations on water temperature and the duration of swelling of the mixture. A large sieve through which the entire composition must be passed will help to get rid of lumps (read here for details on how to cook and use and where to store the paste).
- When applied to the sheets, you need to prepare a place to place them. You can do this on the floor or on a large table. When applying to the walls, you need to make sure of their purity, the absence of dust and small litter.
- Moisten the brush and roller with ordinary water.
- Spread a protective layer of paper on the floor or on the table, lay out the canvases. It is important that the paper does not melt and does not print on the roll when getting wet. This is especially true for white and bright wallpapers.
- Apply glue to the center of the sheet depending on the material of the wallpaper: on thin ones – a little, more on thick ones – more, with the calculation of absorption.
- Distribute with a roller along the entire length: from the edge to the edge of the opposite side. Then go to the near half, apply from edge to edge along the length.
- Separately smear the edge with a brush. Excesses on the front side, get wet with a rag or sponge.
- Thin wallpaper can be glued. Thick – leave to swell, folding the edges to the center and setting aside for 5-10 minutes. Then stick.
- If it is necessary to apply it to the wall, it is better to do it in two layers. The first serves as a primer, the second is where the wallpaper is directly glued.
Vinyl
Technology for sticking:
- Prime the wall well.
- Next, proceed as indicated in the instructions from the roll: Either smear the vinyl sheet and leave it to soak, or lubricate the wall.
- The only possible way of docking is end-to-end. It is important to note that when saturated, this type of fabric stretches greatly.
Non-woven
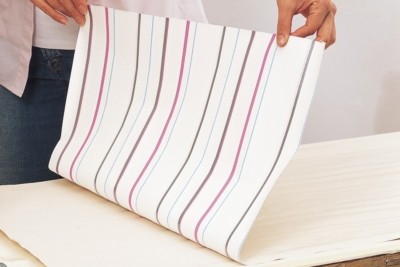
Let’s talk about what needs to be considered and whether glue can be applied to non-woven covering. Guidelines for applying glue:
- No adhesive is applied to this type of wallpaper. It is important to pay attention to careful processing of the surface for non-woven finishing, where the glue is applied in a thick layer, preferably twice. It is important not to miss a single centimeter when applying.
- Glued end to end, without overlap.
- It is convenient that non-woven wallpaper will not tear, as it is mounted on the wall dry. The sheet is convenient to transfer and correct in case of an error.
Paper
Gluing stages:
- Apply glue to the inner surface of the canvas, fold the edges towards the center, leave to swell.
- Straighten the canvas, coat it with glue again, paying attention to the edges and corners.
- If the sheet curls up, it means it is not ready yet, it needs time to soak.
- Gluing – overlapping.
A smooth and durable finish on your walls depends on using wallpaper glue correctly. The first step is to understand the various types of glue and how to mix them properly. The correct consistency for maximum adhesion is ensured by adhering to the manufacturer’s instructions, regardless of whether you’re using pre-mixed adhesive or a powder that needs to be mixed with water.
There are several important steps in the application process. Depending on the type of wallpaper you are using, begin by evenly applying the glue to the wall or the back of the wallpaper. Spread the glue evenly using a brush or roller, being careful to get under all corners and edges. This stops bubbles and peeling edges over time.
After applying the glue, carefully place the wallpaper. Using a brush or other smoothing tool, align it with the wall, working your way down from the top and eliminating any air bubbles. To prevent misalignment and creases, precise and patient work is necessary.
These instructions will help you apply glue correctly and apply wallpaper that will adhere beautifully, transforming your room. Using the proper technique not only makes your walls look better, but it also prolongs the life of your wallpaper, guaranteeing that it will remain in place and look fantastic for many years to come.


