
One of the most important construction steps that increases a building’s stability and strength is the creation of an armored belt, also called a ring beam. The longevity and safety of the structure can be greatly affected by correctly filling an armored belt, whether you’re building a house, a garage, or an outbuilding. Fortunately, you can do this yourself if you have the necessary tools and some advice.
The purpose of an armored belt is to act as reinforcement, distributing loads uniformly and preventing wall cracking or shifting over time. Usually, it is positioned slightly below the roof, atop walls, to offer extra support. Although the materials can be different, commonly used options include metal, concrete, and even some sophisticated composites. Every material has a unique set of benefits and ideal applications.
Although filling an armored belt may seem difficult, it can be done easily if you break it down into small steps. You can increase the overall durability of your building by making sure that your armored belt is filled correctly with a little planning, simple tools, and patience. Let’s get started on the supplies you’ll need and the detailed instructions for filling an armored belt yourself.
We examine doable methods for do-it-yourselfers wishing to reinforce walls with a variety of materials in our guide, "How to Fill an Armored Belt with Different Materials." We help you achieve a robust and long-lasting armored belt in your building or renovation project by breaking down the process into simple, understandable steps, whether you’re working with composite materials, bricks, or concrete.
- What materials are needed?
- What tools will you need??
- How to do it correctly at minus and plus temperatures?
- For monolithic concrete
- For blocks
- Step-by-step instructions for creating it yourself
- Made from concrete
- From blocks
- Errors and difficulties with the device
- Video on the topic
- Armopias 1 floor | Writing from the OSB sheet and filling | Care for an armored carrier
- ARMOBELT WITH YOUR HANDS. Preparing to pour concrete.
- How to fill an armored belt CORRECTLY and SAFELY?
- MANUAL FILLING OF AN ARMOUS BELT – WHAT IS MY MAIN MISTAKE
- 🔥reduce the price of the armored belt and make it yourself🔥
- Do-it-yourself armored belt for an aerated concrete house. Kneaded in a trough and poured two cubes of concrete alone. 16+
- Armopoyas for attic roof. How to fill an armored belt under the Mauerlat. Academy of Roofing in Komarovo, Tyumen.
- Concrete for armored belt
What materials are needed?
The most common materials used to build a reinforced belt are different types of blocks and monolithic concrete. The following supplies must be ready in order to assemble your own armored belt:
- concrete blocks;
- solution for the production of monolithic concrete, if this is what will be used for pouring;
- edged boards 25 mm thick;
- OSB board 8 mm thick;
- black self-tapping screws from 25 to 65 mm in length;
- reinforcement bars;
- reinforcing wire;
- soft wire;
- pure water.
Concrete blocks are the first material to be purchased if the armored belt is constructed of them. You can use foam concrete, gas silicate blocks, aerated concrete blocks, and other materials for this design.
Crucial! Reinforcing bars are inserted into grooves created in the blocks to strengthen them.
Crushed stone, sand, and cement are used to create a solution if monolithic concrete is to be used. There is no need for crushed stone to have a fraction of more than 10 to 40 mm.
Large amounts of dust will result from using material with a smaller fraction, which will obstruct normal mixing. You should buy sand that has the least amount of clay possible.
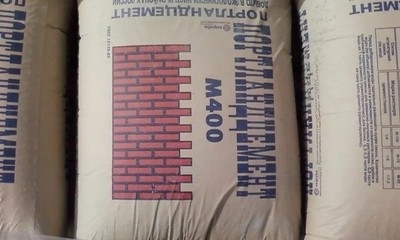
It is preferable to use M400 cement since it will give the concrete good strength. Cement has an expiration date, which should be noted because it needs to be used fresh.
The maximum time cement can be stored is two months in order to produce high-quality concrete.
The water needs to be room temperature, clear, and devoid of silt and other impurities.
Formwork will be assembled using edged boards, OSB boards, and self-tapping screws, into which the reinforced concrete belt will subsequently be poured. The diameter of the reinforcement bars should be between 12 and 14 mm, and wire with a diameter of 6 mm is preferable. You can use soft ties in place of soft wire.
What tools will you need??
The list of tools will be expanded upon based on the technology that is employed. The primary tool list is as follows:
- hand-held circular saw;
- screwdriver;
- concrete mixer;
- wall chaser;
- hacksaw;
- plane;
- tools for tying reinforcement;
- roulette;
- mallet;
- trowel with teeth;
- building level.
When working with boards for a monolithic armored belt, a hand-held circular saw will be useful. With this tool, cutting a board is very quick and convenient.
If the task is substantial, an electric jigsaw can be utilized. Another helpful tool is a screwdriver, which is required to insert self-tapping screws when building formwork and fastening the boards together.
You will need a concrete mixer to create your own solution when pouring monolithic concrete onto a belt.
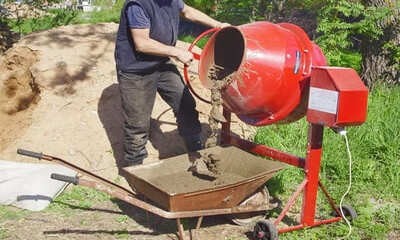
A 160-liter concrete mixer will have the ideal capacity.
When building a reinforced belt out of concrete blocks, you’ll need a wall chaser. You’ll also need to get ready the consumables, which are drills with the right diameter for the reinforcement.
When building a belt out of blocks, a hacksaw and a plane will come in handy. A hacksaw can be used to saw through any contemporary foam or gas block. On a construction site, a building level and a tape measure are necessities.
To level the block in the masonry armored belt, a mallet is required; a trowel is needed to lay mortar when fastening blocks.
How to do it correctly at minus and plus temperatures?
Although creating a reinforced belt is straightforward, there are a few subtle differences. They have to do with things like temperature, working conditions, and other elements. Every technology will have its own set of guidelines.
For monolithic concrete
The entire process involves a few steps: erecting a framework, setting up formwork, and pouring concrete.
The question of what temperature is best to pour concrete is one that interests a lot of builders and belt manufacturers.
Since they could only be done in specific weather conditions at the beginning of the 20th century, all concrete-related activities were referred to as seasonal. These days, a temperature of no less than -15 degrees can be used to pour concrete.
In this instance, it is also important to consider the monolith mixture’s operating temperature. This range should ideally fall between +5 and +15 degrees.
Although the range of borderline indicators is thought to be between -20 and +45 degrees, you shouldn’t take any chances when filling the armored belt. You shouldn’t rely on luck because a reinforced belt is usually made to strengthen the structure.
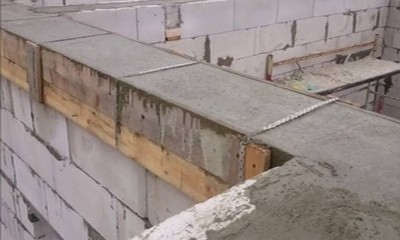
Can winter be made to last longer? Yes, you can use concrete to slightly improve the situation if casting takes place in the winter.
- use heated water when mixing the solution in a concrete mixer;
- add frost-resistant additives to the mixture;
- use electric heating;
- use heat guns.
If you intend to heat concrete that has reinforcing bars, you must switch the electrodes over the whole area where the bars and concrete come into contact with the small voltage.
The armored belt can be manually filled in sections, but it is beneficial to set up a bevel at the intersection. It’s also important to keep in mind that smooth concrete is not ideal.
For blocks
The technology for setting up a concrete block armored belt is likewise simple, but temperature conditions must be considered in this case.
The temperature range at which the blocks can be laid is +5 to +25 degrees; this range can be reached in the summer, spring, and early winter.
How do you get through the winter? You can aid in the structure’s preservation if you still had to operate with a reinforced belt during the winter:
- apply antifreeze additives to the solution;
- use special electric heating in the form of a cord.
Antifreeze additives ensure that the masonry mortar does not prematurely harden at below-freezing temperatures, in addition to keeping the water used to prepare the mortar from freezing.
However, seasoned builders advise against taking any chances and delaying building until the outside temperatures rise above zero.
- If the reinforced belt is made of aerated concrete blocks, then the formwork can be removed when it has reached 50% strength.
- If the temperature outside is +20 degrees, then this will happen on the 3rd day. If the temperature is +5, then the solution will harden within 5 days.
You must wait for the reinforced belt to gain strength because it can only be loaded one month after it is installed.
Step-by-step instructions for creating it yourself
Every kind of reinforced belt has a unique manufacturing process and technology. To ensure that the work is done correctly, it is advised that you go over both instructions.
Made from concrete
Because the concrete solution needs to be mixed, making an armored belt out of monolithic concrete will require more labor than the other option. The detailed instructions are as follows:
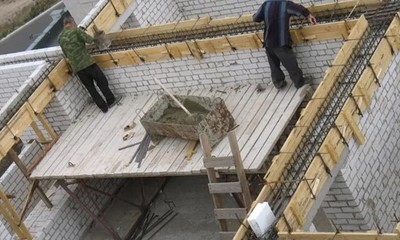
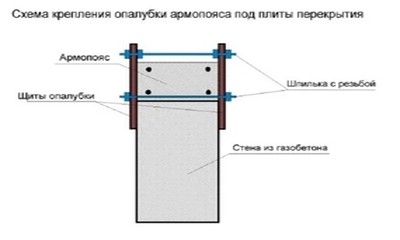
- Installation of formwork. First, all measurements are taken – according to the data obtained, shields are made from the boards, for this, OSB boards are used. The boards are installed level, making sure that there are no height differences of more than 1 cm. All joints must be airtight, since concrete leaking through the cracks will form sagging, which will be difficult to remove later. After assembling and installing the reinforcement frame, the panels are fastened together.
- Creating a Reinforcement Frame. To begin with, cross ties in the form of rectangles are made from reinforcing wire. Then longitudinal reinforcement rods are placed inside them. Rectangles are laid out along the axis in increments of 40-50 cm. Longitudinal reinforcement is connected to each other with soft wire or ties. Reinforcement cages are laid in formwork.
- Pouring concrete. Prepare it yourself or using a concrete mixer. Sometimes you can order imported concrete. The grillage is poured once without interruption. To improve the properties of concrete, plasticizers and strength gain accelerators are added.
You must shield the concrete from the sun and frost on the first day. Refusing to use a shovel to make mortar will help ensure that the concrete you produce is of the highest caliber.
From blocks
The primary distinction from alternative technologies is the ability to use concrete blocks as formwork when they are placed around the perimeter. The detailed directions will look something like this:
- Grooves are made in concrete blocks using a wall chaser.
- Prepare the reinforcement – use a grinder to cut off parts of the required length.
- Construction waste is removed from the grooves.
- Assemble the reinforcement cage and place them in the grooves.
- The cavity is filled with cement mortar.
Since formwork is made of lightweight material, the mortar layer needs to be thick. Thick reinforcement cannot be installed in a concrete wall because the wall is set up on a thin layer of adhesive.
As a result, the reinforced belt for blocks is created as a distinct structural component. It is preferable to use elements similar to boxes when making an armored belt.
Afterwards, you should use mineral wool, polyurethane foam, or polystyrene sheets to insulate the wall.
In this instance, M200 is the minimum cement grade that was used.
Errors and difficulties with the device
There are various challenges and errors that builders encounter:
- you should not make a reinforced belt across the entire width of the wall – you need to leave room for insulation;
- if reinforced concrete or monolithic floor slabs are used, insulation must be made at their ends;
- reinforcing rods should not intersect at the corners;
- if the length of the reinforcement is shorter than the length of the wall, then the reinforcement can be overlapped;
- the armored belt must be looped, if this is not done, then consequences will emerge.
In a home with an attic, inexperienced workers occasionally rip the Mauerlat belt; this should never be done. Consequently, a house like that will have cracked walls.
Your construction project will benefit from careful consideration of materials and techniques when creating an armored belt. You can guarantee the structural integrity and long-term durability of the foundation of your building by selecting the proper materials, like concrete that is reinforced with steel bars or fibers.
Aim to select materials that meet the particular needs of your project. Concrete is a strong and long-lasting option that is adaptable. Its resistance to tension and compression forces is improved by steel reinforcement, which is essential for preserving stability over time.
A number of crucial procedures must be followed in order to build an armored belt: digging the foundation trench, setting up the formwork, adding steel bars or mesh for reinforcement, and pouring the concrete mixture. It is necessary to carefully follow each step in order to create a strong and durable foundation.
Lastly, for the concrete to develop its strength to its full potential, it must properly cure. In order to prevent cracking and guarantee the concrete’s maximum load-bearing capacity, this process entails maintaining moisture content and a constant temperature.


