
Creating your own liquid plaster at home can be a satisfying and affordable way to give your walls a smooth, long-lasting finish. Liquid plaster is more flexible in terms of texture and color and is simpler to apply than traditional plaster.
Obtain your supplies before you start, including water, gypsum powder, a mixing container, a stirring tool, and any tinting pigments you may want. Precise measurement of the ingredients is crucial in order to attain the desired strength and consistency.
First, fill your mixing container with the appropriate amount of water. To avoid clumping, add the gypsum powder gradually while stirring constantly. The mixture should have the consistency of a thick, creamy paste and be lump-free.
After mixing, let the plaster settle for a few minutes to make sure it gets the right consistency before applying it. Depending on the needs of your project, you can use this time to adjust the thickness by adding extra water or gypsum powder as needed.
Make sure your wall surface is dust- and debris-free, clean, and dry before applying the liquid plaster. If a primer is required, use a brush or roller to apply it; this will ensure a smoother finish and improve plaster adhesion.
When the plaster is ready to be applied, spread it evenly over the wall in thin layers using a trowel or spatula. To keep control over the application process and get a consistent texture, work in small sections.
Let each layer completely dry before applying the next after applying it. This drying period reduces the chance of cracks and unevenness and guarantees that the plaster sets properly.
After every layer has dried, you can sand the surface a little bit more to get a silky smooth finish by using fine-grit sandpaper. Lastly, to improve longevity and durability, think about using a protective sealer or wax.
You can give your interior walls a touch of elegance and charm by using homemade liquid plaster and following these steps to create a professional-looking finish.
Discovering how to create liquid plaster at home is an affordable way to improve walls and give them a smooth, long-lasting finish. DIY enthusiasts may make a flexible material that works well for a variety of interior surfaces by combining gypsum powder with water and additives like bonding agents or pigments. With the help of this article’s comprehensive instructions, list of necessary supplies, and expert advice, readers will be equipped to confidently take on home improvement projects.
- Features and positive qualities
- Features of structure and preparation
- Performance of work
- Video on the topic
- DIY decorative plaster. The whole process
- Textured plaster – matting. WITH YOUR OWN HANDS FOR A PENNY
- How to make decorative plaster World map
- ✅ MARBLE FROM PUTTY FOR PENNY | DECORATIVE PLASTER WITH YOUR HANDS | BUDGET APRON IN THE KITCHEN
- DIY WALL FINISHING, ECONOMICAL, 3 SUPER ideas! Repair, decorative plaster
Features and positive qualities
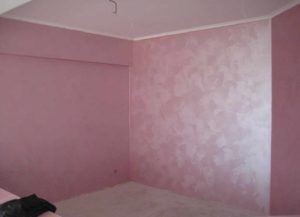
Contemporary manufacturers offer an extensive range of materials intended for use in interior decoration tasks to consumers. Owing to its many advantageous traits and attributes, silk plaster is among the most sought-after and well-liked. The components that make up the mixture’s composition give it these characteristics:
- Adhesive base, the role of which is played by wallpaper glue made from methylated cellulose.
- Two types of fibers, some of which provide the texture and appearance of the coating, while others act as a binding component.
- Acrylic-based filler to create a smooth and durable film on the surface, dye and stabilizer.
- Antiseptic additives that have an antifungal effect and prevent the appearance of mold.
UV protection and extreme wear resistance are two qualities of liquid silk plaster.

Compared to traditional wallpaper, this composition is noticeably better because it allows you to create a seamless, smooth surface, doesn’t require selection, and is much easier to apply.
Features of structure and preparation

After thoroughly mixing the dry mixture with water, it is applied to the prepared wall’s surface. Further insulation against heat and sound is offered by a layer of liquid plaster. One environmentally friendly product that doesn’t damage indoor air quality or release any toxic fumes is liquid wallpaper.

Because silk fibers are incorporated into the mixture, the coating has outstanding decorative qualities and lends the walls a unique charm. You can make your own custom pattern that highlights the room’s features thanks to the manufacturers’ extensive color and texture selections.
The coating’s maintainability is another undeniable benefit. A defective plot can be carefully removed and replaced with a new composition in cases of severe pollution or mechanical damage.
Not only is liquid plaster used for wall decoration in residential spaces, but it is also used for kitchen and bathroom walls. Preserving the surface from direct water exposure and strengthening water-based varnish are the primary requirements.
Performance of work
Liquid wallpapers can only be applied to surfaces that have been previously prepared, as they are classified as decorative coatings.
You need a plaster mixture to level the walls, fill in the spaces, and seal the cracks. Plaster can be made by hand if needless material costs are avoided.

The walls must be completely primed and cleaned of pollutants before you can apply plaster.
The mixture can be made with a 1:4 ratio of cement to sand. Three steps are involved in the plastering technology:

- priming, which requires applying the composition in two layers and completely drying the surface;
- sprayed with a solution more liquid than the main mixture; the thickness of the spray ranges from 5 mm on brick and stone walls to 9 mm on attached reinforcing mesh; after hardening, proceed to the next stage;
- covering – applying the base layer and leveling it using a rule; the thickness of this layer is no more than 4 mm, and the number of layers depends on the desired thickness of the plaster.
The surface is smoothed and roughened with a damp polisher after the solution has had time to solidify. Once all the necessary preparations are finished, you can start making liquid wallpaper.
Silk plaster is made by adding the necessary amount of water and is sold as a dry mixture. At this point, it’s critical to closely follow the technological process guidelines and the manufacturer’s recommended proportions.
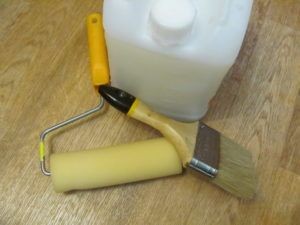
Carefully priming pre-plastered walls is necessary. The primer considerably lowers the amount of moisture absorption and guarantees the material’s consistent adherence to the surface.
After filling a plastic container with the manufacturer’s recommended amount of water, shake the bag containing the dry composition to release the contents into the water. The composition needs to be manually combined to prevent the silk fibers from being harmed. The mixture ought to be lump-free and homogeneous.
Because every component is safe for the environment, you can work with your bare hands without worrying about damaging your skin.
Making liquid plaster at home can be a rewarding and affordable project for homeowners who want to add a distinctive finish to their walls. Plaster of Paris or gypsum powder are basic materials that can be mixed with water to create a versatile material that can be applied smoothly to a variety of surfaces.
First, gather your supplies: water, gypsum powder or plaster of Paris, a mixing container, and a stirring tool. Precisely measure the ingredients based on the required coverage and consistency. Depending on the kind and brand of plaster you select, mixing ratios may change.
When all of your ingredients are prepared, slowly stir the plaster powder into the water while stirring constantly. This guarantees a smooth mixture and lessens the chance of clumping. Try to get a smooth consistency like pancake batter, adding more water or powder as necessary to get the right texture.
Make sure your surface is ready for the liquid plaster by giving it a thorough cleaning and, if needed, applying an appropriate primer. Using a paint roller or trowel, evenly apply the plaster, working in small sections to keep control over the application. As you work, smooth out any flaws or bubbles.
You can use different tools or techniques to create different textures and finishes as the plaster starts to set. Try out different combing, stippling, and swirling techniques to get a style that goes well with the design of your house. As directed by the manufacturer, let the plaster completely dry before applying any more coats or finishes.
Making your own liquid plaster enables you to express your creativity and add personal touches, giving your walls a distinctive appearance that embodies your taste. With homemade liquid plaster, you can achieve a rustic textured look or a sleek modern finish, all without requiring a lot of professional equipment or skills. It’s also very versatile.


