
Using putty on aerated concrete can significantly improve the way your home’s walls are finished. Because of its low weight and insulating qualities, aerated concrete frequently requires additional attention to achieve a smooth, polished finish. When putty is applied properly, it can hide flaws and get the surface ready for painting or wallpapering.
There are a few easy steps involved in getting the putty right. You must first clean the surface to get rid of any dust or debris. If needed, you will then apply a primer to improve the putty’s adhesion. Subsequently, you can begin applying the putty and smoothing it out continuously. A quick sanding will help you achieve an immaculately smooth surface after it has dried.
A little perseverance and the appropriate equipment can make applying putty to aerated concrete a simple task. If you follow these instructions, your walls will be ready for your final embellishments, like a chic wallpaper or a new coat of paint.
- Technical features of aerated concrete
- Selection of material for putty
- Alternative
- Video on the topic
- 🟢EASY way to PLASTER aerated concrete
- How to plaster aerated concrete, preparing the base of the block
- Interior decoration of a house from aerated concrete
- Such PLASTER on aerated concrete will never fall off!
- PLASTER of aerated concrete WITHOUT BEACONS very cheap. Plastering walls with mesh. Builders Club
- Plaster and putty of aerated concrete WE BUILD FOR OURSELVES
- Plastering aerated concrete, preparing the base
Technical features of aerated concrete

Over the past ten years, aerated concrete has become a more readily available building material. The components of aerated concrete blocks are as follows:
- cement plays the role of the main binding element;
- sand is the main filler of the mixture;
- lime is an additional binding element, which also gives the material plasticity and resistance to cracking;
- aluminum powder increases the resistance of the aerated concrete block to atmospheric influences.
Aerated concrete blocks differ primarily from loop or slag blocks in that they have more porosity. These tiny pores immediately fill with water upon production, resulting in water making up one-third of a fresh aerated block.
The percentage of humidity doesn’t start to drop for some time; after a year, it drops to between 5 and 7%.
In light of this, it is not advised to construct masonry using recently manufactured aerated blocks. For their moisture content to drop to a manageable level, they must dry out for a minimum of six months. Aerated concrete homes should, as a last resort, be left for six months to dry before interior design begins.
Aerated concrete has exceptional breathability because of its porosity. Because of this, it’s a great material to use when building low-rise homes.
Aerated concrete homes’ interiors "breathe" well because surplus moisture is eliminated and natural gas exchange takes place through the walls. Because of this, even without ventilation systems installed, living in such houses is comfortable and there is no condensation on the inside surfaces.
Aerated concrete’s exceptional thermal insulation properties are also determined by the abundance of voids within the blocks. It outperforms all contemporary counterparts utilized in private construction in this indicator. Aerated concrete blocks are a great soundproofing material because of their porosity. Such blocks are used to construct buildings where street noise is essentially nonexistent.
The primary technical attributes of gas blocks are displayed in the table.
Owing to these material properties, there are several unique nuances in the finishing of the internal and external surfaces of aerated concrete walls.
Selection of material for putty

The putty for aerated concrete needs to be chosen according to the specifications for this material in order to create a high-quality finish.
First and foremost, the gas block’s primary benefits will be lost if the putty composition completely clogs the blocks’ pores.
The sound-absorbing and heat-insulating qualities of the wall will be rendered ineffective if the finishing solution is not vapor-permeable, as moisture will build up inside the wall. On the other hand, excessive moisture can quickly cause rot and fungus to grow on the walls.
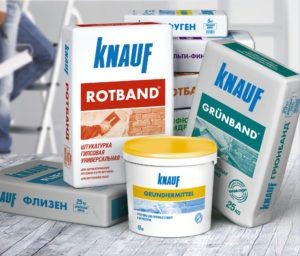
We will take into account every putty mixture option on our finishing materials market in order to make an informed decision about the best putty to use for a building composed of aerated concrete blocks.
- Oily. It is created on the basis of drying oil and has the ability to densely fill all small surface spaces – pores and microcracks. A protective oil film is formed on the treated surface, preventing moisture from penetrating into the wall. But at the same time, oil drying oils also block the natural gas exchange between interior spaces and atmospheric air.
- Adhesive. Consists of 10% PVA construction adhesive with the addition of the same drying oil. PVA itself is quite vapor-permeable, but the oil component makes this option not the best for gas blocks.
- Epoxy. A very rarely used two-component composition of epoxy resin and hardener. Mainly used for sealing seams or cracks. To finish large surfaces, using epoxy putty is very problematic due to its rapid “setting”.
- Polymer. Made from polymer chemical components that give the composition increased plasticity. As a result, polymers penetrate into all pores, firmly sealing them, so polymer compositions also do not differ in vapor-conducting properties.
- Plaster. Consists of gypsum – an environmentally friendly material with excellent gas permeability. Walls plastered with gypsum compounds continue to “breathe” freely. Other advantages include affordable cost, lower than other mixtures. The only major disadvantage of the gypsum composition is the fear of dampness, so gypsum can only be used for finishing aerated concrete in dry rooms. Due to its fine texture, it is usually used as a finishing putty.
- Cement. Unlike gypsum mortars, cement mortars can be used for finishing external walls, as well as indoors with high humidity. They are also low cost and do not interfere with free gas exchange. Cement putty most often acts as a base putty, as a basis for a thinner finishing mixture. For more information about which mixture to choose, watch this video:
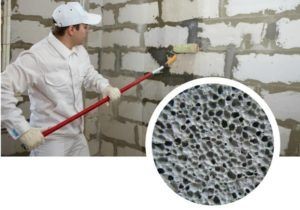
As you can see, puttying aerated concrete requires a mixture of cement and gypsum.
A gypsum composition for finishing and a cement composition for use as a base can also be used in tandem.
The technical limitations of other putties make them unsuitable for use with aerated concrete.
These days, specialized compositions for finishing aerated concrete walls are available in the construction market. Utilizing precisely these mixtures in work is optimal since they are designed with the functional characteristics of aerated concrete in mind.
Putty is a necessary finishing touch for aerated concrete interior walls in order to achieve a smooth, even surface. In order to produce a perfect finish that is prepared for painting or other treatments, this process entails filling in any gaps or imperfections. This post will walk you through the easy processes of priming, painting, and sanding putty on aerated concrete walls, so you can achieve a polished finish with the least amount of work.
Alternative
For aerated concrete homes, there is an additional finishing option, though it is not utilized very often. Its main goal is to maximize the wall surface’s vapor barrier by applying specific primers and putty solutions.
It is utilized when the building’s facade is finished with stone, porcelain stoneware, or other materials that prevent moisture from penetrating.
Preventing the infiltration of moisture into the aerated concrete is imperative in this scenario. It is obvious that in this instance, the cost of installing fresh air ventilation in the home will fall on the homeowner.
This technique is rarely used because it is extremely foolish and wasteful to employ such a special material in building only to give up all of its benefits in the end.
| Step | Description |
| 1 | Prepare the surface by cleaning it of dust and debris. Make sure the aerated concrete is dry and free of any loose material. |
| 2 | Apply a primer to the surface if needed. This helps the putty adhere better to the aerated concrete. |
| 3 | Mix the putty according to the manufacturer’s instructions. Use a mixing paddle or a drill for an even consistency. |
| 4 | Apply the putty using a trowel or putty knife. Spread it evenly over the surface, filling any gaps or holes. |
| 5 | Let the putty dry completely. Follow the drying time suggested by the manufacturer. |
| 6 | Sand the surface smooth once the putty is dry. This helps to achieve a flat and even finish. |
| 7 | Inspect the surface and apply a second coat of putty if needed. Repeat the drying and sanding process. |
| 8 | Finish by painting or decorating the surface as desired. |
Aerated concrete putty application is a simple method that can greatly enhance the appearance and longevity of your walls. You can guarantee a smooth finish and get your walls ready for painting or other finishing touches by following the instructions provided.
First, give the surface a thorough cleaning and preparation. Dust and debris removal will improve putty adhesion and produce a more uniform finish. In order to improve the bond between the putty and the aerated concrete, apply a primer next, if necessary.
To fill in any gaps or imperfections, apply the putty in small sections using a smooth, even stroke. Before applying more coats, let each layer fully dry. This perseverance guarantees that the outcome will be faultless and durable.
Lastly, lightly sand the surface to smooth out any imperfections after the putty has dried and become smooth. This step is essential to getting a polished finish that will prepare your walls for painting or additional decorating.


