
One of the most important steps in building a stable and long-lasting roof for your house is installing gable roof rafters. Knowing the procedure is essential whether you’re constructing a new building or replacing an old roof. You can approach this project with confidence thanks to the clear, step-by-step instructions and accompanying photos provided in this guide.
Careful planning and measuring are the first steps in installing gable roof rafters. Make sure you have the required supplies and equipment ready before you start. Every rafter will have its placement along the roof’s ridge measured and marked. This guarantees uniform spacing and adequate roof structure support.
Next, get the rafters ready in accordance with the requirements for your roof. With a saw, cut each rafter to the proper length and angle. To guarantee a precise fit, measurements and angles must be double checked. The foundation for a strong, weather-resistant roof is laid during this preparatory stage.
It’s time to install the rafters once they are ready. At one end of the roof structure, start by positioning and fastening the first rafter. As you place the next rafters along the ridge, use temporary braces to hold it in place. By taking it step by step, you can make sure that every rafter fits tightly and supports the roof equally.
Continue to check for alignment and levelness as you install the rafters. Make any necessary adjustments to keep the roof slope consistent. Using screws or nails, firmly fasten each rafter to the wall’s top plate and ridge board to create a strong bond that will withstand weather and wind.
Refer to the accompanying photos for visual assistance during the installation process. Having each step illustrated will help you to clear up any confusion and make sure you’re doing things the right way. Work methodically and slowly, making sure that each rafter is firmly in place before proceeding to the next.
For your building or remodeling project, you can successfully install gable roof rafters by following these instructions and using the reference photos that are provided. This procedure not only strengthens your roof’s structural integrity but also gives you a sense of accomplishment as you continue to improve your house.
- Consumables for manufacturing
- Dry board
- Metal
- timber
- How to make rafter legs correctly?
- Treatment with compounds
- How to make cuts?
- DIY assembly
- On the ground or on the roof
- How the length increases?
- Preparation of roof trusses
- Lifting and installation of finished trusses
- How to install rafters on a gable roof alone?
- How to install on a wooden house?
- Installation on a log frame
- How to put on frame?
- For a block (gas-block) structure
- Tricks and useful tips for work
- Video on the topic of the article
Consumables for manufacturing
Steel and wood are used to make rafters. However, universal frames are also available that incorporate both of these consumables. They are therefore bought as consumables.
If you want to complete the work on your own, you’ll need basic knowledge of working with wood and joints and the ability to follow the guidelines on your own drawing.
There are connections available:
- clamps and jumpers;
- metal fasteners;
- tongues and grooves.
Additionally helpful are the following consumables for truss structure construction:
- special products for wood processing;
- anti-corrosion substances for metal (if there is no factory treatment).
Rafters can be made by you or ordered as a prefabricated frame. The two types of system formation are hanging and inclined.
Dry board
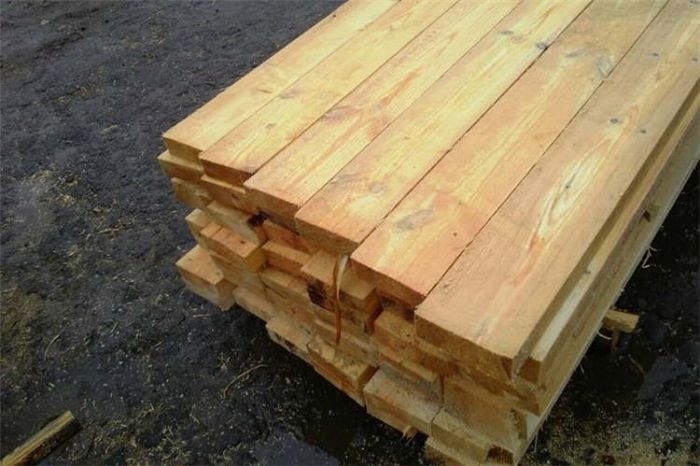
The work uses edged boards divided into sections. The most popular sizes for slopes up to 7–10 meters are 50 x 150 and 50 x 200 mm. Use of a wet board is not advised as it will cause the structure to crack and bend when it dries, greatly weakening it.
Furthermore, flaws (many knots, nicks, through cracks, and rotten areas) that shouldn’t be there are simpler to see on dry material.
For rafters, pine—ideally Siberian—is the best material in terms of strength, durability, and quality. However, blanks can also be made from more expensive materials like cedar, beech, and larch.
Metal
The maximum structural strength is achieved by using the metal rafter system. The brand of material that is selected has a direct impact on its quality. The most common material used is carbon steel that has been galvanized, which consistently prevents corrosion on the frame.
Round and rectangular pipes, steel angles, and brands are used to form the sheathing and base.
Galvanized steel profiles have a maximum step of 200 cm and a maximum slope of 7 m. The frame is welded, along with some sturdy components, to the beams. The lifespan of metal structures is very long.
The cost of such a frame is higher than that of wooden ones, but it has the benefit of having a high degree of fire safety (group "NG").

timber
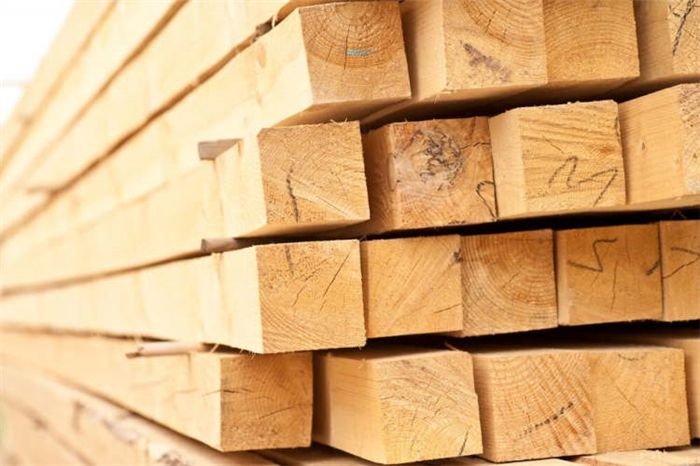
Regular or laminated timber (pine, larch, oak, beech, and rarely cedar) is the material used. It is advised to use a material with a 5 cm thickness for rafter legs. Length: 6 m (standard); width: arbitrary, between 10 and 25 cm. There are occasions when the duration is extended when working on individual projects.
Beam measures 15 by 15 cm for the Mauerlat in section. Racks, fillies, struts, and tightening are used as auxiliary parts; the battens are made of 2.5 x 10 cm boards. Each section measures 5 x 10 cm.
Moreover, consumables comprise all kinds:
- fasteners,
- primers,
- Paints and other substances intended for processing the frame.
How to make rafter legs correctly?
Production of rafters is done in a factory setting using machinery. The wood is meticulously polished, sanded, and dried to a predetermined moisture content before being cut to the required size. Products are kept in a dedicated space with 60% humidity in the air, which satisfies a crucial requirement.
During installation, trusses—two beams joined in the top of the frame to form a triangle—are used to lay the rafters. On top of them, the sheathing is installed. The truss’s angle of inclination and the roof slopes’ angles must line up exactly.
Building standards specify that rafters are fastened using the following techniques:
- hard,
- sliding,
- with extension and reinforcement,
- screwing in a beam or log with its ends,
- and also with the help of double-sided reinforcement with jointing.
The pitch of the rafter leg is limited to 60 centimeters. A single installation board, whether extended or solid, can support up to 100 kg of weight. The rafters’ cross-section ought to be 1.5–2 times smaller than the wall plate’s.
The GOST tables provide information on the specific gravity of the consumable material used in these calculations. The number of m3 of timber and boards used for the project is used to calculate the total tonnage of the roof. The average distance between the rafters’ centers is 0.6 meters.
Treatment with compounds
Through a galvanic galvanizing process, carbon steel metal frames become resistant to water and temperature fluctuations, as well as, ideally, corrosion.
Seldom are wood materials processed on-site in the factory. They employ the following for them:

- Fire retardants (substances that increase the resistance of materials to chemicals).
- Antiseptics (protect against fungi and mold, making the surface completely immune to them).
- Propylents (additionally strengthen and compact the surface of the inner layers, protecting it from precipitation, condensation, temperature changes, insect pests and rodents).
- Primer (under varnish or a selected paint tone, to fill surface pores and economically use paintwork materials).
If the rafter wood hasn’t been treated, you can use a spray gun, roller, or brushes to do it at home.
The use of chemical protection is thought to be environmentally benign because paints and impregnations are entirely mineral-based in their structure, with synthetic additives created specifically for them added on top.
Moreover, wood can be treated with drying oil, wax, liquid wood (flexible abroform), teak, linseed, or sunflower oil.
How to make cuts?
Use carpentry tools to create recesses (cuts) in the rafter legs. The cuts are positioned between 20 and 45 degrees from the overall frame’s angle. For this, the timber’s surface is marked beforehand in accordance with the provided drawing, and then careful cuts are made along the markings using an electric or traditional jigsaw.
The building’s specified dimensions dictate the order of work at an angle. For instance, if the house’s external measurements show that it is 48 meters long and 24 meters wide, the length of the rafters that need to be cut is as follows:
- use the Pythagorean theorem – the attic-ceiling flooring to the middle of the building (at the ridge) and the ridge supports will be considered legs, and the hypotenuse will be the length of the rafter leg, without hanging the lower end beyond the perimeter of the structural (external) wall;
- since a gable roof is being considered, the length of the house is divided in half – 24 m, so for it the angle of inclination is marked on the drawing with a protractor;
- then they measure 2 m 163 cm from the opposite line to the other side, and in the center they make a mark of 2 m 400 cm, for the purpose of additional defense;
- the triangle obtained in the drawing will mean the roof slopes:
- after calculating the length of the rafters, at equal distances, cuts are marked on the timber or boards and formed using a tool, with the ends down, according to the diagram;
- the installed beam for the rafters is attached along the edges using strips, and the corner is cut out.
The only way to make the same cut on all sides of the roof is using a well-planned template. It is best to consider the nooks and crannies for each leg separately, keeping in mind the potential scenario where the Mauerlat may lead to one side.
In order to facilitate easy connectivity with other components of the system and maintain the system’s strength, the cuts shouldn’t be too deep.
DIY assembly
Now let’s examine the rafter assembly process:
On the ground or on the roof
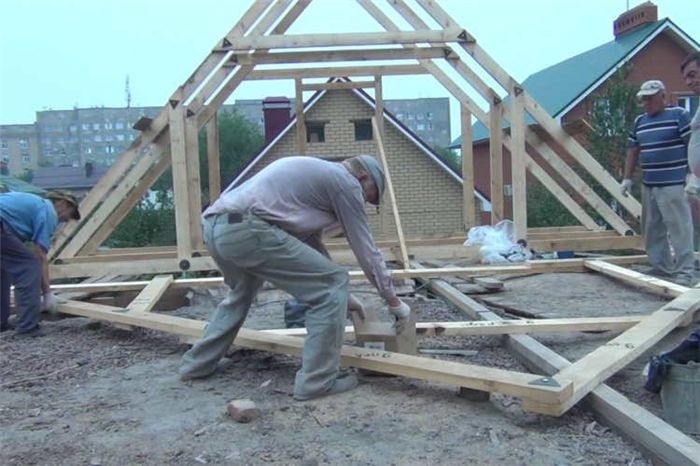
The base frame can be assembled in a variety of methods. Every master selects the installation method that works best for him. The frame is put together on the ground without being secured around the edges. Later, it is raised with the aid of lifting apparatuses and firmly secured.
Assembling on the roof is more challenging; everything must be done in a sequential manner from the inside out, following the marked plan drawing.
Scaffolding and high mounting ladders are erected around the building’s perimeter for both options to facilitate mobility. They use industrial climbers’ services in tough situations.
How the length increases?
The addition of a measured portion of material with an overlap is one characteristic of lengthening the rafters. Welding is used to lengthen metal frames.
Wood extension is done in a few different ways:
- Laying boards on top of each other (overlapping). In this case, the length of the spades is 1 m. Here, at the connection site, 10 nails (preferably screw) are driven in so that the end that comes out can then be bent. Sometimes additional fastening with perforated plates is used to ensure reliable installation.
- The “butt” method can also be used – it is considered even more reliable than the previous one. For this, the end of one board is attached to the end of the second. On top of the joint, on both sides, additional boards are placed (each 1 m long). The knot is fixed with nails, placing them in a checkerboard pattern.
Select "oblique cut" to build up the plank beams and mauerlat. An angle is chosen, and a cut-in is fastened with perforated tape, bolts, and nuts. They provide support with additional boards close by.
You can see how to extend the rafters in the video:
Preparation of roof trusses
Flat triangles made of rafters or legs are assembled. After the trusses are positioned on the mauerlat, purlins are used to join them to one another. Since connection nodes bear the weight of the structure, they need to be fastened with reliability.
They have fixed transverse connections with special corners. Skilled builders utilize struts for trusses during installation; with their assistance, the process is made simpler multiple times. Care is taken to ensure that their location is accurate before installation (check according to the drawing).

Lifting and installation of finished trusses
Scaffolding, stepladders, attic ladders, a jack, and a hand hoist are necessary for working at heights because they let you move beams and boards without risk of damage. Forklifts and other cranes are additional options (machines).
A mechanic’s belt, in which you can store the required hand tools, will be very helpful for the master at heights for ease of work. When lifting structures with load-bearing devices, the structures are fastened at two parallel points instead of just one, and the perimeter of the structure is then reinforced with fasteners.
How to install rafters on a gable roof alone?
It is best to use the "butt" method to install the rafters from the inside, or the attic side, at the beginning of the project. This is accomplished by sawing off the beams (upper ends) at a specific angle so that they precisely coincide with one another.
After that, fasteners (plates and nails) are used to secure them. The technique works well for modest buildings. A ladder can be used to navigate the perimeter.
How to install on a wooden house?
Rafferails on a gable roof can be installed using a few well-liked techniques, the most common of which is the cutting method (saw + axe). It works well for building block and brick homes because it is as stiff and strong as possible. The incision is made to correspond with the Mauerlat’s relief.
Another method is to sew a support beam and then cut it using a blank made of two thin boards and a long board (1 m). This fixation technique, which is sewn on the rafters’ sides, is advised for building outbuildings.
Installation on a log frame
Because of the weight of the logs, it is regarded as challenging. Here, they either use a moving method or make cuts at the fastener sites. This technique works well for layered wooden structures in order to cause the structure to shrink even more.
One half of the sliding support rests on the rafters, while the other half rests on the mauerlat. Hinges are used to join structural components together.
In the video, rafters are installed on a log home.
How to put on frame?
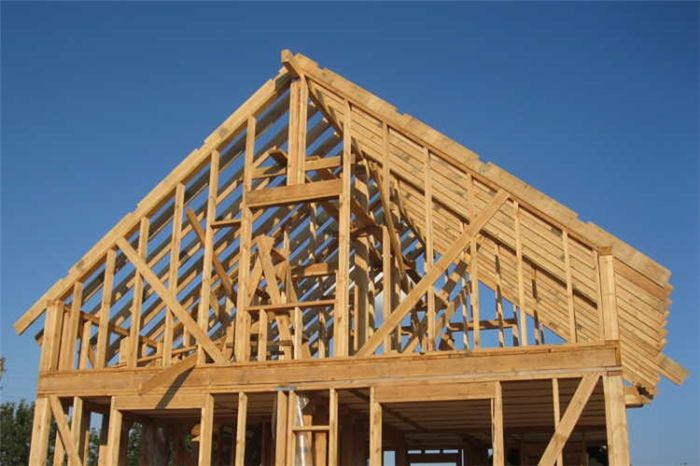
The most common method of installation, which involves both the main structure and sheathing and is covered in detail above, is done either directly on the roof or on the ground. The owner decides which approach is most appropriate.
Regardless of the roofing layers and covering material selected, an engineer will create a detailed drawing of the frame after consulting with the client. The actual frame may be made of metal or wood.
For a block (gas-block) structure
A block house’s raft system is composed of gas blocks, foam blocks, reinforced concrete, and concrete slabs that are always put on a reinforced belt using the conventional method (mentioned above).
The foundation of the structure is created by gluing protruding reinforcement rods with waterproofing material and placing a wide, thick profiled beam on top of them along the designated drilled holes.
Then, using mechanical and automated tools (a forklift), the frame made of the prepared consumable material is assembled on the ground and raised. Either the side of the roof is used for assembly, followed by scaffolding or an extension ladder on the exterior.
Anchors, which are used in exactly the same quantity as the rafters, are used to fasten the entire rafter system.
You can use stud fixation in concrete for gas-block homes without an armored belt. With the use of this technology, the entire perimeter of the house can have large, long bolts installed deeply into the structural walls, fastened by either metal or wooden plates that will eventually support rafters.
In the video, rafters are installed on a gas-block home.
With clear instructions and practical photos, we take you step-by-step through the installation of gable roof rafters in this comprehensive guide. This post covers every step of the process, from gathering supplies to installing rafters, whether you’re a homeowner or a do-it-yourself enthusiast. You’ll get the confidence to take on this crucial aspect of roof construction and guarantee a strong and dependable gable roof for your house by following these easy steps.
Tricks and useful tips for work
A few pointers to help you with your work:
- For a hanging rafter system, including tie-downs, it is advisable to use grade I wood; for rafters on a slanted roof, use grade II.
- For posts and struts that provide support, grade III wood is also suitable, but when choosing raw materials you should pay attention to the material that contains the least knots.
- The thickness of the blanks depends on the weight of the selected roofing material, future load, as well as on the climatic characteristics of the region, taking into account snowy winters. For example, for the central part of the Russian Federation, the load of 1 m2 of roof is approximately 180-200 kg.
- The parameters of the rafters for construction depend on the calculated dimensions of the entire structure, taking into account its inclined properties at a given angle.
- Instead of nails, it is better to use threaded hardware. If nails are used, their minimum diameter should be 4 mm and their length should be at least 40 mm.
- The corner for fastening rafters is always installed on both sides of the unit, if its design allows this – this will ensure symmetrical placement of the fasteners.
- Beams are made only from thick timber, with a cross-section of 150 x 50 mm. When installing, the rafters should not slide over the supporting elements – they are secured as tightly as possible.
Video on the topic of the article
Gable rafter system installation is shown in the following video:
Building a strong and long-lasting roof for your house requires installing gable roof rafters. The structural integrity of the roof must be ensured by meticulous planning and precise execution of this process.
First, as stated in the article, gather all required equipment and supplies. This includes safety gear like goggles and gloves, rafters, ridge board, braces, and nails. Everything prepared in advance will make installation go more smoothly.
Next, make sure every rafter is positioned and fastened correctly by following the detailed instructions that are supplied. In order to guarantee consistency and stability throughout the roof structure, pay close attention to the angles and measurements.
Throughout the installation, refer to the accompanying photographs as a visual guide. Any written instructions can be made clearer by using visual aids, which also make it simpler to comprehend where each rafter is placed and oriented.
Check the rafters’ alignment and connections to the ridge board and supporting walls once they are all in place. The purpose of this last examination is to confirm that the roof framework is weatherproof and sturdy.
Finally, spend some time tidying up the workspace and appropriately disposing of any debris after the installation is finished. In addition to enhancing safety, a tidy workspace conveys a professional attitude toward building and remodeling tasks.
You can successfully install gable roof rafters and extend the lifespan and structural integrity of your home’s roof by carefully following these instructions.


