
Wet floor screed is essential for building and remodeling projects because it provides a stable and level base for flooring. This necessary component is employed to produce a level and smooth surface, acting as a base for different kinds of flooring, such as hardwood and tile. Anyone involved in building or renovating residential or commercial spaces must have a basic understanding of its types, characteristics, and design guidelines.
Cement, sand, and water are the main ingredients of wet floor screed, which is commonly referred to as just "screed." To create a level surface, it is poured directly over insulation materials or onto a concrete subfloor. This procedure not only strengthens the floor’s structural integrity but also its acoustic and thermal insulation. The kind of flooring that will be installed as well as the particular requirements of the project will determine the composition and application of screed.
Wet floor screed comes in a variety of varieties that are frequently utilized in building. The classic sand-cement screed is still widely used because of its affordability and toughness. Depending on the required thickness and strength of the screed layer, the proportions of cement to sand are usually 1:3 or 1:4 by volume. Other varieties include self-leveling screed, which is intended to settle into a smooth, even surface without requiring a lot of manual leveling, and fiber-reinforced screed, which uses synthetic fibers to decrease cracking and increase flexibility.
There are certain guidelines that must be followed when designing and applying wet floor screed in order to achieve the best results. It is essential to prepare the subfloor properly because any imperfections or moisture problems can compromise the strength of the screed layer and the flooring that comes after. The type of flooring to be installed and load-bearing requirements, among other considerations, must be carefully considered when determining the thickness of the screed layer. Furthermore, sufficient curing time following installation is necessary to enable the screed to solidify and become strong enough before moving forward with additional building or finishing work.
Builders and renovators can confidently plan and carry out flooring projects by knowing these basic aspects of wet floor screed, such as its composition, types, and application guidelines. This information enhances the general comfort and caliber of interior spaces in addition to guaranteeing structural stability and longevity.
- What it is?
- Where is filling possible??
- Regulations
- Characteristics
- Strength
- Thickness
- Abrasion
- Frost resistance
- Waterproof
- Kinds
- Knitted
- On waterproofing
- On thermal insulation
- With self-leveling coating
- What kind of concrete is used?
- Residential and office premises
- Kitchens, bathrooms and other wet areas
- Open spaces
- Retail and sports premises
- Industrial buildings
- Concrete proportions and preparation rules
- Equipment and materials
- Step-by-step description of device technology
- Difficulties and errors of the process
- Rules of care
- Advantages and disadvantages
- Average prices
- Video on the topic
- About all types of floor screeds.
- Dry and wet floor screed
- Floor screed. Which one is better and why. Subtleties of screeding.
- Pros and cons of dry floor screed
- Which floor screed is better? I Dry, semi-dry, wet or self-leveling floor.
- The fastest way to install beacons on a screed! Few people know about this
What it is?
The final coating of the floor slab is made by mixing and then laying liquid concrete in the design position. Wet floor screed is the load-bearing and enclosing structure that serves as the foundation for this process.
Medium-sized sand, cement grades M300–M500, plasticizers, antifreeze, and modifying polymer additives are all included in this screed. After the concrete has been placed in the structure, moisture evaporation is used to set and harden the material. Hydration of the binder component is accomplished by adding water in the necessary amount.
If a reinforcement stack is not laid, the average thickness of the structure can range from 50 to 70 mm; if it is, it can range from 70 to 150 mm.
Although this screed is long-lasting, stronger, resistant to water, and dependable, it necessitates a lot of wet processes and a lengthy waiting period for the material to polymerize and strengthen.
Where is filling possible??
Residential and public spaces of the following kinds can have wet floor screed installed:
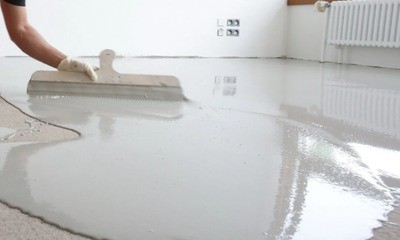
- Kitchens, bathrooms, hallways and other rooms with high temperature and humidity conditions.
- Porches, summer verandas, terraces, balconies, loggias, as well as other used spaces that require increased frost resistance from the structure.
- Garages, service stations, shopping centers and other premises, the operation of which involves the application of increased loads, which requires ensuring the proper mechanical strength of the material.
- Industrial buildings, since such screeds, their thickness, strength characteristics and reinforcement fully satisfy the technology features of the property.
- Other residential or public premises for private residential buildings, apartments, public buildings that are exposed to aggressive environmental influences, dynamic or static loads with increased values.
However, it is not advised to use this kind of structure—which is created by solidifying liquid concrete—for the following kinds of real estate objects:
- Living rooms of apartments and private residential buildings – dining rooms, living rooms, bedrooms, since these spaces do not imply intensive use and application of increased loads.
- Offices in office buildings.
- Wooden houses, since wet screed causes rotting of natural materials.
- Premises, the space of which is divided by plasterboard partitions, to prevent excessive lateral loads on these enclosing structures.
- Any cold spaces, repair and finishing work in which is carried out in the cold season.
- Other premises, excessive concentration of water vapor during hardening of the screed in which leads to the destruction of finishing elements or technological equipment.
In order to achieve the desired outcome, it is advised that you become familiar with all technical and space-planning constraints before deciding to install a wet screed in a residential or public area. Where the use of such a screed is not advised, the floor covering should be installed on semi-dry or dry load-bearing bases.
Regulations
The following regulatory documents, which are in effect throughout the Russian Federation, govern the requirements for wet floor screed for residential and public buildings:
- SP 71.13330.2017. Insulating and finishing coatings.
- SP 63.13330.2018. Concrete and reinforced concrete structures.
- SP 29.13330.201.1 Floors.
- GOST 31489-2012. Garage equipment. Safety requirements and control methods.
- GOST 13087-2018. Concrete. Methods for determining abrasion.
Since representatives of technical and architectural supervision, as well as members of the state commission, are involved in the acceptance of each stage of work on large objects, every installation organization must abide by these requirements.
In this regard, a hidden work report and as-built documentation are created at every stage of the installation of a wet screed. These documents include all the technological specifications and operational features of the screed components and are subsequently presented to the appropriate authorities.
Characteristics
Installed in either residential or public spaces, wet floor screed is a responsible structure that needs to meet regulatory documentation requirements by having specific technical features that ensure faultless long-term operation. A detailed description of these mechanical, operational, and physical parameters can be found below.
Strength
The primary determinant of a screed’s quality is its mechanical compressive strength, which is contingent upon several factors such as the type and quantity of sand used, the brand of cement used, the overall thickness of the structure, and the presence of specific modifying additives in the liquid mixture upon completion.
The following metrics for mechanical compressive strength must be present in screed:
- For classic screeds in residential premises of apartments and private residential buildings, the strength is from 30 to 35 MPa.
- For high-strength self-leveling floors in apartments and houses, as well as in office premises that do not require the application of increased loads – from 35 to 40 MPa.
- For heavy concrete made on the basis of cement with grade M500 – from 40 to 45 MPa.
- For heavy concrete used for screeding in shopping centers, industrial buildings and other special-purpose facilities – from 50 MPa and above, which is achieved by introducing strengthening and modifying additives into the mixture.
It should be mentioned that the concrete screed itself is only standardized for compression because this material is more brittle and doesn’t function well in tension or bending. It is advised to install reinforcement made of masonry or road mesh with overlapping cells if stresses of this kind arise in the screed structure in order to maintain the continuity of the bending moment.
Thickness
The concept of minimum and maximum thickness is introduced for wet screeds installed in rooms of different categories. The thicknesses vary within the following limits:
- The minimum thickness of a coating that does not involve reinforcement ranges from 30 – 40 mm.
- The optimal fashion layer without reinforcement is 50 – 60 mm.
- The minimum thickness of the structure, taking into account the reinforcing glass, is 60 – 70 mm.
- The optimal thickness of the concrete screed with a masonry masonry device is from 90 to 110 mm.
- The maximum permissible power of the concrete structure reinforced with a mesh is 140 – 150 mm.
If a local screed with a thickness of more than 150 mm needs to be installed in public or industrial buildings, it is advised to fill the structure in two layers and wait three to four days between each capture to guarantee total moisture evaporation and stop the growth of fungus.
Abrasion
One of the most crucial mechanical and physical properties of the screed is this indicator, which establishes the material’s capacity to maintain its weight and volume under continuous application of static and dynamic loads while the structure is in use. Based on this criterion, all concrete screeds installed in various categories of premises possess the following attributes:
- For living rooms of apartments, private houses, as well as for offices in office premises – 0.8 – 0.9 g/cm 2 .
- For garages, porches, vestibules and other rooms with high traffic levels – 0.9 – 1.1 g/cm 2 .
- For shopping complexes, shops, restaurants, as well as for public spaces with high intensity of use – 1.eleven.2 g/cm 2 .
- For industrial real estate properties that require special technological processes – 1.3 – 1.5 g/cm 2 .
Experts advise adding epoxy resins, methyl acrylates, and other modifying additives to the liquid mixture or covering the rough coating with a self-leveling floor made of polymer ingredients to increase the level of abrasion of a concrete screed.
Frost resistance
One feature of concrete that is useful for screed in different kinds of rooms is its ability to withstand temperature fluctuations below zero degrees Celsius without collapsing. This property is known as frost resistance.
The material is given a brand by frost resistance, which is represented by the Latin letter f and a numerical index indicating the number of freezing and thawing cycles per year, based on the results of testing the screed, which gained design strength:

- For screed in heated premises of residential apartments, offices or public buildings – from F50 and above.
- For glazed balconies and loggias, terraces, vestibules, verandas, covered garage boxes – from F75 or more.
- For open garages and parking spaces, street spaces attached to the building, exposed to an aggressive environment, for shopping centers, loading platforms – at least F
- For industrial buildings and structures with special technological processes – from F125 – 150 and more.
In spite of the above-mentioned standard values, it is advised to intentionally raise the grade of cement-sand screed mortar with regard to frost resistance by mixing in specific anti-freeze additives. This will considerably lower the structure’s porosity and lengthen the coating’s lifespan.
Waterproof
Water resistance—the capacity of a wet floor screed built on hydraulic binders to retain its basic mechanical and structural properties under liquid pressure—is a crucial sign of the product’s excellent quality and dependability.
Additionally, this indicator describes a building’s ability to keep water out of its structure, guaranteeing the security of all nearby property and building components as well as the area being used. The following categories apply to all screeds based on the water resistance criterion:
- For living rooms of apartments, private houses, as well as for office premises, administrative buildings – W2, which means the resistance of concrete or cement-sand mortar to the passage of moisture under a water column pressure of 2 atm.
- For halls, kitchens, bathrooms, corridors, hallways, porches, terraces and verandas – W The same applies to storage rooms, plumbing shops and other public spaces where there is a risk of liquid spills.
- For all other types of building structures, including industrial buildings, as well as outdoor gazebos, summer kitchens, indoor or outdoor garages, the water resistance index of the cement-sand screed must be no lower than W
It is advisable to apply specific polymer liquid water repellents to the screed of swimming pools in private residential buildings, saunas, baths, and other areas with high humidity and temperature. These repellents offer a durable film coating on the top of the structure, preventing moisture and water vapor from penetrating even into the material’s surface layers.
Kinds
In reality, a number of primary types of wet screeds are applied to different kinds of structures and properties. Below is a detailed description of all the features, pouring technology, layer design, and benefits and drawbacks of concrete or cement-sand mortar screeds.
Knitted
Installing this kind of screed requires specialized technical procedures or high traffic area locations. In building such a structure, concrete must be reinforced locally to prevent brittle fracture because it works in tension or bending in addition to compression.
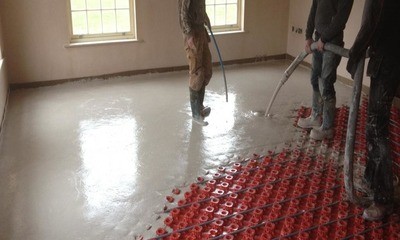
Strangenesses:
- Plastic chairs are placed on the base of the slab or floors on the ground to distance the mesh from the bottom of the screed slab.
- The reinforcing mesh is laid out with cards overlapping in both directions by an amount from 1.5 to 2.5 of the dimensions of one cell. All cards are tied together with annealed soft binding wire.
There is another way to set up the reinforcement cage for this kind of screed: first, spacers are used to lay out longitudinal reinforcing bars with the necessary spacing between them. Next, the reinforcement for the second layer is laid out in an orthogonal direction. The rods in every ceiling are linked together using the same wire until a seamless structure is achieved.
In both situations, deep vibration of the structure is necessary after tying and marking the top of the screed slab and pouring concrete. This allows the liquid composition to permeate under each reinforcing bar and ensure proper screed operation in bending or tension under load.
Benefits
- high structural strength;
- no risk of brittle fracture due to the compensation of tensile forces by the reinforcement;
- Possibility of using the screed in areas with high traffic levels.
Drawbacks:
- increased cost of the entire structure, labor intensity during work;
- the need to install a screed with a thickness of at least 70 – 100 mm, which may contradict the space-planning requirements for the room, in accordance with the working design.
On waterproofing
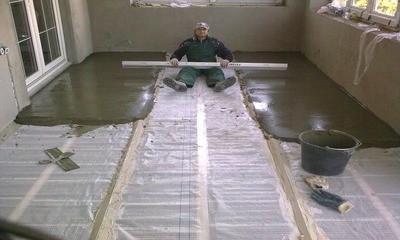
Adhesive or coating waterproofing beneath the floor screed is necessary in rooms with floors on the ground, where there is a chance of capillary rise of moisture, or in wet, exploited spaces, like bathrooms or kitchens.
There are several technical and architectural subtleties to these concrete or cement-sand mortar constructions.
For this design, the base must first be leveled and covered with bitumen mastic. The waterproofing material is then rolled out in one or two layers, carefully adhering to the overlap of the seams. Adhesive waterproofing overlaps are only permitted in a longitudinal direction, up to 100 mm.
The bitumen base is heated using gas burners to fuse the material and guarantee adhesion. Sagging and heated bitumen can be visually inspected to determine the quality of the joining.
It is advised to provide bends on the nearby walls of the premises by a minimum of 100 mm around the whole perimeter of the used space when installing a waterproofing screed in bathrooms.
According to the above-discussed technological map, a screed of concrete or a cement-sand mixture is applied as the adhesive waterproofing cools.
Benefits
- the highest water resistance;
- effective vapor barrier and protection against condensation accumulation are achieved;
- eliminates the risk of mold and mildew formation in damp areas.
Drawbacks:
- the need to purchase or rent fire-hazardous equipment;
- the complexity of carrying out work that requires special knowledge and experience;
- significant increase in screed cost.
On thermal insulation
Installing insulating materials is necessary if the screed is placed in a room with different temperature and humidity levels than the used spaces nearby in order to achieve energy efficiency and appropriate heat transfer resistance. Rigid polystyrene foam boards, which are used to make thermal insulation, must adhere to a specific technological map while being constructed.
The construction of a stiff base is necessary in order to fill such a floating screed. When laying a screed on top of a monolithic or prefabricated floor slab, the surface needs to be leveled beforehand or all sagging needs to be sanded. When laying floors on the ground, the sand-gravel mixture needs to be compacted to a degree of 0.95 or higher. Make sure the insulation boards fit together properly when installing them, and use polyurethane foam to seal any gaps and seams.
It is advised to use plastic spacers with solid supports rather than point ones when reinforcing the screed to keep them from sinking into the pliable insulation. To lessen the chance of damaging the polystyrene foam, it is advised to make sure the mixture is gently compacted and vibrates when pouring concrete or cement-sand mortar.
Benefits
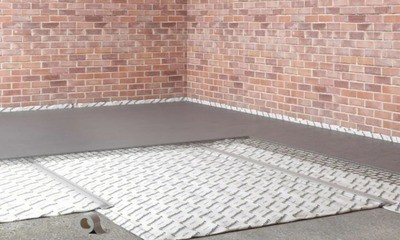
- in addition to effective resistance to heat transfer, the effect of a floating screed is also achieved, which eliminates the spread of structural noise throughout the premises;
- this type of screed compensates for shock loads, ensuring vibration absorption in the insulation body.
Drawbacks:
- the insulation eats up at least 50 mm of the free height of the room, its installation requires compliance with a certain algorithm;
- in case of choosing and purchasing low-quality cheap polystyrene foam type PSB-S;
- there is an increased risk of screed settlement due to gradual compression of the insulating material.
With self-leveling coating
In order to install parquet, laminate, porcelain tiles, linoleum, and other types of flooring, modern living rooms, office spaces, and other used spaces in buildings of various categories are subject to increased requirements to ensure a perfectly even rough surface.
Because of this, screeds in homes with such limitations are created by pouring a bearing layer of concrete or a cement-sand mixture, followed by the installation of a thin, highly durable self-leveling floor.
Using the technology mentioned above, the first layer of wet screed is applied to the floor slab or compacted soil base. It is composed of concrete or cement-sand mortar. The material is laid and left for at least five to seven days to allow it to polymerize and gain strength.
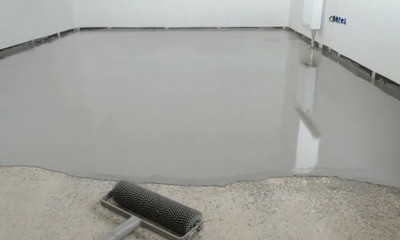
A plastic solution based on a ready-made dry mix for self-leveling floors is prepared when the surface reaches at least 70% of the design strength. This material is then applied over the entire area of the premises, distributed with a special roller with toothed working parts, and it automatically assumes a strictly horizontal position with the fewest pores and no drips.
The mixture must harden for no more than 24 to 36 hours before finishing coating can be applied.
Benefits
- a perfectly smooth and almost completely impenetrable coating, which is ideal for laying laminate, block parquet or linoleum;
- increased structural strength;
- protection against rapid abrasion.
Drawbacks:
- high cost of materials, the need for a long wait for polymerization of the cement-sand mortar for the rough screed before installing the self-leveling floor;
- there is a risk of manufacturing defects if the mixture preparation technology is violated.
What kind of concrete is used?
Depending on the operational requirements for the structure and the type of premises, different types of concrete or cement-sand mortars can be used for wet floor screeds; however, in practice, liquid compositions are most often used for pouring screeds with the following mechanical and physical properties:
Residential and office premises
Name:
- Cement – M250 – M300.
- Frost resistance – F50.
- Waterproof – W2.
- Class: B10 – B12.5.
Mixture:

- Cement (20% – 25%), sand (70% – 75%), modifying additives – up to 1%, water – up to 9% – 12%
- Garages, loggias, porches, verandas, terraces, balconies
- Brand: M300 – M400, F75 – F100, W4.
- Class: B15 – B17.5.
Measurements:
- cement up to 1/3;
- sand up to 2/3;
- antifreeze additives;
- plasticizers – up to 2% – 4%.
Kitchens, bathrooms and other wet areas
The qualities are as follows:
- Brand: M300 – M400, F75, W6.
- Class: B12.5 – B17.5.
- Composition: Cement up to 30%, sand up to 70%, modifying components – up to 2%.
Open spaces
Strangenesses:
- Brand: M400 – M500, F100, W6.
- Class: B20 – B25.
- Composition: cement 1/3, sand – up to 50%, fine-grained crushed stone – up to 20%, modifying additives, anti-frost and water-repellent components – up to 5%.
Retail and sports premises
Features:
- Brand: M400 – M500, F75 – F100, W4 – W6.
- Class: B15 – B20.
- Composition: cement – up to 35%, sand – up to 50%, crushed stone – up to 15%, plasticizers – up to 3%.
Industrial buildings
These are the informational data:
- Brand: M500 and above, F100 and above, W6 and above.
- Class: B25 and above.
- Composition: cement – 25% – 30%, sand – up to 45%, crushed stone – up to 20%, plasticizers and modifying additives – 4% – 5%.
It is advised to order fine-grained concrete or mortar based on hydraulic binders with plasticizers from BSU when installing floor screeds in large areas (150–200 m2 and larger). This way, an exact recipe and the consistency of the key elements in every new batch are guaranteed, ensuring the highest strength, dependability, and durability of the completed structure.
Concrete proportions and preparation rules
When preparing the screed, the following liquid composition proportions must be kept in mind in order to prolong the service life of the floor’s supporting structure in rooms with standard operating conditions:
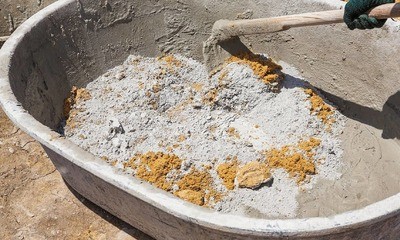
- Cement – as a rule, this component is added in an amount from 20% to 33% – 35% (no more than 1/3 of the total amount of the mixture), which determines the level of hydration, setting speed and other important technological indicators.
- Quartz-based sand – from 50% to 65% – 70%. The final value of the mass fraction of sand depends on the need to add fine-grained crushed stone.
- Crushed stone is added only for high-strength screeds that are used under increased static or dynamic loads, or are constantly exposed to an aggressive environment. The total amount of granite crushed stone with a fraction of up to 15 mm is from 15% to 20%.
- Plasticizers, antifreeze additives, methyl acrylates and epoxy resins, which increase the setting time of the composition, increase its strength, frost resistance, and water resistance, are added no more than 0.5% each, and their total mass fraction, as a rule, does not exceed 3% – 4%.
- The amount of water depends on the required mobility of the finished mortar or concrete. To achieve P2 mobility, no more than 8% – 9% is required, and to ensure cone settlement to P3, about 12% – 13% of liquid is required.
In order to prepare the mixture, first blend the cement and sand together until the mixture is uniformly colored gray. Water is then added to the mixture in amounts of two to three liters. At the very end, plasticizers and additional liquid or dry additives are added once the mixture reaches the required consistency. After the kneading is done, you must use a drill attachment to stir the finished mixture in a bucket or a special mixer for at least five minutes.
It should be noted that the water amount is only an estimate because it is added in small amounts and mixed continuously with the other cement-sand mortar ingredients. When the material reaches the appropriate consistency—which can only be determined empirically—the water supply is cut off.
Equipment and materials
The following basic and consumable materials, tools, and electrical equipment are required for installing such a wet screed in a residential building, apartment, public building, commercial building, or industrial building:

- To measure the room in front of the screed device:
- Laser level for determining the height of the future screed.
- Bubble building level with a length of the slats of at least 2 – 3 m, to control the plane of the base before starting work.
- Electronic or mechanical scales with divisions starting from 0.1 kg for precise dosage of material.
- Construction angle with a right angle for measuring angles between adjacent vertical planes, or between the floor and wall.
- Marker, chalk or pencil for marking.
- To prepare the base:
- Broom or mop for dry cleaning.
- Industrial vacuum cleaner.
- Compressor for blowing out cracks, chips, shells from construction dust.
- Brush for applying primer or concrete contact.
- Ditch for dosing primer.
- Spatula for local filling of defects before screeding.
- Vibrating rammer for compacting artificial base.
- Gas burner for fusing adhesive waterproofing.
- Foam gun used for fixing insulation boards.
- Roller for applying bitumen mastic.
- Grinder for cutting mesh or rod reinforcement.
- Crochet hook for attaching reinforcing bars after laying out.
- Mixer with electric motor and receiving hopper volume from 100 – 150 l.
- Mixer attachment for drill,
- Electric drill without impact function.
- Scoop shovel for dosing dry ingredients.
- Scoop with a capacity of 2 – 3 liters for adding water to the mixture.
- Hose for supplying tap water.
- Wheelbarrow or stretcher for transporting the finished mixture to the installation site.
- Vibrating screed or rule for smoothing the mixture between the beacons.
- Trowel for finishing concrete or cement-sand mortar until an ideal plane is achieved.
- Deep or surface vibrator for compacting freshly laid material into the structure.
- Cement of the selected brand.
- Sand of the required granulometric composition.
- Ready-made sand concrete or dry floor screed with various additives that increase mechanical strength and resistance to aggressive environments.
- Plasticizers, modifying and antifreeze additives, epoxy resins, depending on the requirements for the composition of liquid concrete or cement-sand mortar.
- Extruded polystyrene foam with a thickness of 50 – 100 mm, a density of at least 30 – 35 kg/m 3 .
- Adhesive waterproofing on fiberglass with a bitumen base.
- Vapor barrier membrane.
- Masonry or road mesh, rod reinforcement of the required diameter, with a periodic profile.
- Concrete contact.
- Non-shrinking mortar for preparing repair mixture for floor slabs.
- Coating waterproofing – bitumen mask type “Tehnomast”.
- Solvents.
- Polyurethane foam.
- Mixer rinsing water.
- Dowel-nails for fixing reference points.
- Mounting tape to protect adjacent surfaces from contamination.
- Degreasers and cleaning agents for preparing the floor slab before installing the screed.
The quality certificate on the packaging must be carefully examined in order to ensure that all materials are fresh and have not passed their expiration date. Quality, functionality, sharpness, and work readiness are all requirements for tools.
Step-by-step description of device technology
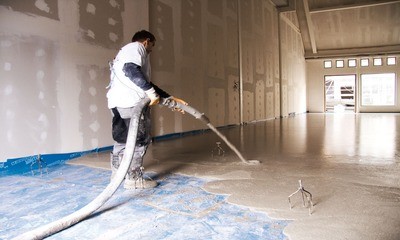
It is advised to hire contractors or experts to install wet screed on property for a variety of uses. In the event that the property owner chooses to handle everything themselves and this is not feasible, adherence to a specific technology roadmap will be necessary:
- The surface of the floor slab is prepared, cleaned and dust-free.
- All shells, chips, cracks and sagging are recommended to be treated with a grinding machine and puttied.
- If necessary, a waterproofing membrane, vapor barrier, and insulation are laid out on top of the base, in accordance with the requirements of the project.
- A laser level is installed, after which the upper elevation mark of the screed is marked on the wall.
- If necessary, the slope of the future structure is determined.
- Galvanized rack beacons are mounted along the base of the floor, strictly in one direction, with a distance between them of no more than 2 m.
- Remote chairs are installed on the base under the reinforcing mesh.
- Ready-made grid cards are laid out over the entire area of the room, or a reinforcement frame is knitted.
- The cement-sand mixture is mixed in a mixer, strictly following the technological map.
- The finished concrete is fed into a stretcher or wheelbarrow, after which it is spread over the entire installation plane.
- Liquid concrete is smoothed between the beacons using a vibrating screed or steel rule.
- At the final stage, the design is refined to perfection with a trowel.
- Before leaving freshly laid concrete to gain strength, it is recommended to re-check compliance with the upper level of the coating, and, if necessary, adjust the height of the screed.
For the hydraulic binder and water to react chemically normally after the concrete mixture is laid, humid, high-temperature conditions must be created. The finished screed can be walked on after 48 to 72 hours after it has gained at least 50% of the design strength. Hardening takes two to three weeks.
A quick overview of the gadget:
Difficulties and errors of the process
Given that screed installation by hand is a responsible production operation, the master may run into a variety of obstacles and make careless errors that have unfavorable outcomes when working in this category:
- Incorrect recipe when mixing concrete or cement-sand mortar – the screed after the chemical reaction of cement with water will not be able to gain the design strength.
- Neglecting cleaning and preparation of the base – there is a risk of delamination of the structure due to the low level of adhesion of materials.
- Absence or insufficient amount of screed reinforcement – there is a risk of brittle fracture of concrete when operating loads are applied, since this stone material does not work well in tension and bending.
- Violation of the mixture care technology after laying the liquid material in the designed position – shrinkage cracks appear on the surface of the screed.
- The device of the screed at negative temperatures – water begins to crystallize and turn into ice before the end of the chemical reaction, which disrupts the adhesion of the main components of the structure and leads to the destruction of its structure.
- Poor mixing of the main ingredients of the screed – free particles of sand will remain on the surface, and the structure begins to gradually delaminate due to the lack of bonds between the molecules of the crystal lattice.
- Lack of plasticizers – the design will not satisfy regulatory and design requirements for premises with special operating conditions.
- Excessive dosage of water – too flexible a mixture causes greater shrinkage, which can lead to the formation of dips in the hardened structure and the need for a self-leveling floor.
It is advised that you familiarize yourself with master classes and video lessons from professionals who frequently share their training videos with other users on the network before beginning work in order to avoid the mistakes mentioned above.
Rules of care
The new screed must be properly cared for after liquid concrete or cement-sand mortar is laid in order for it to quickly acquire design strength and then last for many years without requiring replacement or significant repairs:

- The screed must harden and gain strength at high air humidity, since cement is a hydraulic binder.
- All windows in the ventilated area must be closed to ensure a high concentration of water vapor.
- It is recommended to install a heat gun to increase the temperature to 25 – 35 o C during the first 24 hours after installation.
- On the second day, it is recommended to spill the concrete with water so that free cement particles can completely react with it, and the screed can gain its design strength.
- You can walk on the set surface of the screed no earlier than after 48 hours.
Installing a PNSV heating cable inside the structure and connecting its ends to the TMF is also advised in the event of subzero temperatures. This will guarantee that the concrete is continuously heated throughout the entire volume and greatly lower the possibility of strength loss from moisture crystallization occurring too soon.
Advantages and disadvantages
Wet screed is still very popular among property owners and professional finishers despite its somewhat antiquated technology because it offers so many unquestionable benefits:
- Increased strength, reliability and durability of the structure.
- No need to rent expensive equipment.
- Possibility of doing the work yourself.
- Possibility of installing screeds of any thickness.
- The user independently controls the dosage of each ingredient, as well as the mobility of the mixture.
- Easy installation and compaction of the structure.
- Possibility of changing the chemical composition, physical and mechanical characteristics and operational properties of the material due to the introduction of various additives.
- No need to smooth the freshly laid mixture with a heavy paddle smoother.
- Ability to set the slope between beacons.
- Simplicity of arrangement of technological openings using boxes.
- Availability of ingredients in most retail outlets in every region of the country.
However, because of the following drawbacks, these structures are gradually being replaced in buildings of all kinds by the use of a mechanized semi-dry screed or other alternative techniques for building a load-bearing base for a finished floor covering:
- Large number of wet processes.
- Time limit for installation of the structure – the set solution loses its operational properties and cannot be laid in the designed position.
- Difficulty in carrying out work in winter.
- High risk of defects due to incorrect mixing of ingredients, violation of the recipe, or insufficiently intensive mixing.
- The need to purchase or rent a mixer with an electric motor.
- Difficulty in delivering large quantities of inert materials to the installation elevation.
- The need to wait a long time for the screed to harden before starting other work in the room.
- The need to provide care for freshly laid mixture.
- Risk of shrinkage cracks and other serious structural defects.
Wet screeds are still very popular among the general public despite their drawbacks, and the demand for these designs is steady, as shown by positive dynamics in the sales statistics provided by major suppliers.
Gaining knowledge of wet floor screed, its varieties, and fundamental design concepts entails exploring an important aspect of building and remodeling projects. Wet screed is essential for providing even surfaces and efficient insulation to meet a variety of construction requirements. This article’s goal is to provide professionals and homeowners with the necessary knowledge to achieve long-lasting, effective, and well-insulated floors in a variety of construction settings by examining the fundamentals of the material and providing important installation guidelines.
Average prices
The owner of the property must pay for the services of installers as well as the cost of materials, tools, and professional equipment rental when installing a wet concrete floor screed.
Given that hundreds of major suppliers provide the primary ingredients for concrete screed in our nation, their costs are roughly equal:

- Sand concrete M300 – M400 – 120 – 170 rub./40 kg.
- Ready rough/finish screed – 200 – 250 / 450 – 500 RUR./30 kg.
- Cement grade M300 – 500 – 1050 rub. for 50 kg.
- Sand and crushed stone:
- Medium-sized quartz sand / washed chalk aggregate – from 2400 – 2700 / 2900 – 3400 rubles. per 1 m 3 .
- Granite crushed stone of fine fraction – from 5400 – 6400 rubles. per 1 m 3 .
Regarding add-ons:
- Plasticizer – 350 – 450 rub. for 10 l.
- Antifreeze additive – 380 – 480 rub. for 10 l.
- Modifying additive – 340 – 480 rub. for 10 l.
- Epoxy resin – 230 – 340 rub. for 5 l.
- Methyl acrylate – 55 – 140 rub. for 1 l.
- Water repellent – from 4000 – 6000 rubles. for 20 l.
Bolstering mesh and beacons:
- Masonry mesh 3Вр-I, 50 x 50 mm – 50 x 100 mm – 90 – 140 rub. for 1 card 1.5 x 0.76 m.
- Road mesh d5 – d6 A500s, 100 x 100 mm – 500 – 750 rub. / m 2 .
- Rod reinforcement d6 – d8 A500s – 38 – 45 rub./kg, 38 – 45 thousand. rub./T.
Regarding vapor barrier insulation and waterproofing:
- Vapor barrier – 1.8 – 2.2 thousand. rub. for 50 – 75 m2 .
- Rolled waterproofing – 2.5 – 3.0 thousand. rub. for 7.5 – 12.5 m2 .
- Extruded polystyrene foam – 5.5 – 7.5 thousand. rub./ m 3 .
The estimate states that prices for screed installation work are based on a variety of direct and indirect factors and are unique for each job. Professionals also point out that the average cost of all installation trapezoids is between 50% and 70% of the total cost of all the building materials used.
The aforementioned prices may differ slightly based on the supplier’s internal marketing policy, the logistics complexity, the delivery distance, the region in which the goods are sold, the requirement to lift materials to the floor, and other factors.
A basic understanding of wet floor screed is essential for anyone working on building or remodeling projects. It is an essential layer that gives different floor finishes a level surface. You can guarantee the longevity and effectiveness of your projects by selecting the appropriate type of screed, whether it be self-leveling compound, flowing screed, or conventional sand and cement.
Following fundamental guidelines is essential to designing a successful screed. It’s crucial to prepare the substrate correctly, make sure it’s thick enough, and give drying and curing enough time. These elements affect not only the screed’s quality but also the flooring system’s longevity and overall performance.
Different conditions and needs are met by different types of wet floor screed. With its strength and adaptability, traditional sand and cement screed is still a dependable option for many projects. Conversely, flowing screeds offer better self-leveling qualities and faster application. The best material for smoothing out existing floor finishes is self-leveling compound.
In conclusion, both construction professionals and do-it-yourselfers can accomplish better results with their flooring projects by understanding the principles of wet floor screed. Choosing the right type and adhering to recommended practices will guarantee that your floors not only look good but also endure over time, regardless of your priorities for strength, speed, or smoothness.
This conclusion should effectively summarize the main points of your article while maintaining clarity and accessibility.


